Managing OmniSwitch 6600 Family Stacks | Setting Up a Stacked Configuration |
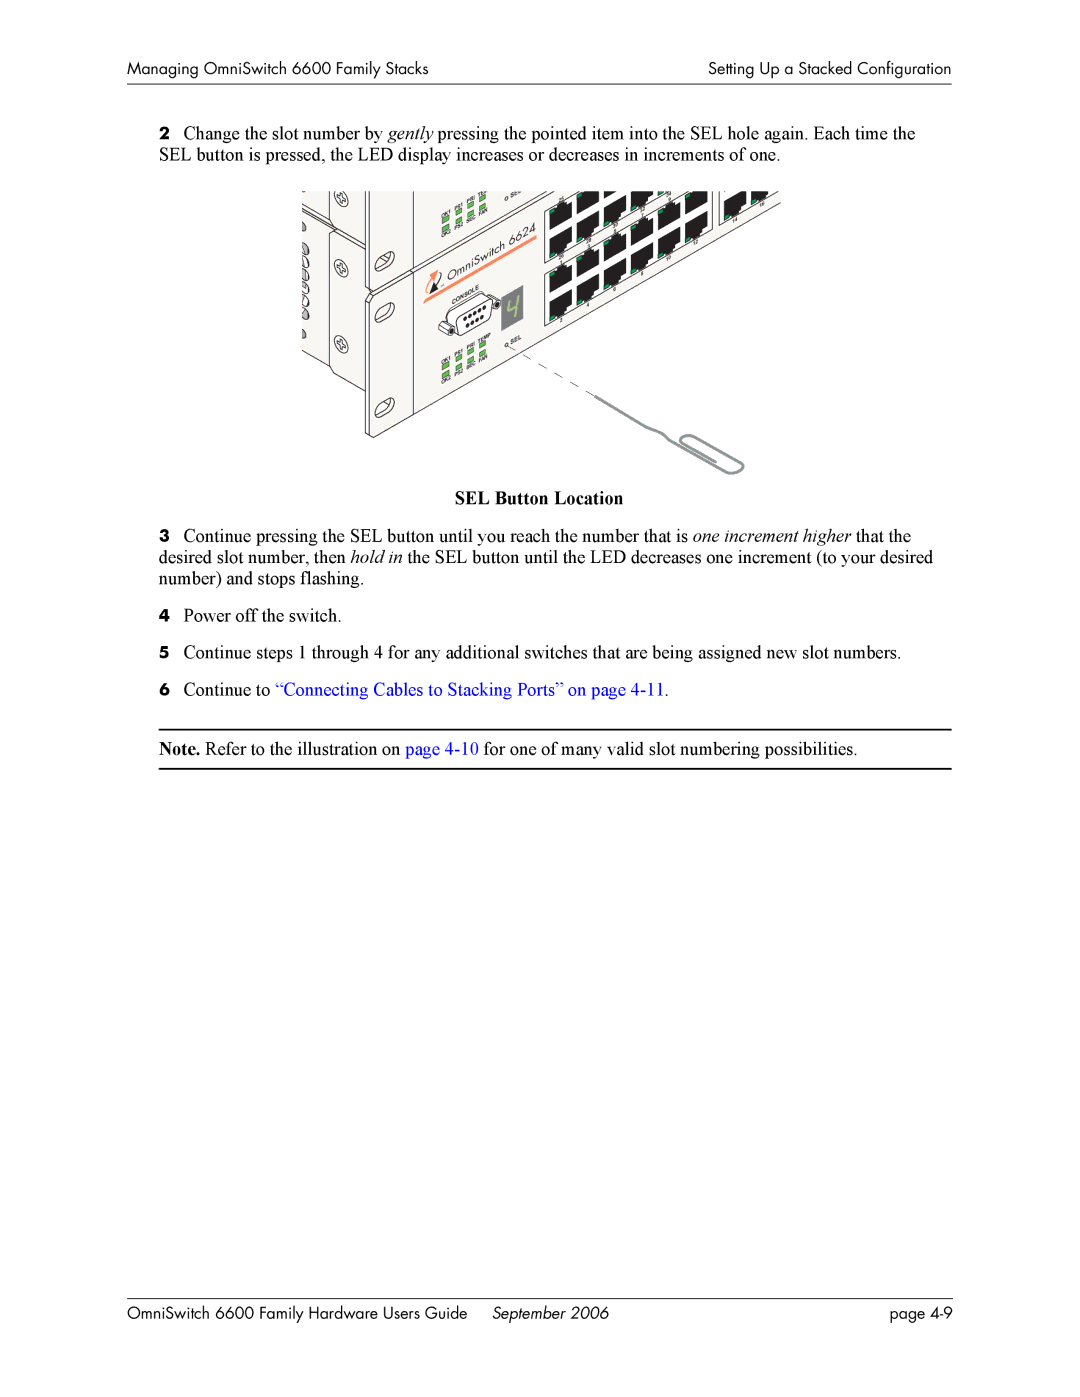
2Change the slot number by gently pressing the pointed item into the SEL hole again. Each time the SEL button is pressed, the LED display increases or decreases in increments of one.
|
|
|
|
| TEM |
|
|
|
| PRI |
|
| PS1 |
|
| ||
OK1 |
|
|
|
| FAN |
|
|
|
| SEC | |
| PS2 |
|
| ||
OK2 |
|
|
|
|
|
TM |
|
|
| L | E |
|
|
|
| ||
|
|
| N | SO |
|
|
| O |
|
| |
| C |
|
|
| |
|
|
|
|
| TEMP |
|
|
|
| PRI |
|
| PS1 |
|
| ||
OK1 |
|
|
|
| FAN |
|
|
|
| SEC | |
| PS2 |
|
| ||
OK2 |
|
|
|
|
|
S | E | L |
| 3 | 4 |
|
|
|
| ||
|
|
|
| 9 | |
|
|
|
|
| 16 |
|
|
|
| 32 |
|
|
|
|
| 7 |
|
|
|
|
|
| 14 |
|
|
| 24 | 30 |
|
|
|
| 5 |
| |
66 | 28 |
| 12 | ||
|
|
| 3 |
|
|
|
|
| 26 | 10 | |
|
|
| 1 |
|
|
|
|
|
| 8 |
|
|
|
|
| 6 |
|
|
|
| 4 |
|
|
|
|
| 2 |
|
|
S | EL |
|
|
| |
SEL Button Location
3Continue pressing the SEL button until you reach the number that is one increment higher that the desired slot number, then hold in the SEL button until the LED decreases one increment (to your desired number) and stops flashing.
4Power off the switch.
5Continue steps 1 through 4 for any additional switches that are being assigned new slot numbers.
6Continue to “Connecting Cables to Stacking Ports” on page 4-11.
Note. Refer to the illustration on page
OmniSwitch 6600 Family Hardware Users Guide September 2006 | page |
