SwitchBlade x3112 Installation Guide
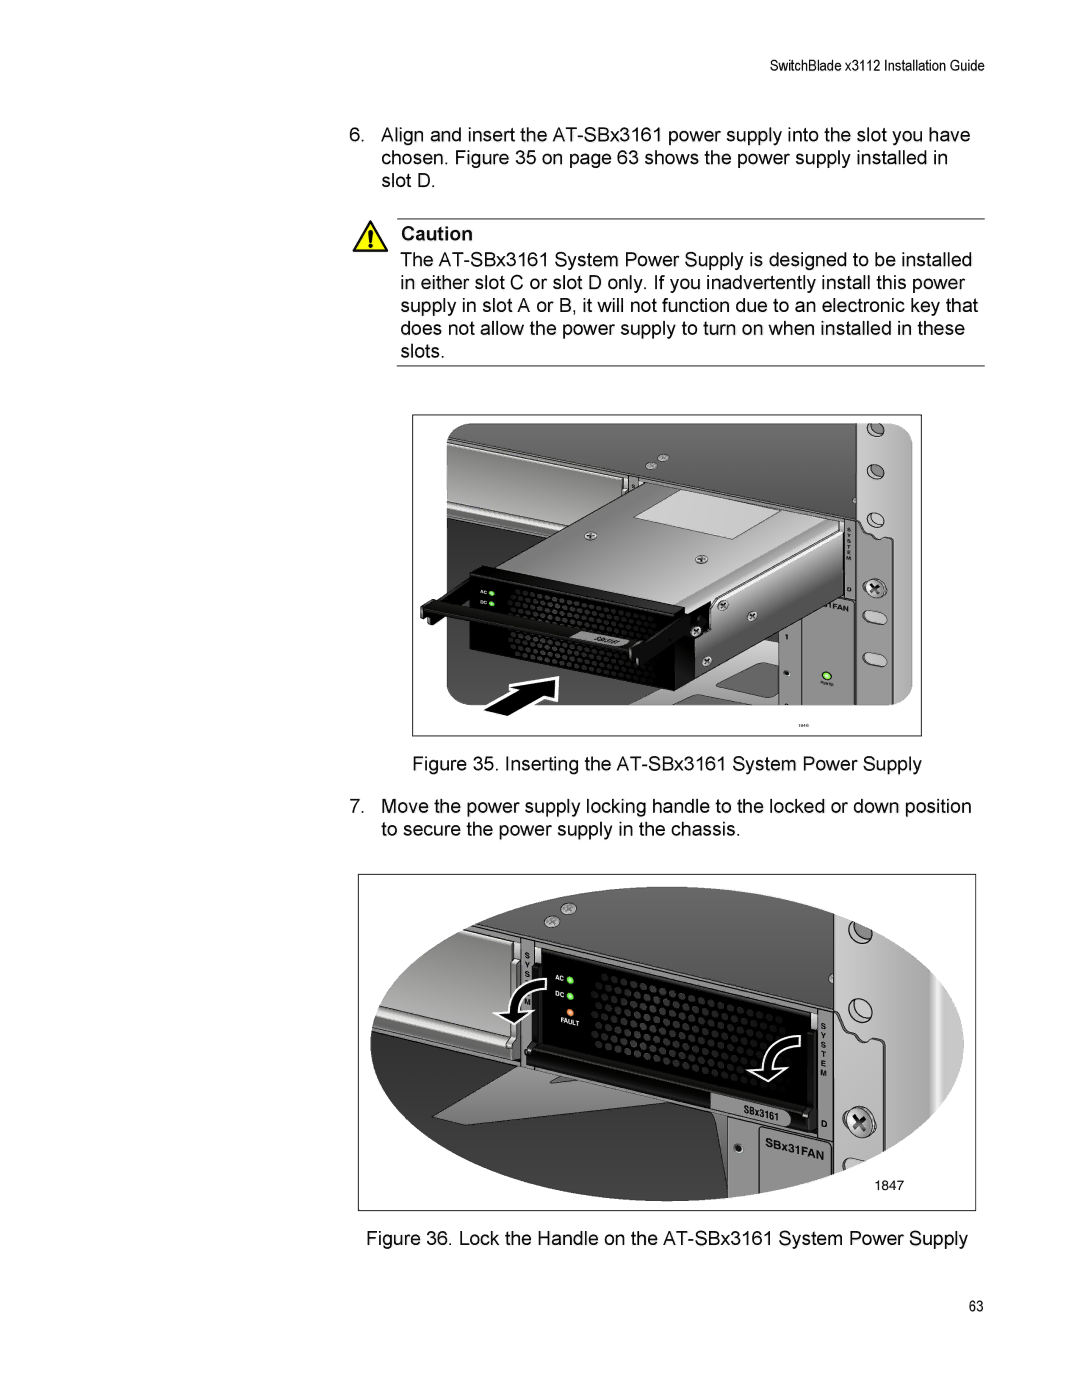
6.Align and insert the
Caution
The
|
| S |
|
|
| Y |
|
|
| S |
|
|
| T |
|
|
| E |
|
|
| M |
|
|
|
| S |
|
|
| Y |
|
|
| S |
|
|
| T |
|
|
| E |
|
|
| M |
AC |
|
|
|
DC |
| SBx3 | 1FAN |
|
| ||
|
|
| |
FAULT |
|
|
|
| SBx3161 | 1 |
|
|
|
| |
|
| POWER | |
|
| 3 |
|
|
| 1846 |
|
Figure 35. Inserting the AT-SBx3161 System Power Supply
7.Move the power supply locking handle to the locked or down position to secure the power supply in the chassis.
S |
|
|
Y |
|
|
S | AC |
|
T |
| |
|
| |
E | DC |
|
M |
|
|
| FAULT | S |
|
| |
|
| Y |
|
| S |
|
| T |
|
| E |
|
| M |
|
| SBx3161 |
|
| SBx31FAN |
|
| 1847 |
|
| 1 |
Figure 36. Lock the Handle on the AT-SBx3161 System Power Supply
63