SwitchBlade x3112 Installation Guide
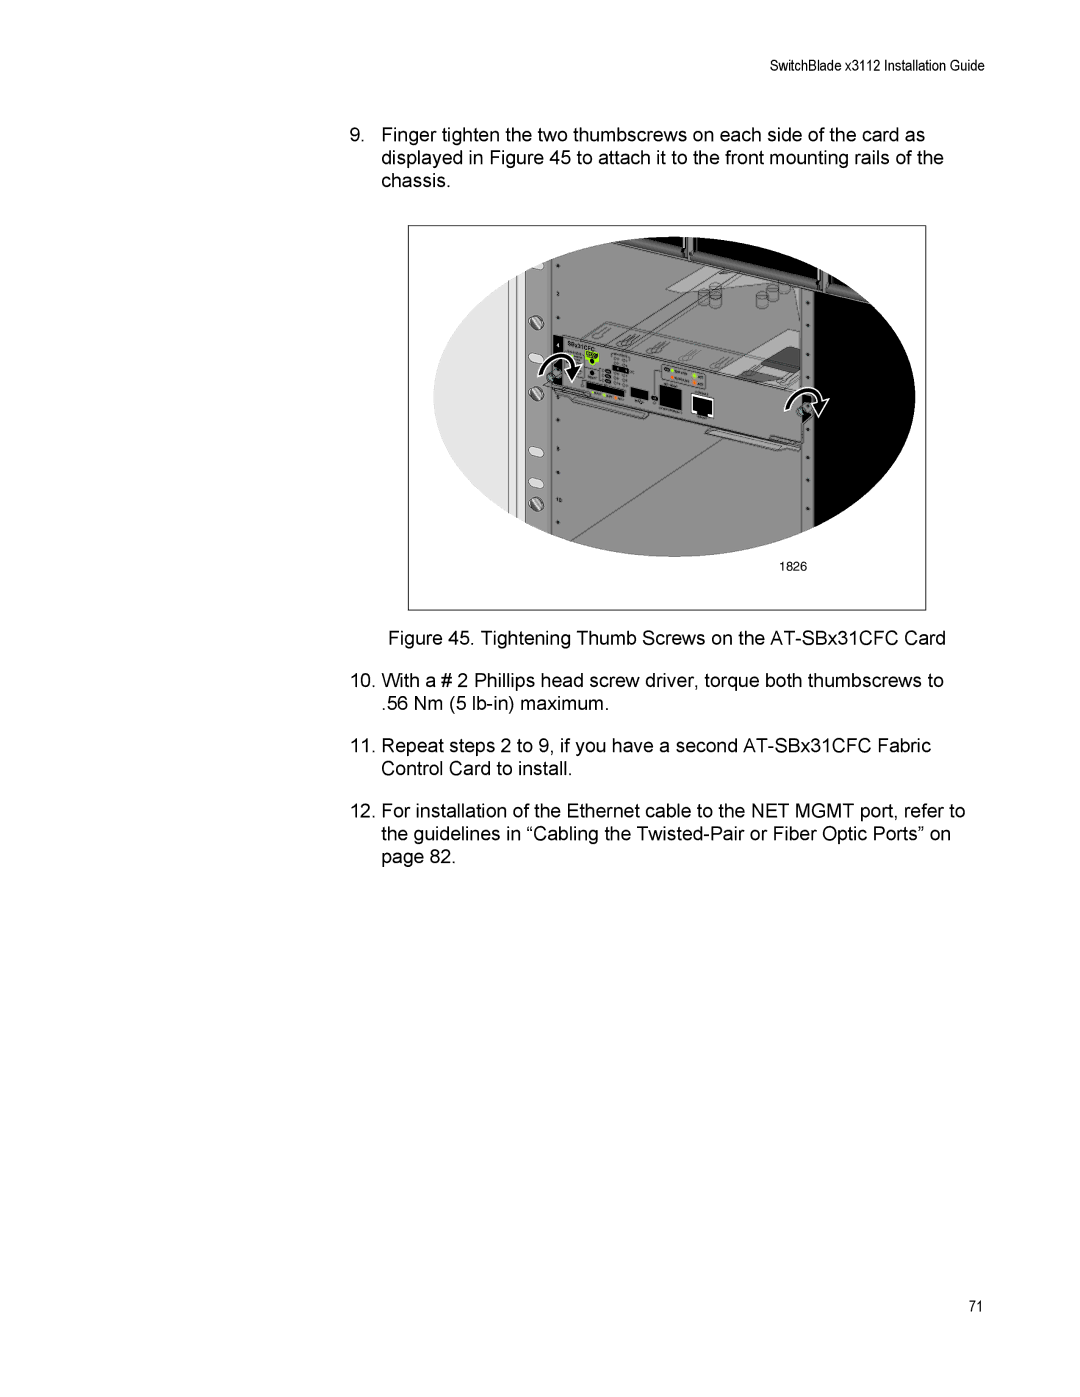
9.Finger tighten the two thumbscrews on each side of the card as displayed in Figure 45 to attach it to the front mounting rails of the chassis.
0 |
|
|
|
|
|
|
|
|
|
|
|
|
|
|
|
2 |
|
|
|
|
|
|
|
|
|
|
|
|
|
|
|
4 | SBx31 | CFC |
|
|
|
|
|
|
|
|
|
|
| ||
| SYS | STATUS |
| SBx | STATUS |
|
|
|
|
|
|
| |||
| M/S |
|
|
|
|
|
|
|
|
|
| ||||
|
| MASTER |
|
|
| 0 |
|
|
|
|
|
|
| ||
| PSU | SLAVE |
|
|
|
| 1 |
|
|
|
|
|
|
| |
|
| NORMAL |
|
|
| 2 |
| 3 |
|
|
|
|
|
|
|
|
| MAL |
|
| M/S | 4 |
| 5 | CFC |
| 1000 |
|
|
|
|
|
|
|
| 6 |
|
| LINK |
|
| ||||||
|
| LT | RE | SET | PSU |
| 7 |
|
|
|
| ACT | |||
|
|
| 8 |
| 9 |
|
| 10/100 | LINK |
| |||||
|
|
|
| FAN |
|
|
|
| ACT | ||||||
|
|
|
|
| SD | 10 | 11 |
| NET | MGMT |
|
|
| ||
|
|
|
|
|
|
|
|
|
|
|
|
| |||
6 |
|
|
| READY |
|
|
|
|
|
|
|
|
| C | ONSOLE |
|
|
| BUSY |
|
|
|
|
|
|
|
|
| |||
|
|
|
|
| FAULT |
|
| L/A |
|
|
|
|
| ||
|
|
|
|
|
|
|
|
|
|
|
|
| |||
|
|
|
|
|
|
|
|
|
|
|
|
|
|
| |
8 |
|
|
|
|
|
|
|
|
|
|
|
|
|
|
|
10 |
|
|
|
|
|
|
|
|
|
|
|
|
|
|
|
|
|
|
|
|
|
|
|
|
|
|
|
|
|
| 1826 |
Figure 45. Tightening Thumb Screws on the AT-SBx31CFC Card
10.With a # 2 Phillips head screw driver, torque both thumbscrews to
.56 Nm (5 lb-in) maximum.
11.Repeat steps 2 to 9, if you have a second AT-SBx31CFC Fabric Control Card to install.
12.For installation of the Ethernet cable to the NET MGMT port, refer to the guidelines in “Cabling the Twisted-Pair or Fiber Optic Ports” on page 82.
71