Chapter 2: Installation
Applying A/C Power to the SwitchBlade x3112
If you have not already installed the power supply(s), go to the “Installing the
1.Locate the AC sockets on the back of the
|
| AC INPUT |
|
C | C | A | A |
SYSTEM PSU | POE PSU | ||
D | D | B | B |
SYSTEM PSU | POE PSU | ||
|
| POWER SUPPLY INTERFACE | |
|
|
| A and C PSU |
|
|
| B and D PSU |
|
|
| 1783 |
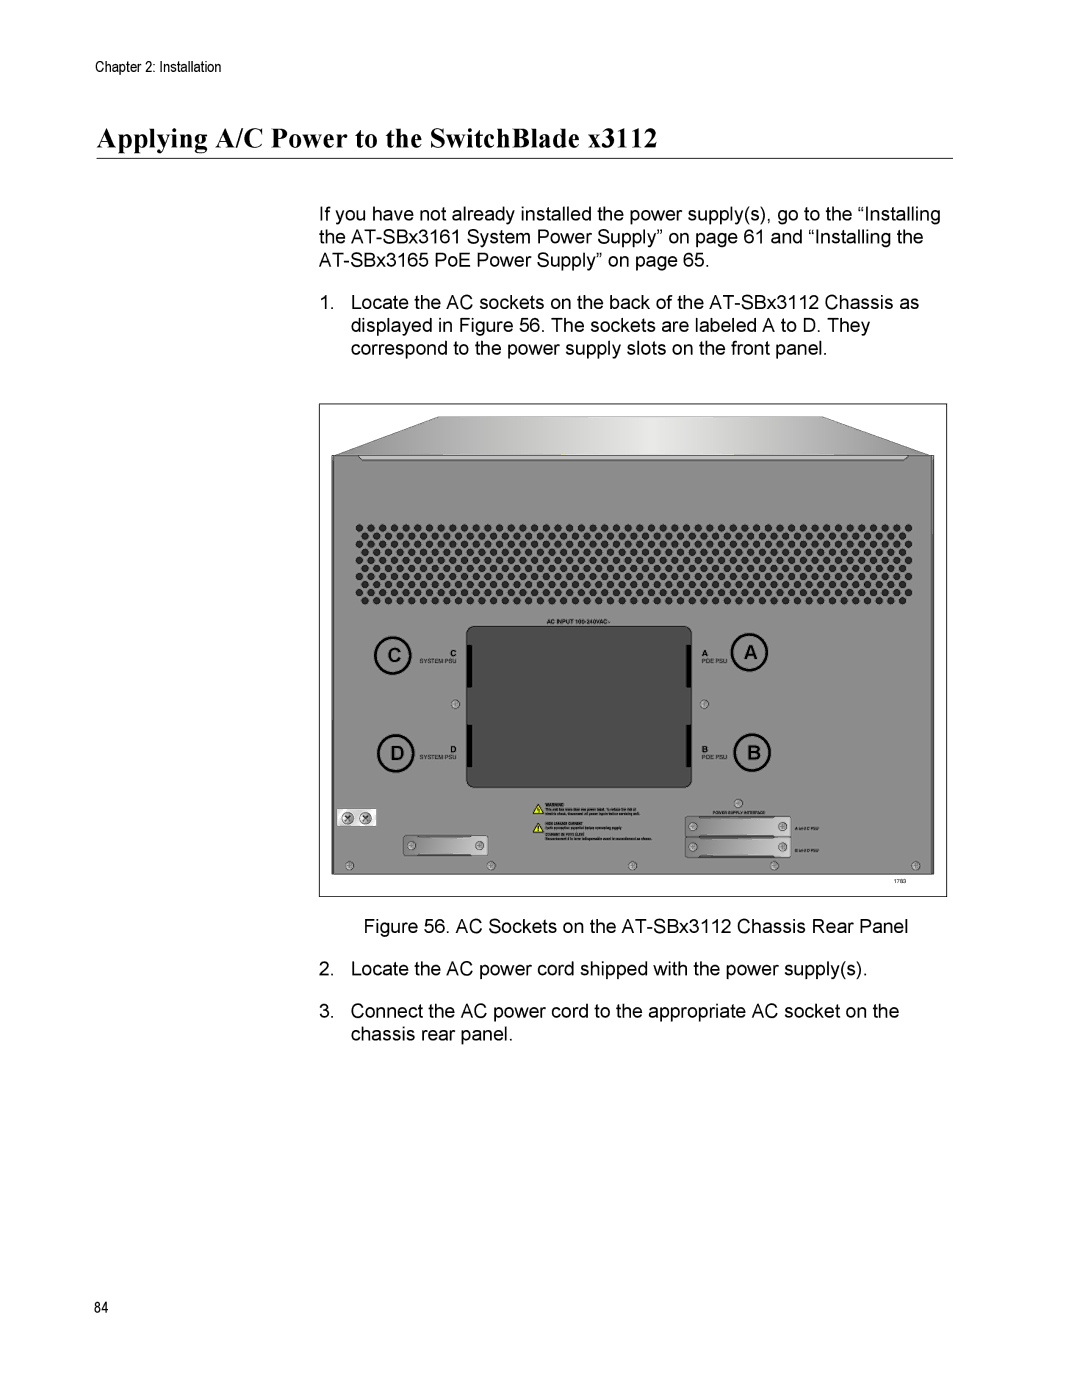
Figure 56. AC Sockets on the AT-SBx3112 Chassis Rear Panel
2.Locate the AC power cord shipped with the power supply(s).
3.Connect the AC power cord to the appropriate AC socket on the chassis rear panel.
84