The Port Forwarding Screen
The Port Forwarding Screen
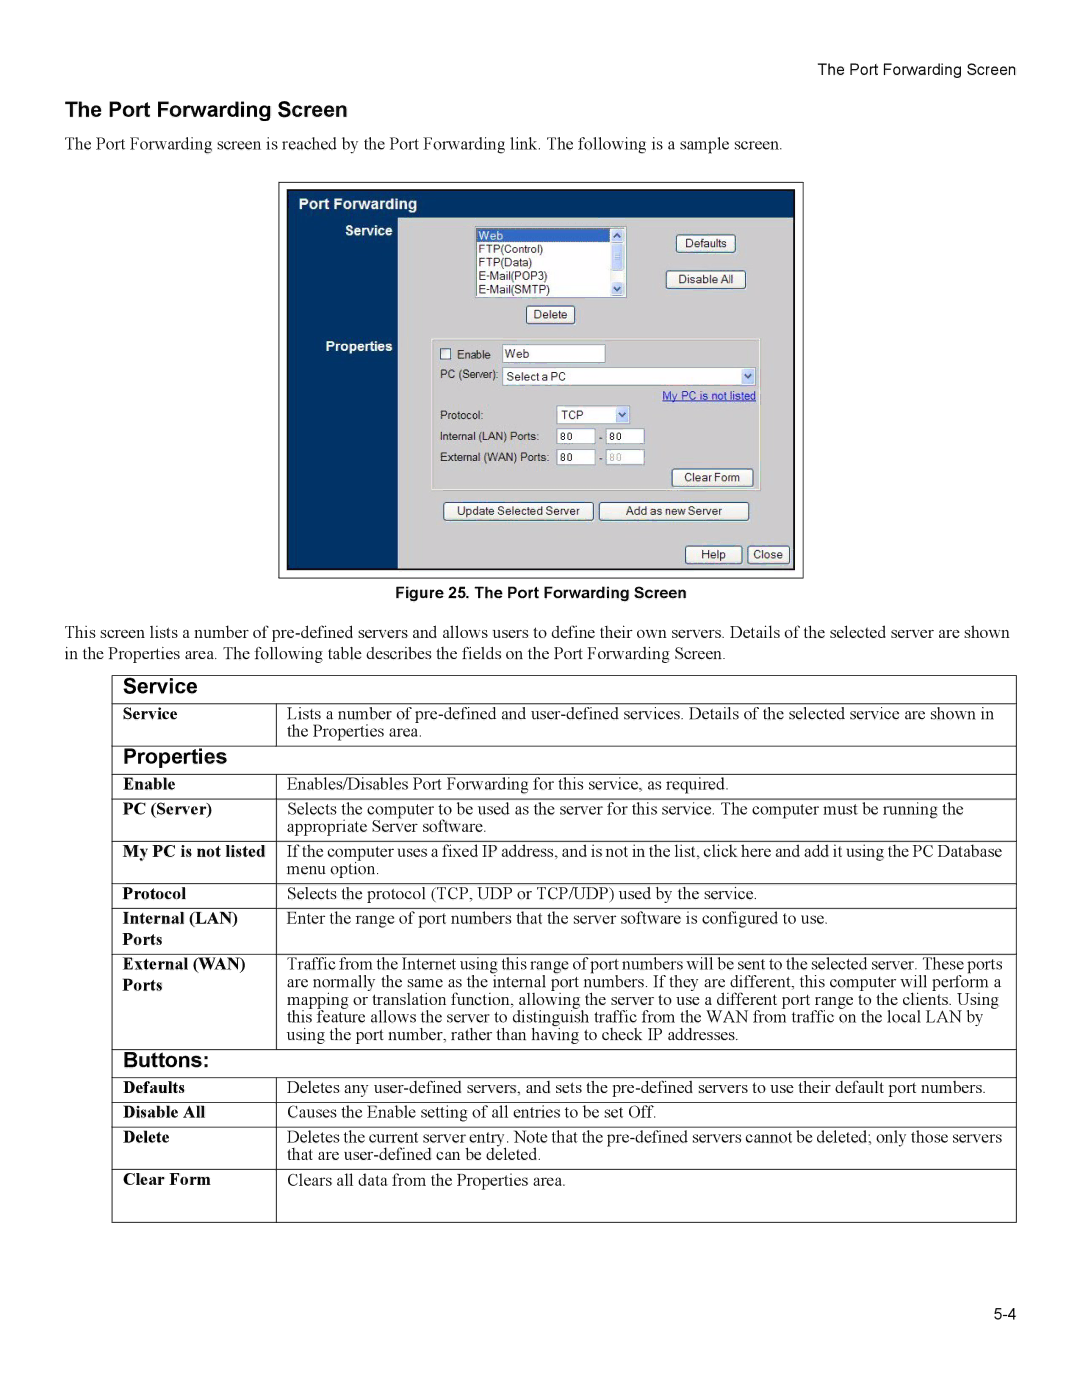
The Port Forwarding screen is reached by the Port Forwarding link. The following is a sample screen.
Figure 25. The Port Forwarding Screen
This screen lists a number of
Service
Service | Lists a number of |
| the Properties area. |
Properties |
|
Enable | Enables/Disables Port Forwarding for this service, as required. |
PC (Server) | Selects the computer to be used as the server for this service. The computer must be running the |
| appropriate Server software. |
My PC is not listed | If the computer uses a fixed IP address, and is not in the list, click here and add it using the PC Database |
| menu option. |
Protocol | Selects the protocol (TCP, UDP or TCP/UDP) used by the service. |
Internal (LAN) | Enter the range of port numbers that the server software is configured to use. |
Ports |
|
|
|
External (WAN) | Traffic from the Internet using this range of port numbers will be sent to the selected server. These ports |
Ports | are normally the same as the internal port numbers. If they are different, this computer will perform a |
| mapping or translation function, allowing the server to use a different port range to the clients. Using |
| this feature allows the server to distinguish traffic from the WAN from traffic on the local LAN by |
| using the port number, rather than having to check IP addresses. |
Buttons: |
|
Defaults | Deletes any |
Disable All | Causes the Enable setting of all entries to be set Off. |
Delete | Deletes the current server entry. Note that the |
| that are |
Clear Form | Clears all data from the Properties area. |
|
|