Using the EMM-E6 Hub View
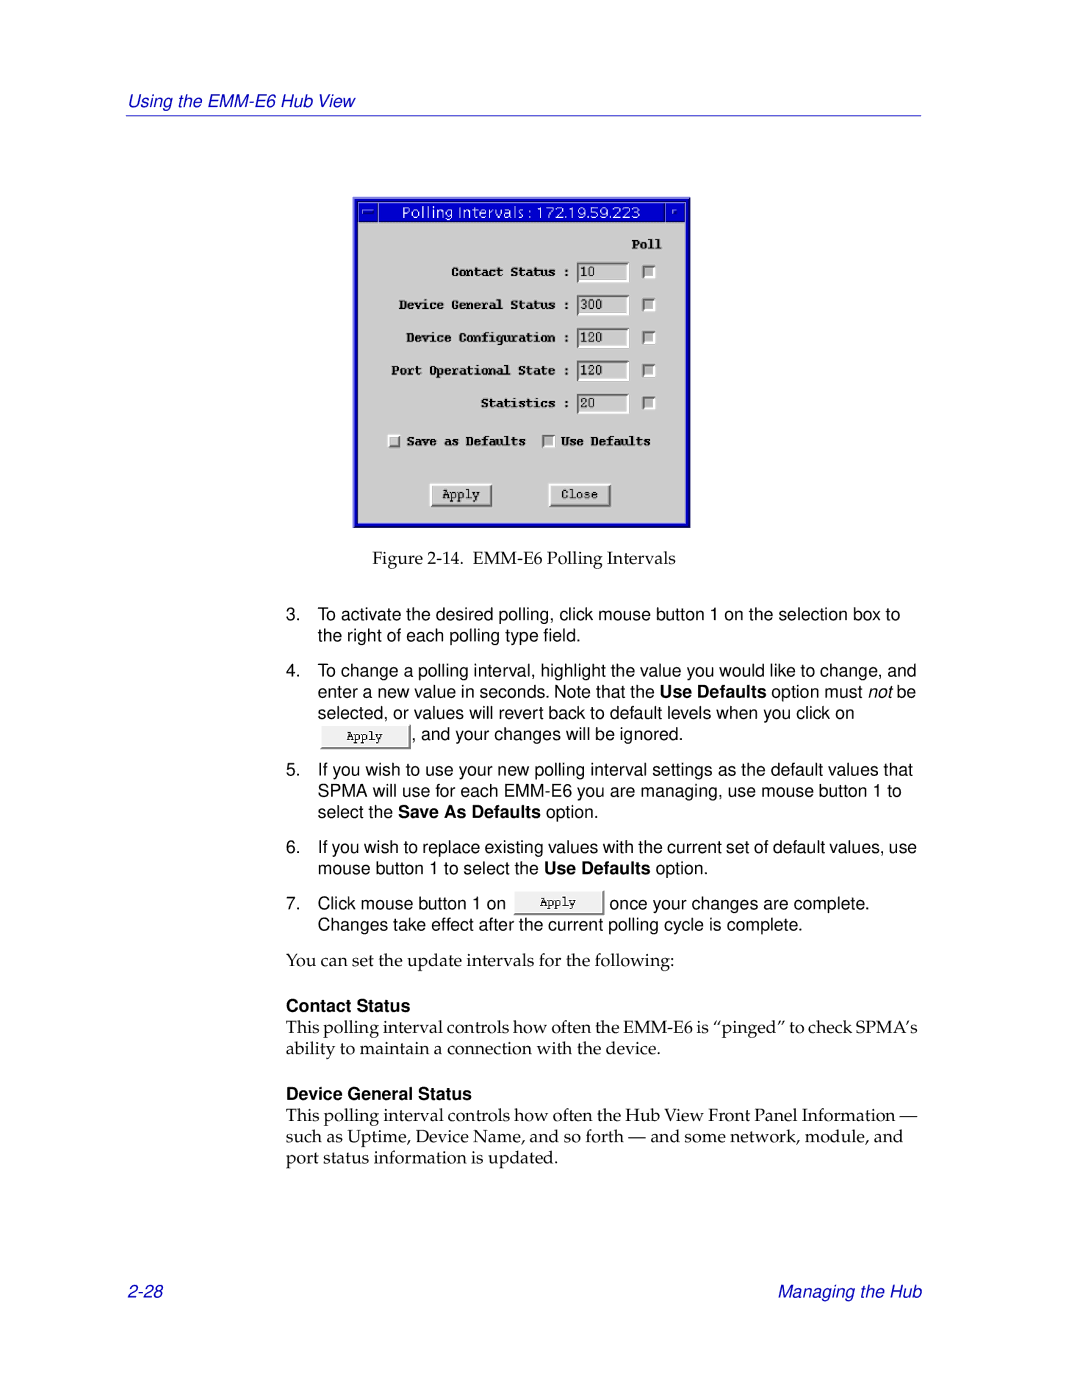
Figure 2-14. EMM-E6 Polling Intervals
3.To activate the desired polling, click mouse button 1 on the selection box to the right of each polling type field.
4.To change a polling interval, highlight the value you would like to change, and enter a new value in seconds. Note that the Use Defaults option must not be
selected, or values will revert back to default levels when you click on
![]() , and your changes will be ignored.
, and your changes will be ignored.
5.If you wish to use your new polling interval settings as the default values that SPMA will use for each
6.If you wish to replace existing values with the current set of default values, use mouse button 1 to select the Use Defaults option.
7.Click mouse button 1 on ![]() once your changes are complete. Changes take effect after the current polling cycle is complete.
once your changes are complete. Changes take effect after the current polling cycle is complete.
You can set the update intervals for the following:
Contact Status
This polling interval controls how often the
Device General Status
This polling interval controls how often the Hub View Front Panel Information — such as Uptime, Device Name, and so forth — and some network, module, and port status information is updated.
Managing the Hub |