3.2.4 Adjusting Levels for Video Sources
Video sources are adjusted best if a color bar test pattern is available from the video source: the DVD or VCR player. If not, you will have to adjust by eye and the “feel” of the picture.
Adjusting the picture
1.Select a video source in the Picture menu.
2.Press LEVEL on the remote.
✎These controls are also used for analog sources when you chose YPbPr Colorspace.
Now you have two choices.
•Adjust using any picture from the video source.
•Adjust using a standard color bar pattern from the source.
Adjusting with color bars
1.If possible, use a color bar pattern from the video source you will use for the program material. You can- not use the color bar from the Test Patterns menu.
2.In the Main Menu > Picture > Input Levels menu, check Blue Only. You should see only the alternate color bars, all of them blue.
3.Adjust Saturation to make the outer two color bars match. Match them in brightness; they will already match in color.
4.Adjust Hue to make the inner two color bars match.
5.Uncheck Blue Only
✎When a video source is selected, Auto Setup Options is not available. Adjustments must be made manually.
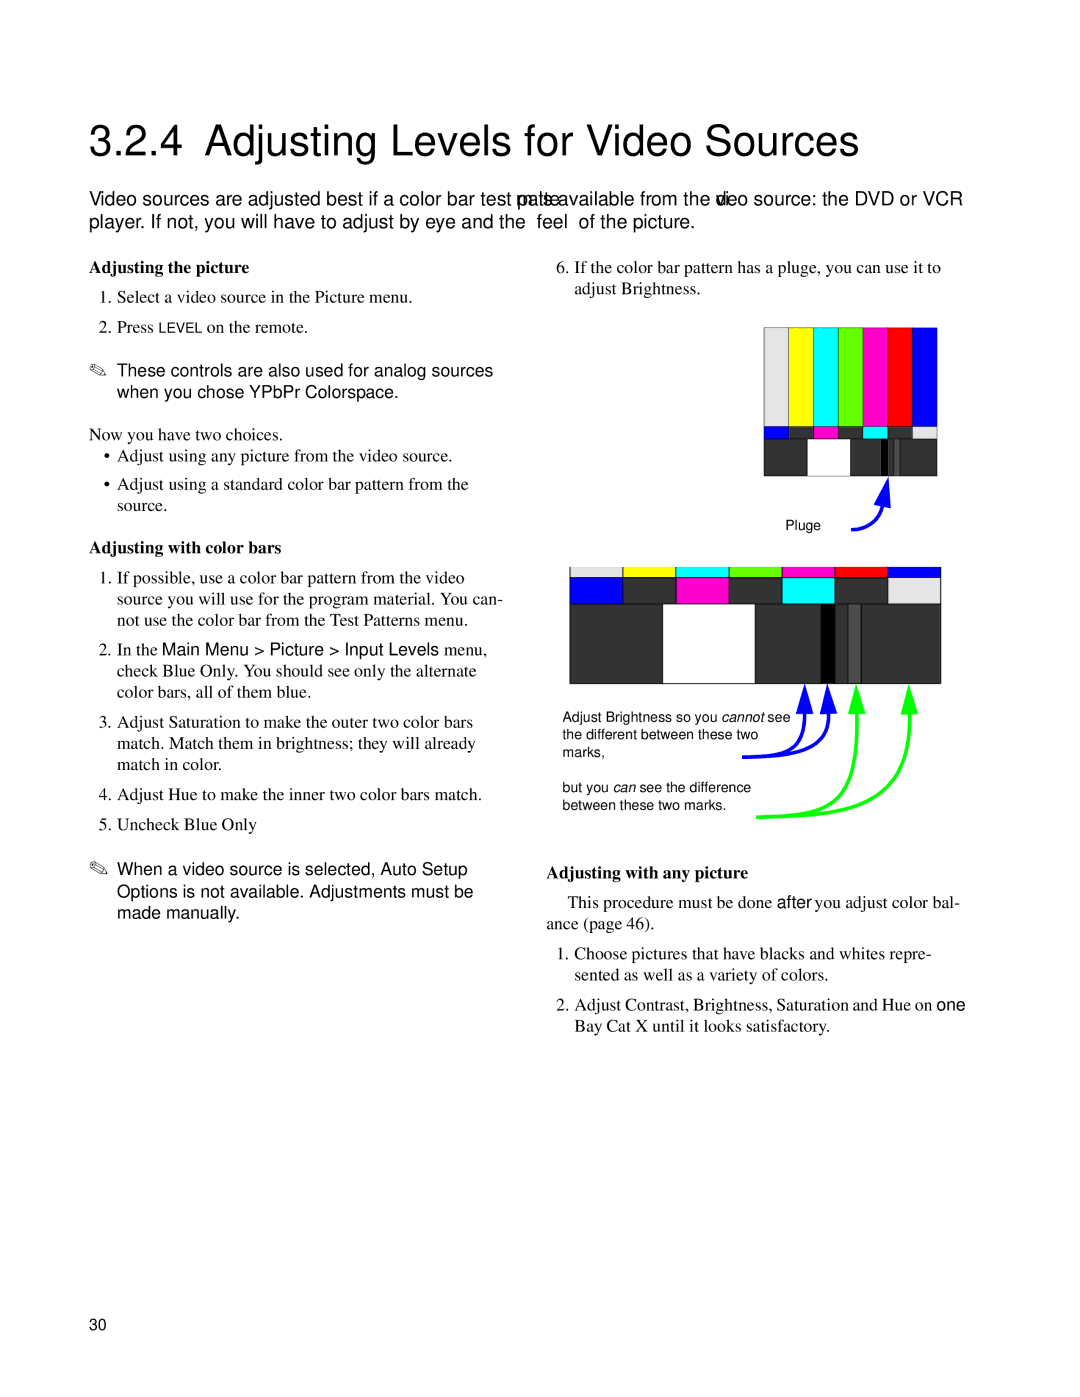
6.If the color bar pattern has a pluge, you can use it to adjust Brightness.
Pluge
Adjust Brightness so you cannot see the different between these two marks,
but you can see the difference between these two marks.
Adjusting with any picture
This procedure must be done after you adjust color bal- ance (page 46).
1.Choose pictures that have blacks and whites repre- sented as well as a variety of colors.
2.Adjust Contrast, Brightness, Saturation and Hue on one Bay Cat X until it looks satisfactory.
30