displays, not the adjacent edges. (If you can’t bring the- ses settings down to match the baseline, maybe you didn’t choose the darkest display.) Do not adjust the Gray values at this time.
6.Continue with other adjacent displays until all the dis- plays have the same appearance when white. Be careful not to change the values of displays once you are satis- fied with them. Use Hide Menu to keep from setting
other displays and allow you to see more of the white field. To unhide the menu, press ENTER
✎The menus will automatically turn off after a time determined in Menu Options (MENU > Advanced Options > Menu Options > Menu Timeout). If Menu Timeout is 0 (zero), the menus stay up indefinitely.
7.When all displays look the same for White, choose the Gray test pattern in all displays.
8.Choose any display as the new baseline display. It does not need to be the baseline display you used for White.
9.Adjust all the displays in the Gray part of the Test Pat- terns menu until they match the baseline display. Do one display at a time. Again, match the center part of the picture, not the edges.
10.When all displays match in Gray, close all the menus. The test pattern automatically turns off.
Tips for color balancing
•Copy to Clipboard will save all the current settings to a temporary memory. You can then make more adjust- ments to see if it gets better or worse. Recall from Clip- board will restore these saved settings. The clipboard is only for testing. These values are not saved when AC power is off.
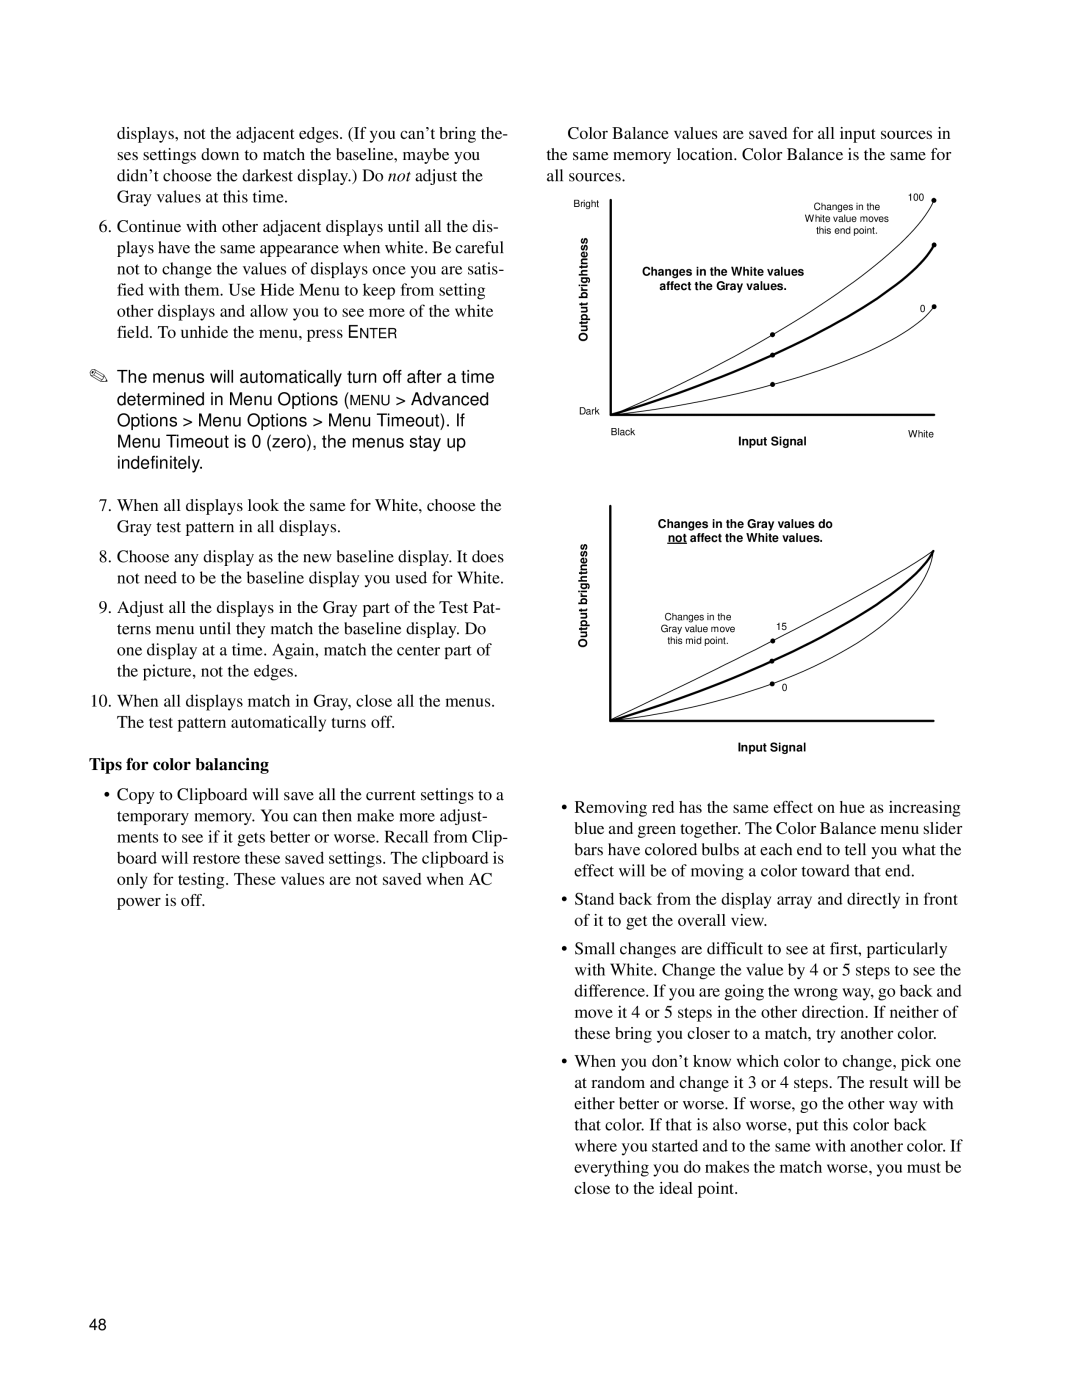
Color Balance values are saved for all input sources in the same memory location. Color Balance is the same for all sources.
Bright | Changes in the | 100 |
| ||
| White value moves |
|
brightness | this end point. |
|
Changes in the White values |
| |
affect the Gray values. |
| |
|
| |
Output |
| 0 |
|
| |
Dark |
|
|
Black | Input Signal | White |
|
|
Changes in the Gray values do
not affect the White values.
brightness | this mid point. |
|
Output |
| |
| Changes in the | 15 |
| Gray value move | |
|
| 0 |
Input Signal
•Removing red has the same effect on hue as increasing blue and green together. The Color Balance menu slider bars have colored bulbs at each end to tell you what the effect will be of moving a color toward that end.
•Stand back from the display array and directly in front of it to get the overall view.
•Small changes are difficult to see at first, particularly with White. Change the value by 4 or 5 steps to see the difference. If you are going the wrong way, go back and move it 4 or 5 steps in the other direction. If neither of these bring you closer to a match, try another color.
•When you don’t know which color to change, pick one at random and change it 3 or 4 steps. The result will be either better or worse. If worse, go the other way with that color. If that is also worse, put this color back where you started and to the same with another color. If everything you do makes the match worse, you must be
close to the ideal point.
48
