• When you press the SETUP button.
Retry on lost signal occurs only when the present signal (picture) disappears or changes in some way. If this item is not checked, the Bay Cat X will not try to sync to a new signal. Keep this menu item checked.
Note that searching will not happen just because the pic- ture goes black. Black, from video or from a computer, is a valid picture. The signal itself (the sync pulses) must be lost to trigger a search.
The several Do items in this menu will, if checked, happen in these situations:
•If a new signal is acquired, either through a search to a different connector or because source picture changed modes, such as from WXGA to UXGA, each of the checked items occurs in the order listed in the menu.
•When you press the SETUP button on the remote, each of the checked actions occurs in the order given in the menu.
Do Quick Black/White Levels searches for the bright- est and darkest pixels in the picture and adjusts to these. Black and White Levels are best done
Do Frequency and Do Phase find the frequency and phase (separately) of the computer picture and adjust to them. This works best on a picture that has lots of sharp changes in brightness, such as text (adjacent white and black pixels).
Do Position centers the picture on the screen.
About the input memories
The Bay Cat X has a ten input memories for storing the most recent attributes of the pictures it displays. When a new picture arrives that is near enough to a previous type, it uses the stored attributes rather than automatically adjust- ing brightness, contrast, frequency, etc.
For example, suppose the Bay Cat X sees an analog WXGA picture and
If you now switch back to the computer with the WXGA picture, Bay Cat X will use the Brightness, Contrast, as well as other settings, from the last time it saw a WXGA picture.
✎Aspect Ratio is specific to the source, which means it applies to all modes. It does not change when the system recalls a memory from cache.
Setup button
The SETUP button on the remote starts the “Do” pro-
cesses. Each Do that is checked ![]()
![]() will begin, one at a time, until all are adjustments completed.
will begin, one at a time, until all are adjustments completed.
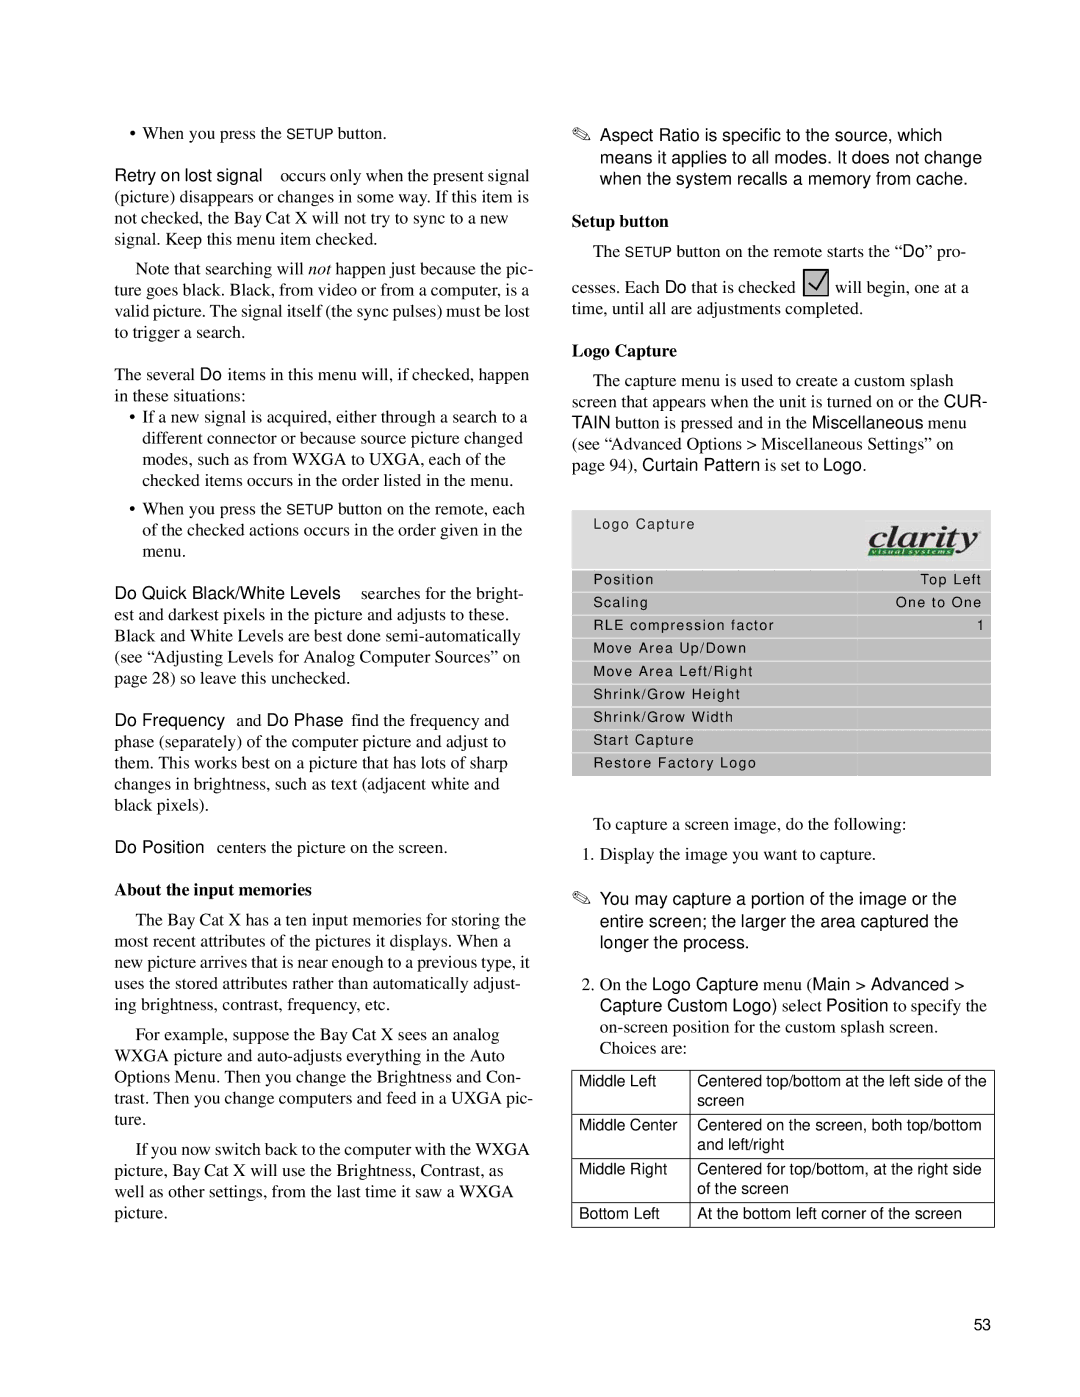
Logo Capture
The capture menu is used to create a custom splash
screen that appears when the unit is turned on or the CUR- TAIN button is pressed and in the Miscellaneous menu
(see “Advanced Options > Miscellaneous Settings” on page 94), Curtain Pattern is set to Logo.
Logo Capture
Position | Top Left |
Scaling | One to One |
RLE compression factor | 1 |
Move Area Up/Down |
|
Move Area Left/Right |
|
Shrink/Grow Height |
|
Shrink/Grow Width |
|
Start Capture |
|
Restore Factory Logo |
|
To capture a screen image, do the following:
1.Display the image you want to capture.
✎You may capture a portion of the image or the entire screen; the larger the area captured the longer the process.
2.On the Logo Capture menu (Main > Advanced > Capture Custom Logo) select Position to specify the
Middle Left | Centered top/bottom at the left side of the |
| screen |
|
|
Middle Center | Centered on the screen, both top/bottom |
| and left/right |
Middle Right | Centered for top/bottom, at the right side |
| of the screen |
|
|
Bottom Left | At the bottom left corner of the screen |
|
|
53