Chapter 3 Startup | 31 |
3.2 | Startup Process |
|
| |
|
|
|
|
|
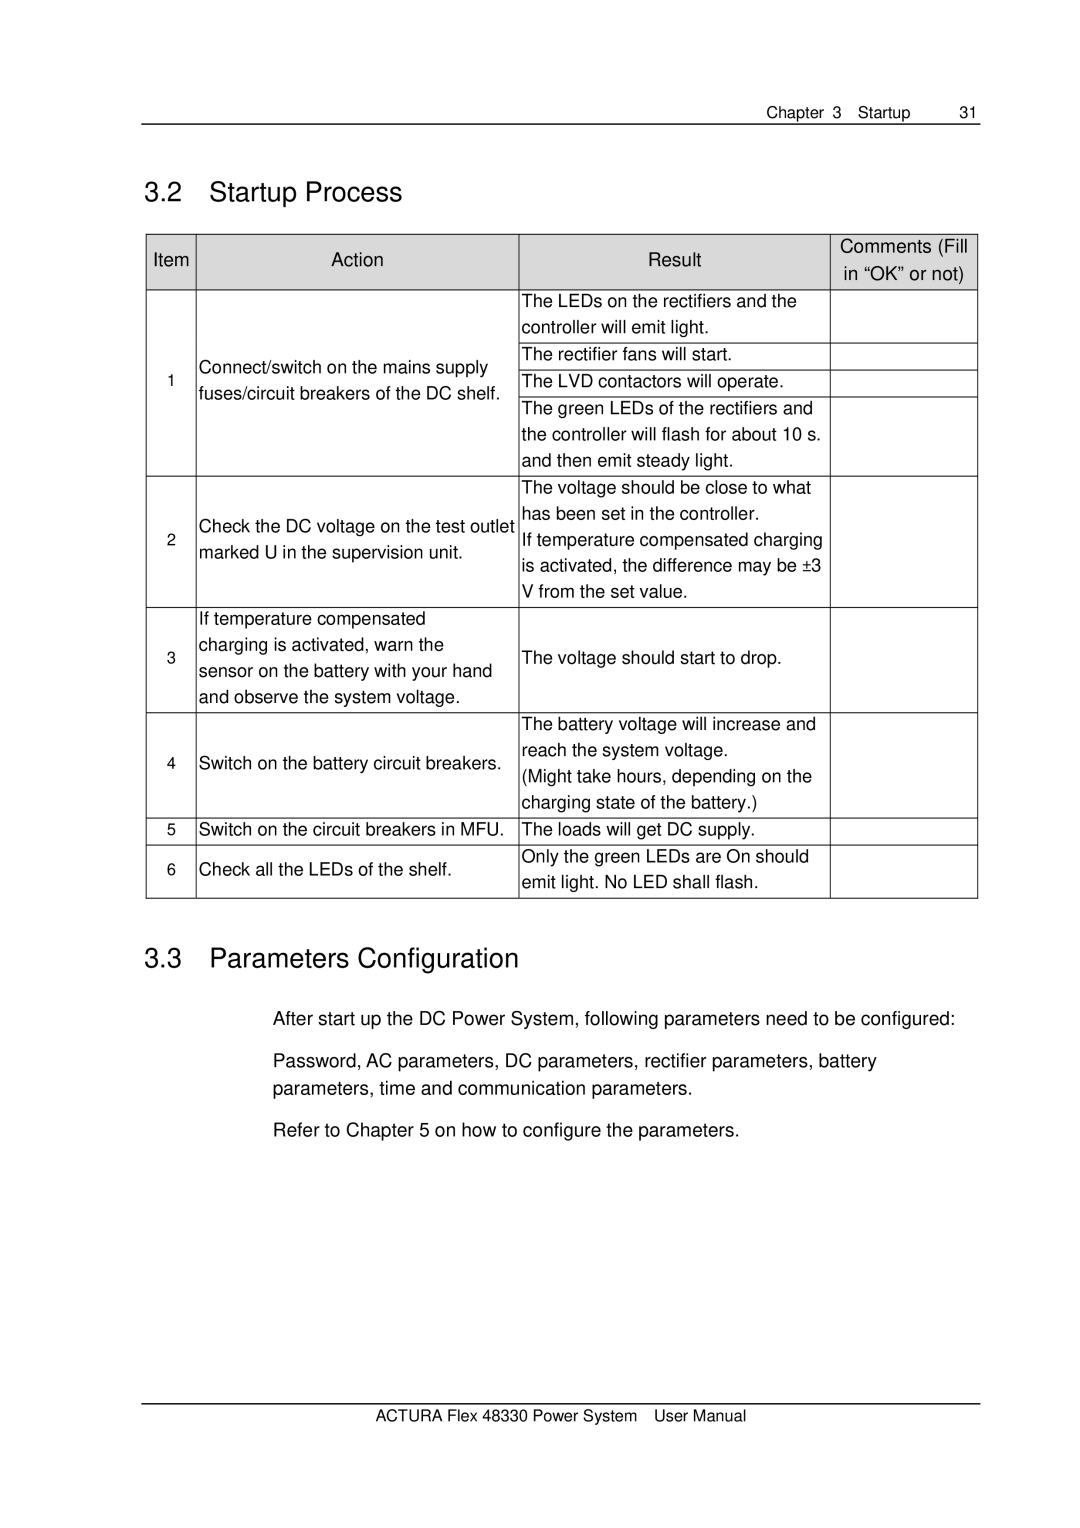
| Item | Action | Result | Comments (Fill |
| in “OK” or not) | |||
|
|
|
| |
|
|
| The LEDs on the rectifiers and the |
|
|
|
| controller will emit light. |
|
|
|
|
|
|
|
| Connect/switch on the mains supply | The rectifier fans will start. |
|
1 | The LVD contactors will operate. |
| ||
fuses/circuit breakers of the DC shelf. |
| |||
|
|
|
| |
|
| The green LEDs of the rectifiers and |
| |
|
|
|
| |
|
|
| the controller will flash for about 10 s. |
|
|
|
| and then emit steady light. |
|
|
|
|
|
|
|
|
| The voltage should be close to what |
|
2 | Check the DC voltage on the test outlet | has been set in the controller. |
| |
marked U in the supervision unit. | If temperature compensated charging |
| ||
|
| is activated, the difference may be ±3 |
| |
|
|
|
| |
|
|
| V from the set value. |
|
|
|
|
|
|
|
| If temperature compensated |
|
|
3 | charging is activated, warn the | The voltage should start to drop. |
| |
sensor on the battery with your hand |
| |||
|
|
|
| |
|
| and observe the system voltage. |
|
|
|
|
|
|
|
|
|
| The battery voltage will increase and |
|
| 4 | Switch on the battery circuit breakers. | reach the system voltage. |
|
| (Might take hours, depending on the |
| ||
|
|
|
| |
|
|
| charging state of the battery.) |
|
|
|
|
|
|
| 5 | Switch on the circuit breakers in MFU. | The loads will get DC supply. |
|
|
|
|
|
|
| 6 | Check all the LEDs of the shelf. | Only the green LEDs are On should |
|
| emit light. No LED shall flash. |
| ||
|
|
|
| |
|
|
|
|
|
3.3 Parameters Configuration
After start up the DC Power System, following parameters need to be configured:
Password, AC parameters, DC parameters, rectifier parameters, battery parameters, time and communication parameters.
Refer to Chapter 5 on how to configure the parameters.
ACTURA Flex 48330 Power System User Manual