16 | Chapter 2 Installation |
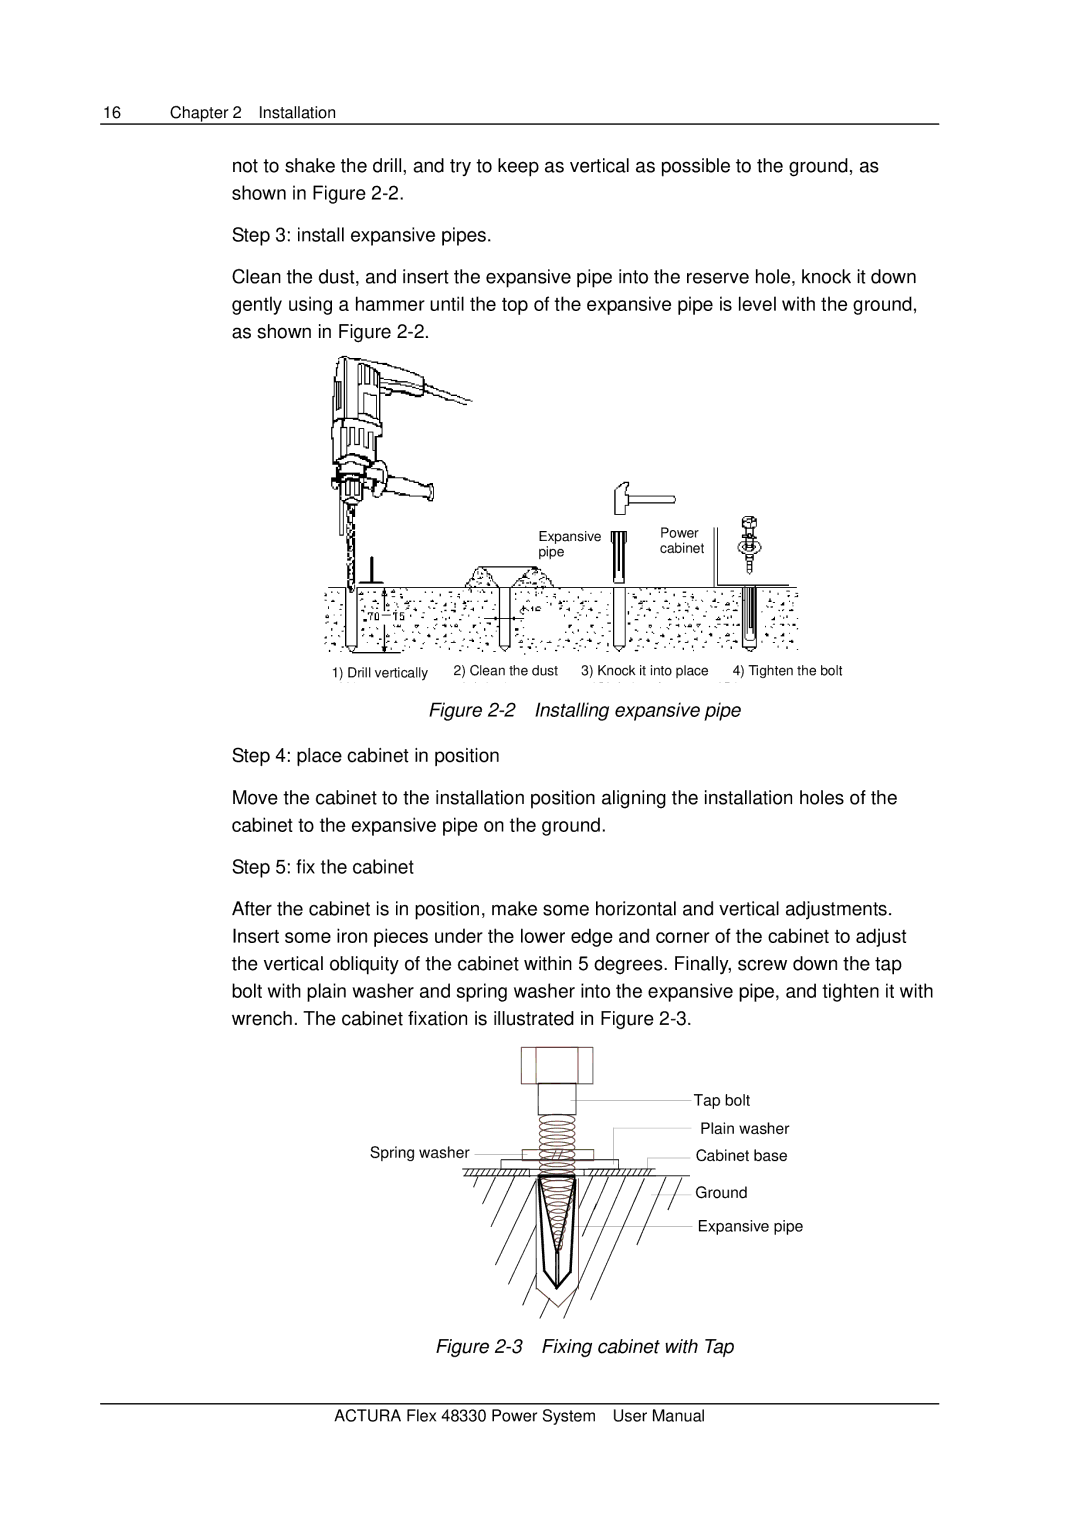
not to shake the drill, and try to keep as vertical as possible to the ground, as shown in Figure
Step 3: install expansive pipes.
Clean the dust, and insert the expansive pipe into the reserve hole, knock it down gently using a hammer until the top of the expansive pipe is level with the ground, as shown in Figure
Expansive Power
pipecabinet
1) Drill vertically |
| 2) Clean the dust |
| 3) Knock it into place | 4) Tighten the bolt |
Figure 2-2 Installing expansive pipe
Step 4: place cabinet in position
Move the cabinet to the installation position aligning the installation holes of the cabinet to the expansive pipe on the ground.
Step 5: fix the cabinet
After the cabinet is in position, make some horizontal and vertical adjustments. Insert some iron pieces under the lower edge and corner of the cabinet to adjust the vertical obliquity of the cabinet within 5 degrees. Finally, screw down the tap bolt with plain washer and spring washer into the expansive pipe, and tighten it with wrench. The cabinet fixation is illustrated in Figure
|
|
|
|
|
|
| Tap bolt |
|
|
|
|
|
|
| |
Spring washer |
|
|
|
|
|
| Plain washer |
|
|
|
|
|
| ||
|
|
|
|
| Cabinet base | ||
|
|
|
| ||||
|
|
|
|
|
|
| Ground |
|
|
|
|
|
|
| |
|
|
|
|
|
|
| |
|
|
|
|
|
|
| Expansive pipe |
|
|
|
|
|
|
| |
Figure 2-3 Fixing cabinet with Tap
ACTURA Flex 48330 Power System User Manual