5.2Troubleshooting Checklist
This section describes common problems that may occur during the use of ScanSnap and how to solve them.
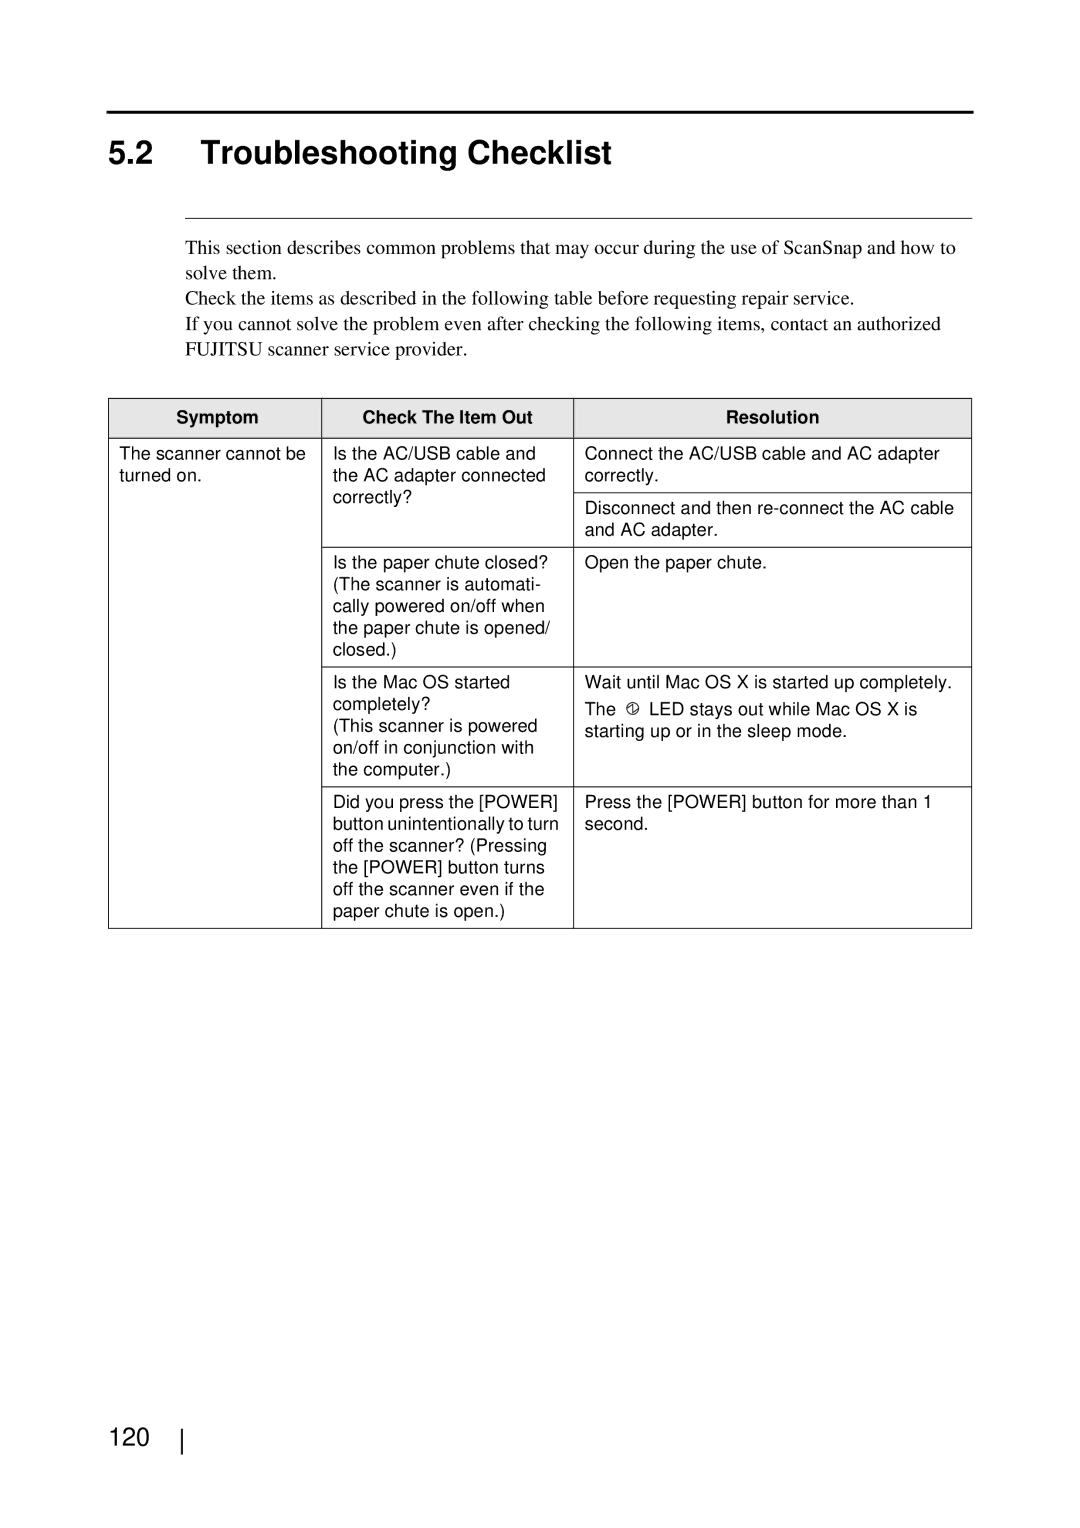
Check the items as described in the following table before requesting repair service.
If you cannot solve the problem even after checking the following items, contact an authorized FUJITSU scanner service provider.
Symptom | Check The Item Out | Resolution |
|
|
|
The scanner cannot be | Is the AC/USB cable and | Connect the AC/USB cable and AC adapter |
turned on. | the AC adapter connected | correctly. |
| correctly? |
|
| Disconnect and then | |
|
| |
|
| and AC adapter. |
|
|
|
| Is the paper chute closed? | Open the paper chute. |
| (The scanner is automati- |
|
| cally powered on/off when |
|
| the paper chute is opened/ |
|
| closed.) |
|
|
|
|
| Is the Mac OS started | Wait until Mac OS X is started up completely. |
| completely? | The LED stays out while Mac OS X is |
| (This scanner is powered | starting up or in the sleep mode. |
| on/off in conjunction with |
|
| the computer.) |
|
|
|
|
| Did you press the [POWER] | Press the [POWER] button for more than 1 |
| button unintentionally to turn | second. |
| off the scanner? (Pressing |
|
| the [POWER] button turns |
|
| off the scanner even if the |
|
| paper chute is open.) |
|
|
|
|