6
7
8
9
10
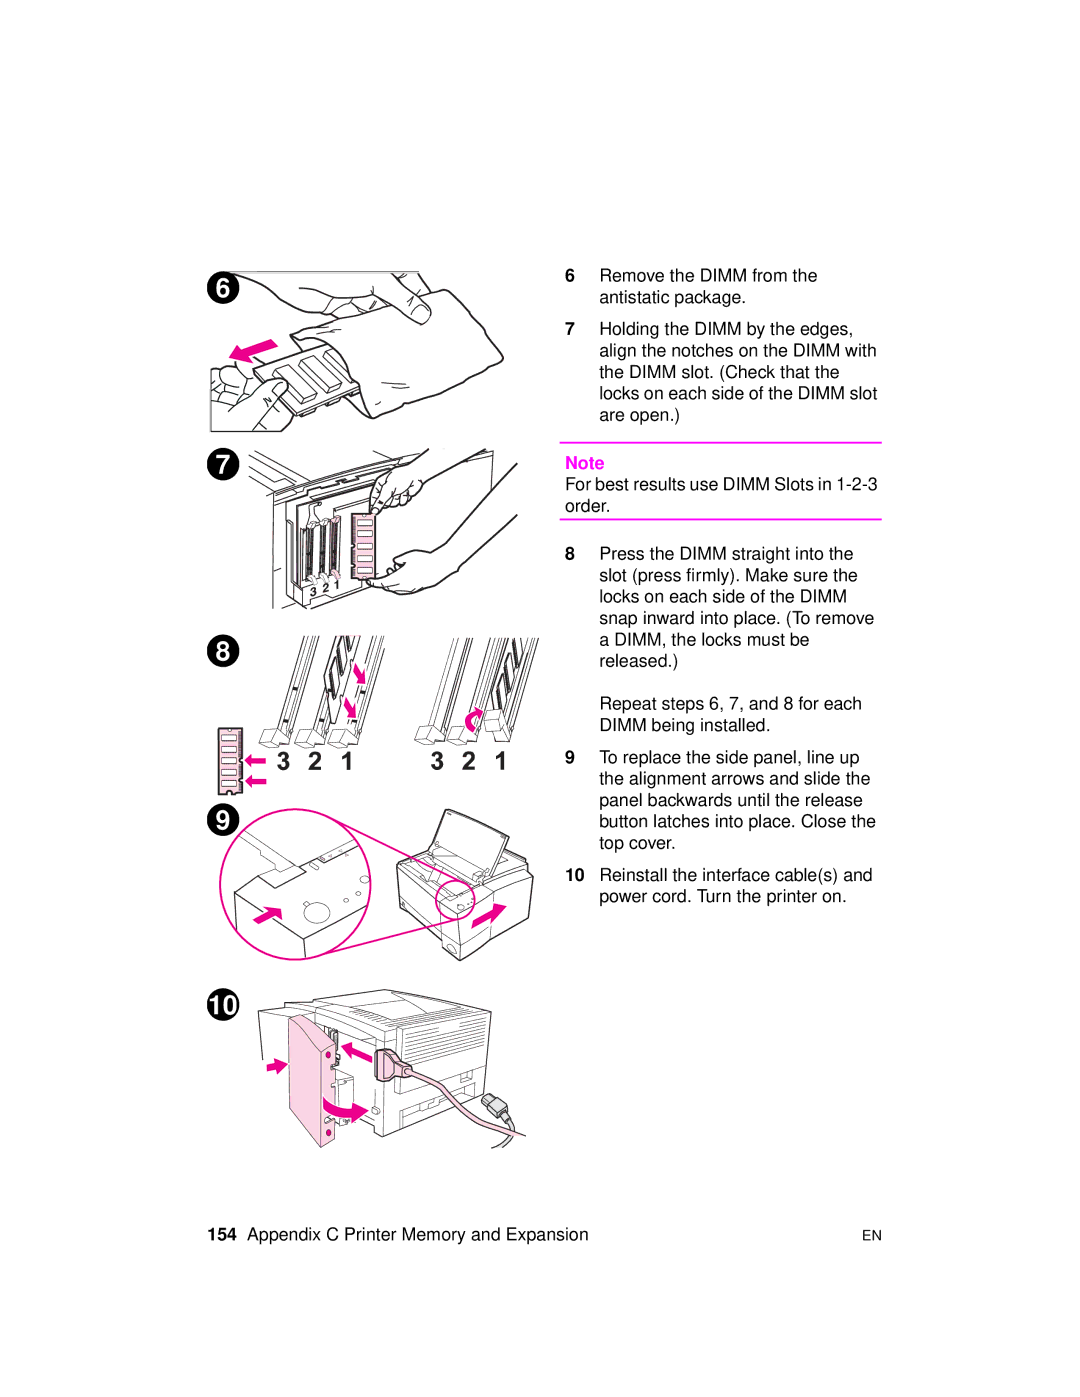
6Remove the DIMM from the antistatic package.
7Holding the DIMM by the edges, align the notches on the DIMM with the DIMM slot. (Check that the locks on each side of the DIMM slot are open.)
Note
For best results use DIMM Slots in
8Press the DIMM straight into the slot (press firmly). Make sure the locks on each side of the DIMM snap inward into place. (To remove a DIMM, the locks must be released.)
Repeat steps 6, 7, and 8 for each DIMM being installed.
9To replace the side panel, line up the alignment arrows and slide the panel backwards until the release button latches into place. Close the top cover.
10Reinstall the interface cable(s) and power cord. Turn the printer on.
154 Appendix C Printer Memory and Expansion | EN |