4.Make sure the tray is not overfilled. If it is, remove the entire stack of paper from the tray, straighten the stack, and then return some of the paper to the tray.
5.Make sure the paper guides in the tray are adjusted correctly for the size of paper. Adjust the guides so they are touching the paper stack without bending it.
6.Make sure that the tray is fully inserted in the product.
7.If you are printing on heavy, embossed, or perforated paper, use Tray 1, the
Clear jams
Jam locations
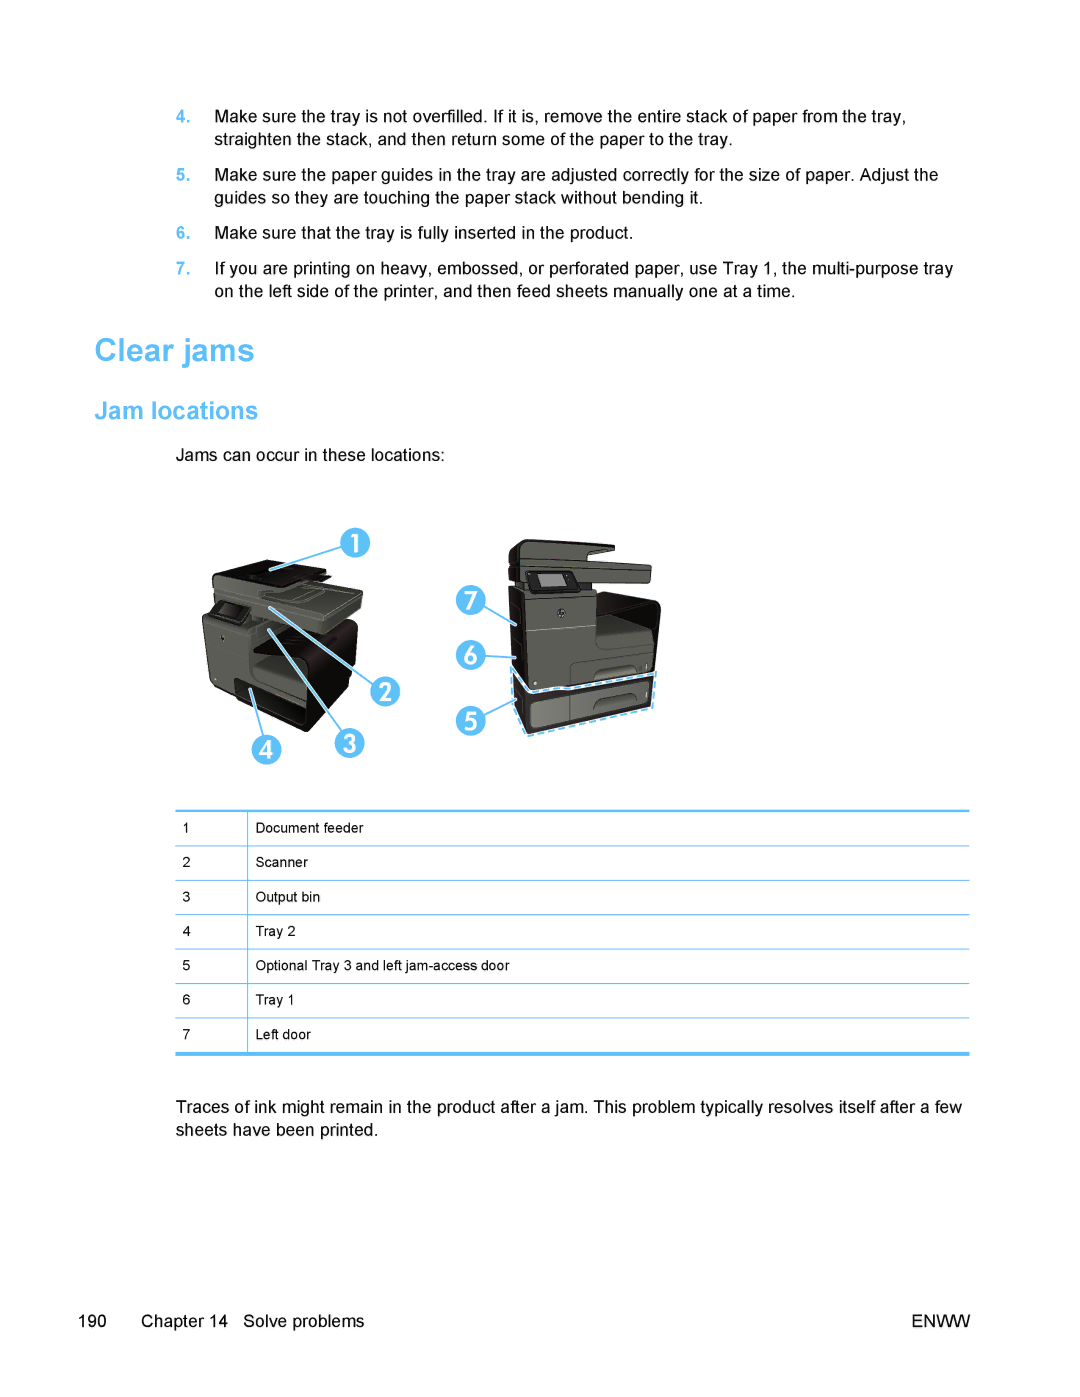
Jams can occur in these locations:
1
2
3
4
5
6
7
1
7
6![]()
2
5
4 3
Document feeder
Scanner
Output bin
Tray 2
Optional Tray 3 and left
Tray 1
Left door
Traces of ink might remain in the product after a jam. This problem typically resolves itself after a few sheets have been printed.
190 Chapter 14 Solve problems | ENWW |