![]() Note: ESD can damage disk drives, boards, and other parts. This system can withstand normal levels of environmental ESD while you are
Note: ESD can damage disk drives, boards, and other parts. This system can withstand normal levels of environmental ESD while you are
Installing or Swapping a Hard Disk Drive
1.Power off the system and ensure it is disconnected from the AC power source.
2.Open the front door as described earlier in this chapter.
3.Remove the left and right side panel as described earlier in this chapter.
4.Tag and disconnect all interface cables and voltage cables connected to all drives in the drive bay.
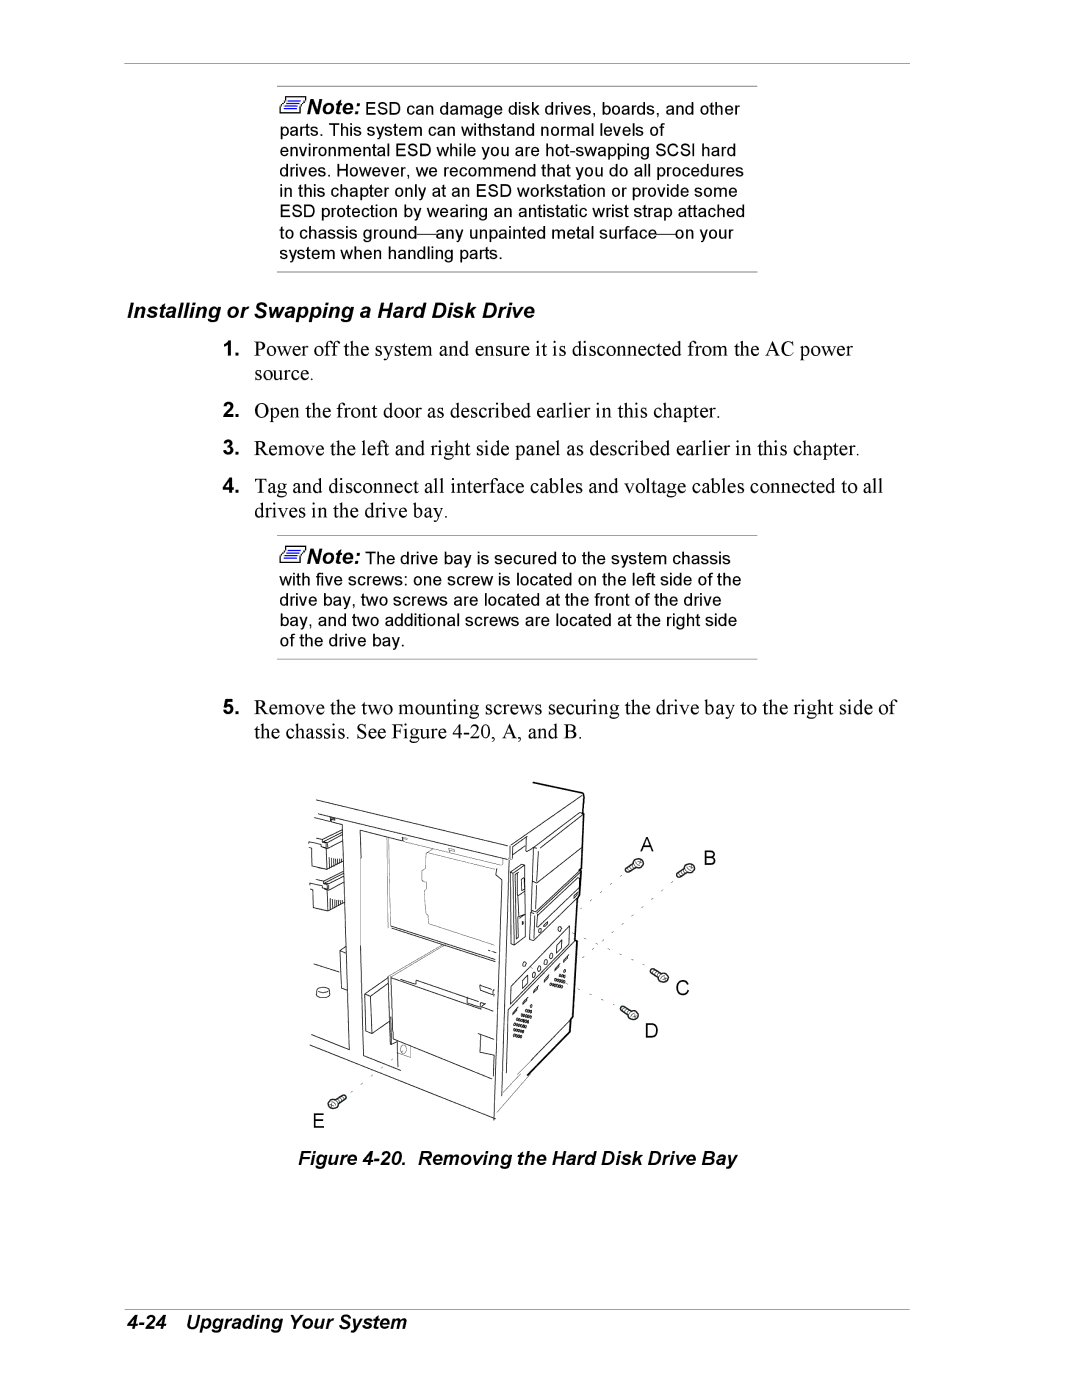
![]() Note: The drive bay is secured to the system chassis with five screws: one screw is located on the left side of the drive bay, two screws are located at the front of the drive bay, and two additional screws are located at the right side of the drive bay.
Note: The drive bay is secured to the system chassis with five screws: one screw is located on the left side of the drive bay, two screws are located at the front of the drive bay, and two additional screws are located at the right side of the drive bay.
5.Remove the two mounting screws securing the drive bay to the right side of the chassis. See Figure
A
B
![]() C
C
D
E
