Installing a 5.25-Inch Media Device

!CAUTION

CD-ROM devices contain a laser system and are classified as CLASS 1 LASER PRODUCTS. To use these devices, thoroughly read the documentation provided by the CD- ROM manufacturer, and keep the documentation for future reference. In case of any trouble with a CD-ROM, please contact your nearest service representative. To prevent direct exposure to the laser beam, do not try to open the enclosure. Use of controls or adjustments or performance of procedures other than those specified in the CD-ROM manufacturer's documentation may result in hazardous radiation exposure

1.Power off the system and ensure it is disconnected from the AC power source.

2.Open the front door as described earlier in this chapter.

3.Remove the left side panel as described earlier in this chapter.

!CAUTION

Observe static precautions. Use an antistatic wrist strap.

4.Perform Steps 4, 5, and 6 of Removing the 3.5-Inch Diskette Drive described earlier in this chapter. It is not necessary to remove the diskette drive from the mounting bracket to which it is mounted.

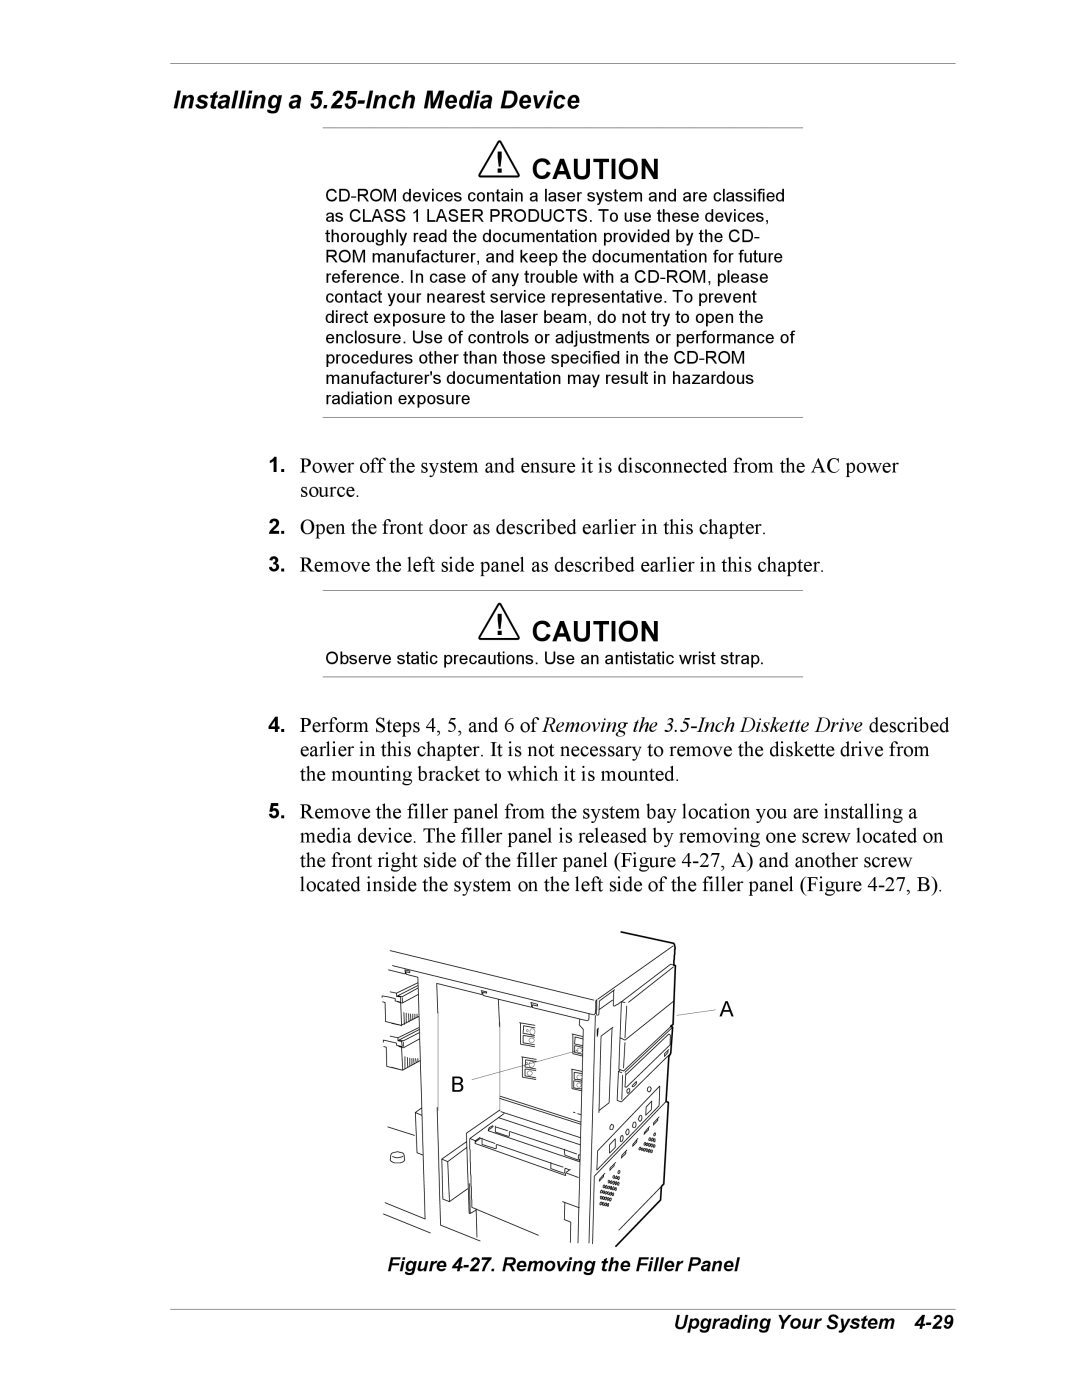
5.Remove the filler panel from the system bay location you are installing a media device. The filler panel is released by removing one screw located on the front right side of the filler panel (Figure 4-27, A) and another screw located inside the system on the left side of the filler panel (Figure 4-27, B).

A

B

Figure 4-27. Removing the Filler Panel

Upgrading Your System 4-29

Page 97
Image 97
Intel 5800/120Ld manual Installing a 5.25-Inch Media Device, Removing the Filler Panel Upgrading Your System