Removing Side Panels
To install options in your system, you must remove the side panel on the left side of the system (as viewed from the front). The side panel on the right side of the system (as viewed from the front) only has to be removed when adding SCSI hard disk drives to the
!CAUTION
For proper cooling and airflow, do not operate the system with the side panels removed. Always replace the panels before powering on the system.
!WARNING
If you are removing the side panel after the system is set up, you must first power off the system and all external devices and then Unplug the system power cord
To remove the left side panel:
1.Power off the system and ensure it is disconnected from the ac wall outlet.
2.Open the front door following procedures in the previous section.
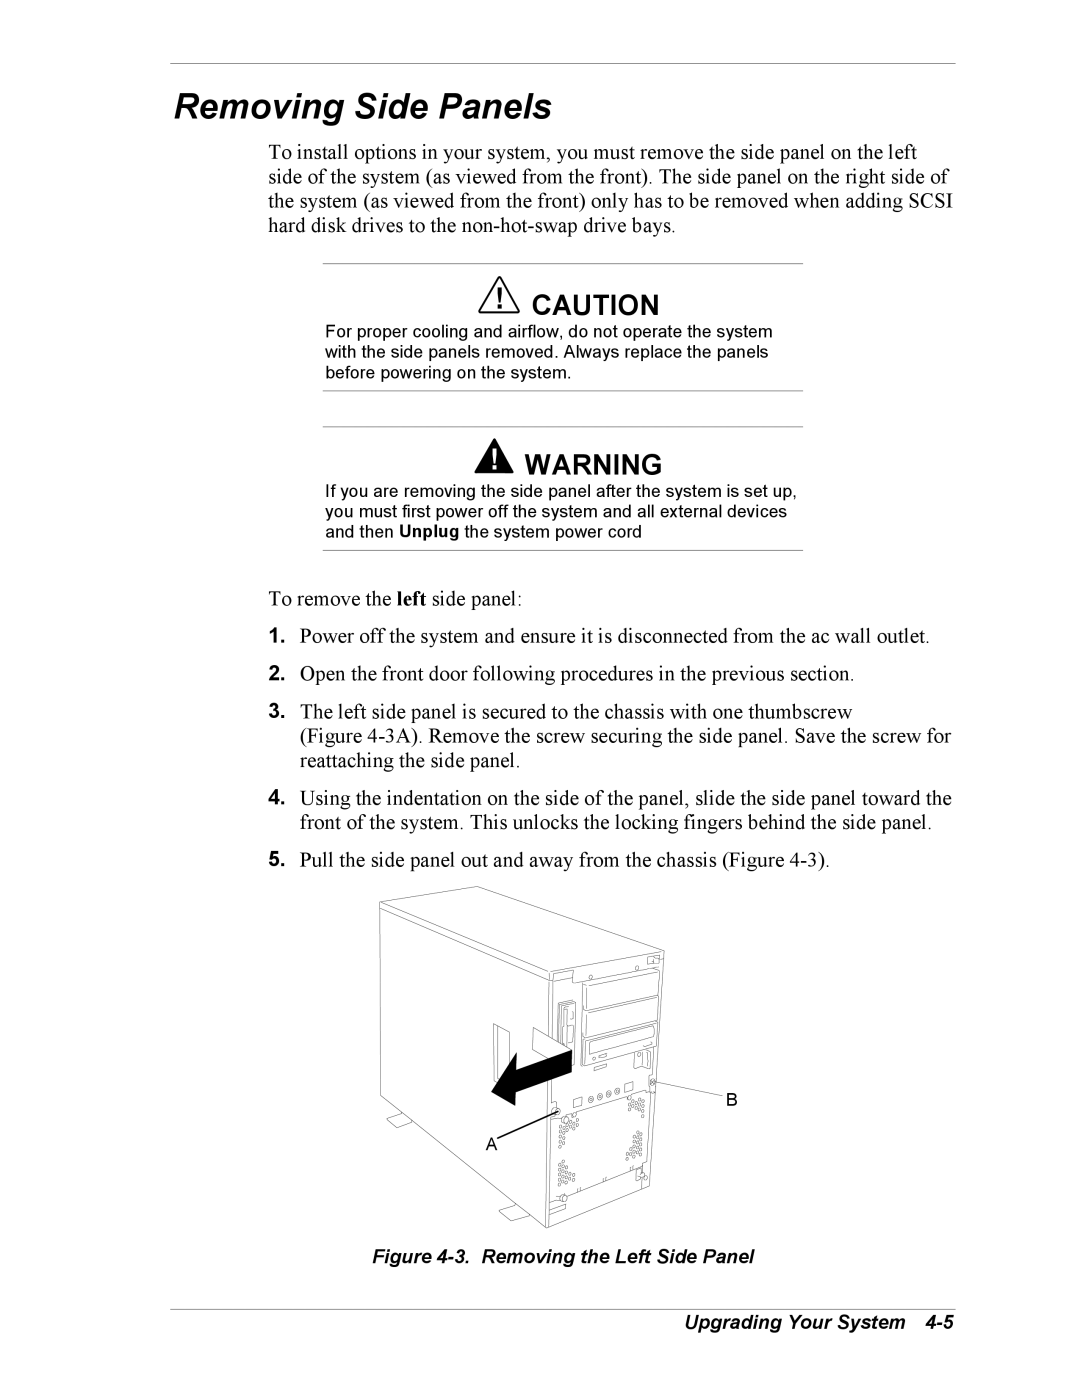
3.The left side panel is secured to the chassis with one thumbscrew
(Figure 4-3A). Remove the screw securing the side panel. Save the screw for reattaching the side panel.
4.Using the indentation on the side of the panel, slide the side panel toward the front of the system. This unlocks the locking fingers behind the side panel.
5.Pull the side panel out and away from the chassis (Figure 4-3).
B
A