First Installation
Transponder:
Use the buttons to scroll through the transponders of the satellite highlighted in yellow at the top of the display. At the right you will see the signal strength of the transponder on the two tuners, enabling you to check that the satellite configuration you just set up is OK.
When you have finished configuring this satellite, press .
If in the preceding “Select Satellite” menu you selected more than one satellite, you will now see the configuration for the next of the satellites you selected. Configure the satellite as described above.
When you have finished configuring the satellite
press . The receiver then automatically calls up the selection menu for the channel search.
Transponder:
Use the buttons to scroll through the transponders of the satellite highlighted in yellow at the top of the display. At the right you will see the signal strength of the transponder on the two tuners, enabling you to check that the satellite configuration you just set up is OK.
When you have finished configuring the satellite press .
If in the preceding “Select Satellite” menu you selected more than one satellite, you will now see the configuration for the next of the satellites you selected. Configure the satellite as described above.
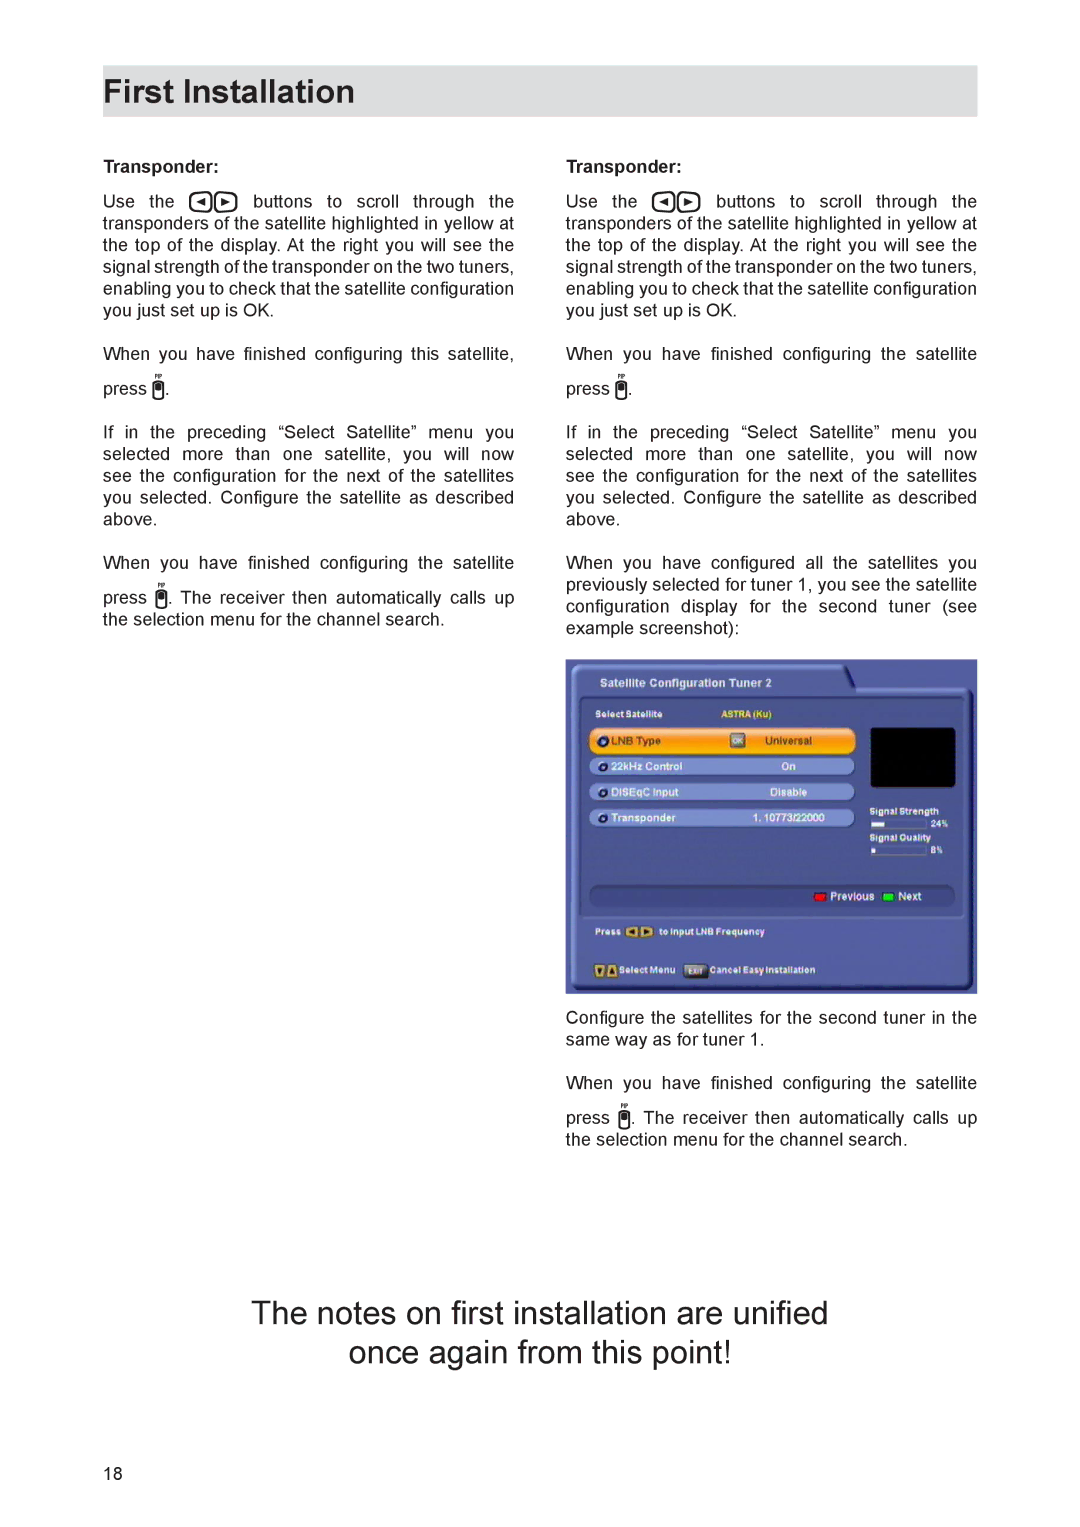
When you have configured all the satellites you previously selected for tuner 1, you see the satellite configuration display for the second tuner (see example screenshot):
Configure the satellites for the second tuner in the same way as for tuner 1.
When you have finished configuring the satellite
press . The receiver then automatically calls up the selection menu for the channel search.
The notes on first installation are unified
once again from this point!
18