9.Printer feeds the paper into the printer when your computer sends data.
10.Preparation
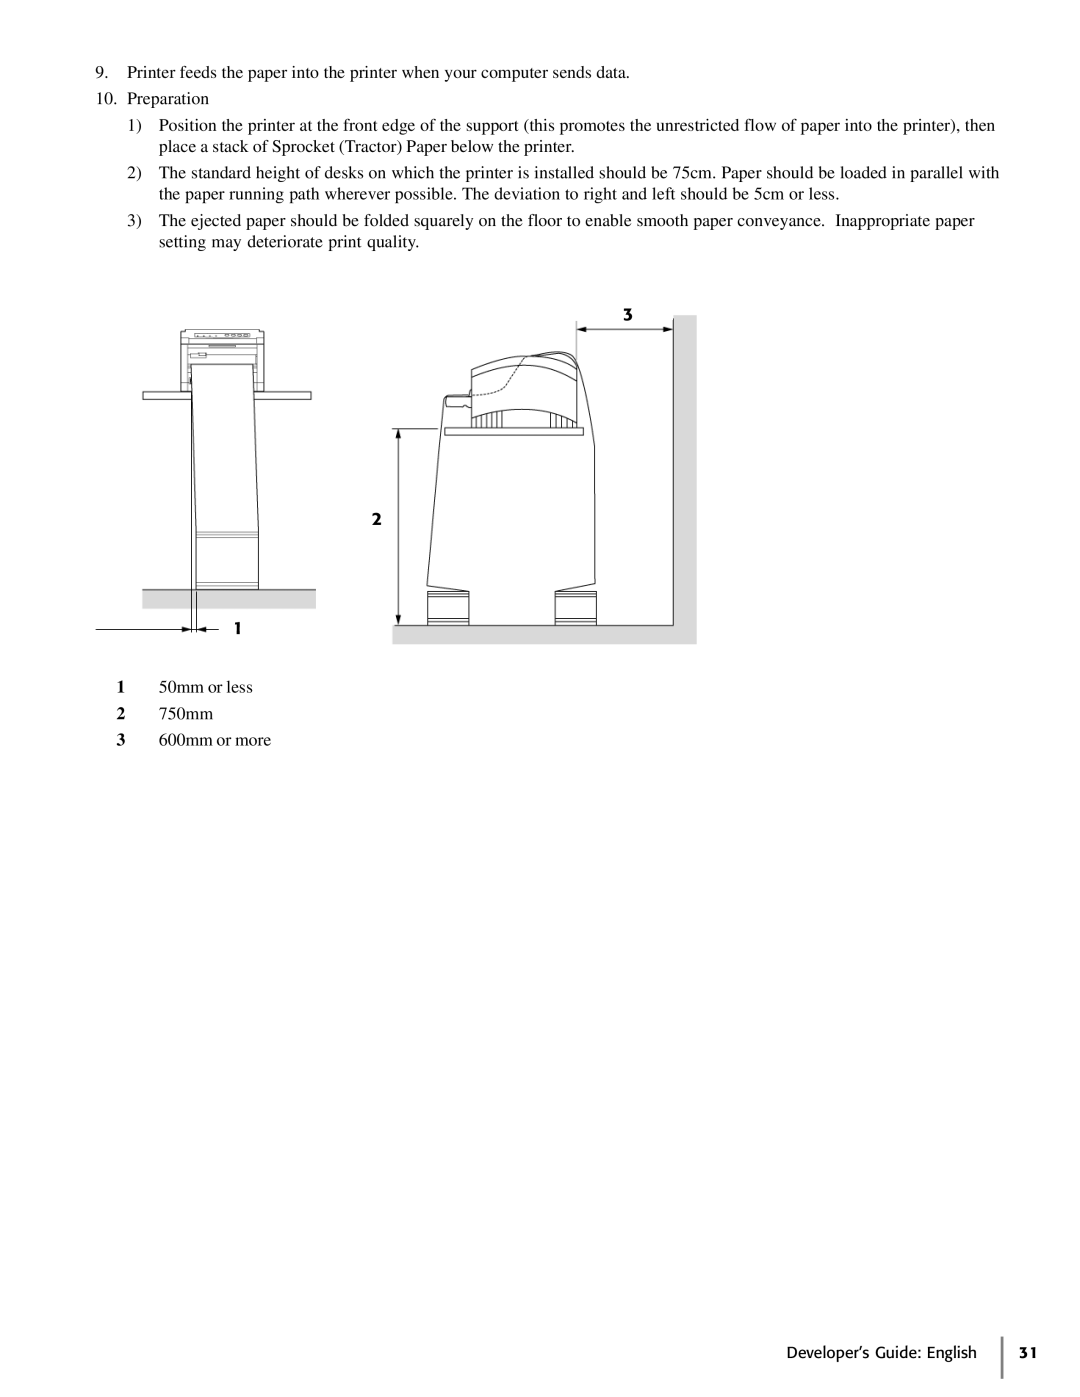
1)Position the printer at the front edge of the support (this promotes the unrestricted flow of paper into the printer), then place a stack of Sprocket (Tractor) Paper below the printer.
2)The standard height of desks on which the printer is installed should be 75cm. Paper should be loaded in parallel with the paper running path wherever possible. The deviation to right and left should be 5cm or less.
3)The ejected paper should be folded squarely on the floor to enable smooth paper conveyance. Inappropriate paper setting may deteriorate print quality.
3
2
1
150mm or less
2750mm
3600mm or more