5.7.5 Appendix: Media Specifications
5.7.5.1.Cut-Sheet Paper (Slip/Validation)
5.7.5.1.1.Paper Size and Printing Area
1
3
4
1
6
2
5
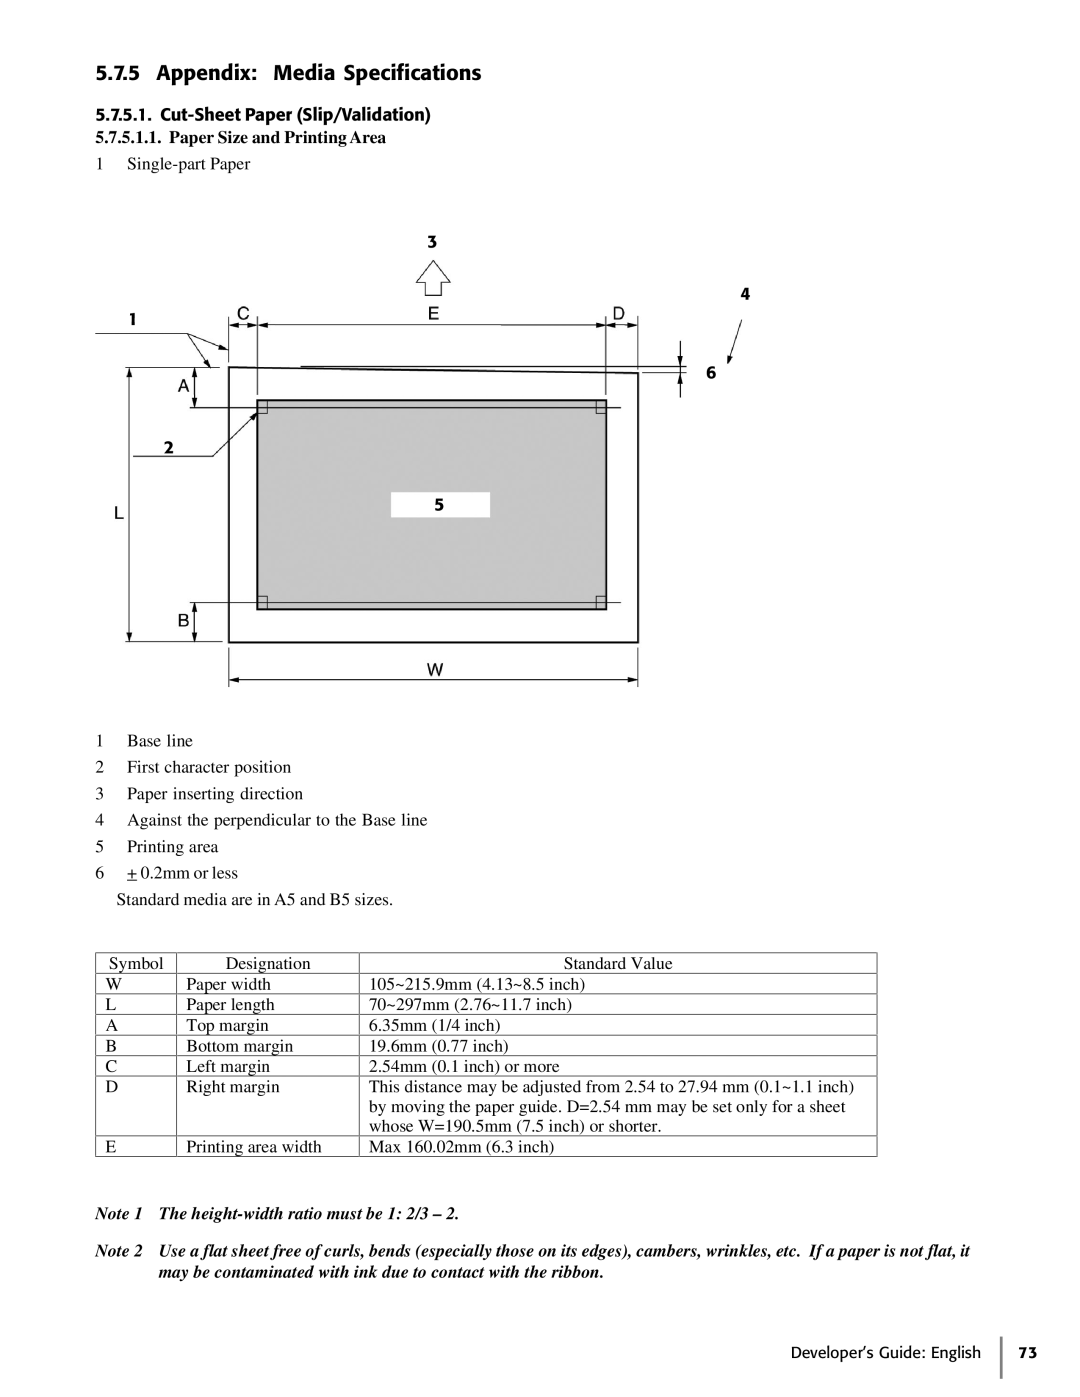
1Base line
2First character position
3Paper inserting direction
4Against the perpendicular to the Base line
5Printing area
6+ 0.2mm or less
Standard media are in A5 and B5 sizes.
Symbol
W
L
A
B
C
D
E
Designation
Paper width
Paper length
Top margin
Bottom margin
Left margin
Right margin
Printing area width
Standard Value
105~215.9mm (4.13~8.5 inch)
70~297mm (2.76~11.7 inch)
6.35mm (1/4 inch)
19.6mm (0.77 inch)
2.54mm (0.1 inch) or more
This distance may be adjusted from 2.54 to 27.94 mm (0.1~1.1 inch) by moving the paper guide. D=2.54 mm may be set only for a sheet whose W=190.5mm (7.5 inch) or shorter.
Max 160.02mm (6.3 inch)
Note 1 The
Note 2 Use a flat sheet free of curls, bends (especially those on its edges), cambers, wrinkles, etc. If a paper is not flat, it may be contaminated with ink due to contact with the ribbon.