2.3.3 How to Operate
Start
To start the Menu Mode, turn the printer on while holding down SW2 + SW1. When the printer’s initialization ends correctly, the printer prints the title “Menu Print” and all the menu items and set values. Then, the printer
Operation
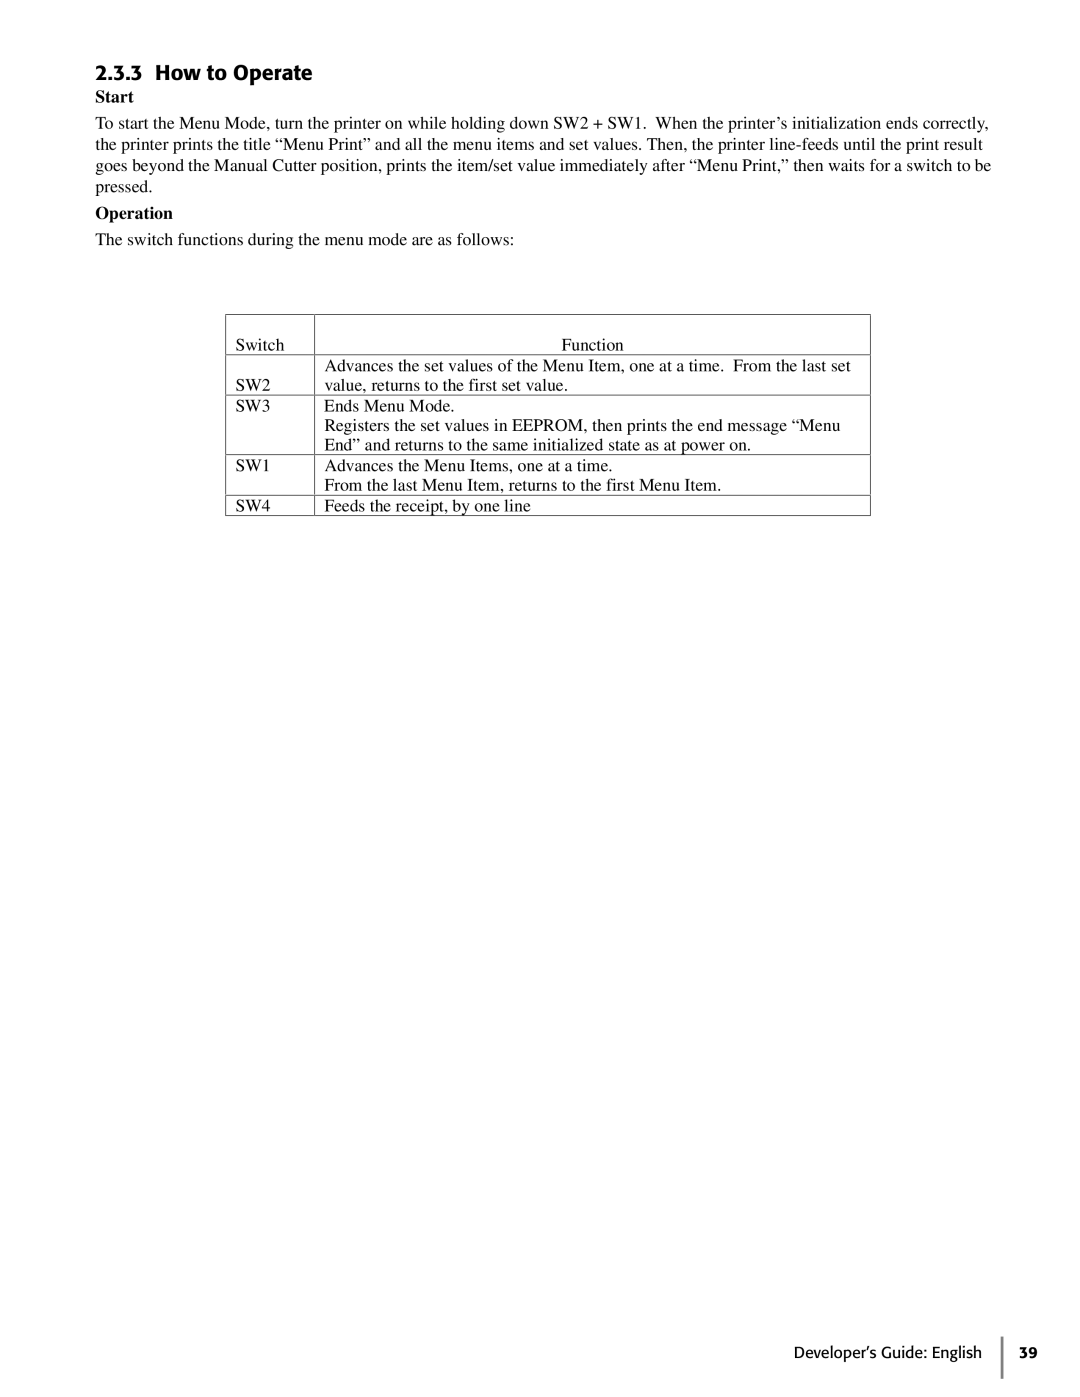
The switch functions during the menu mode are as follows:
Switch
SW2
SW3
SW1
SW4
Function
Advances the set values of the Menu Item, one at a time. From the last set value, returns to the first set value.
Ends Menu Mode.
Registers the set values in EEPROM, then prints the end message “Menu End” and returns to the same initialized state as at power on.
Advances the Menu Items, one at a time.
From the last Menu Item, returns to the first Menu Item.
Feeds the receipt, by one line