6.Command Description
6.1Control Code List
6.1.1 OEM — Standard Model
6.1.1.1Function Code
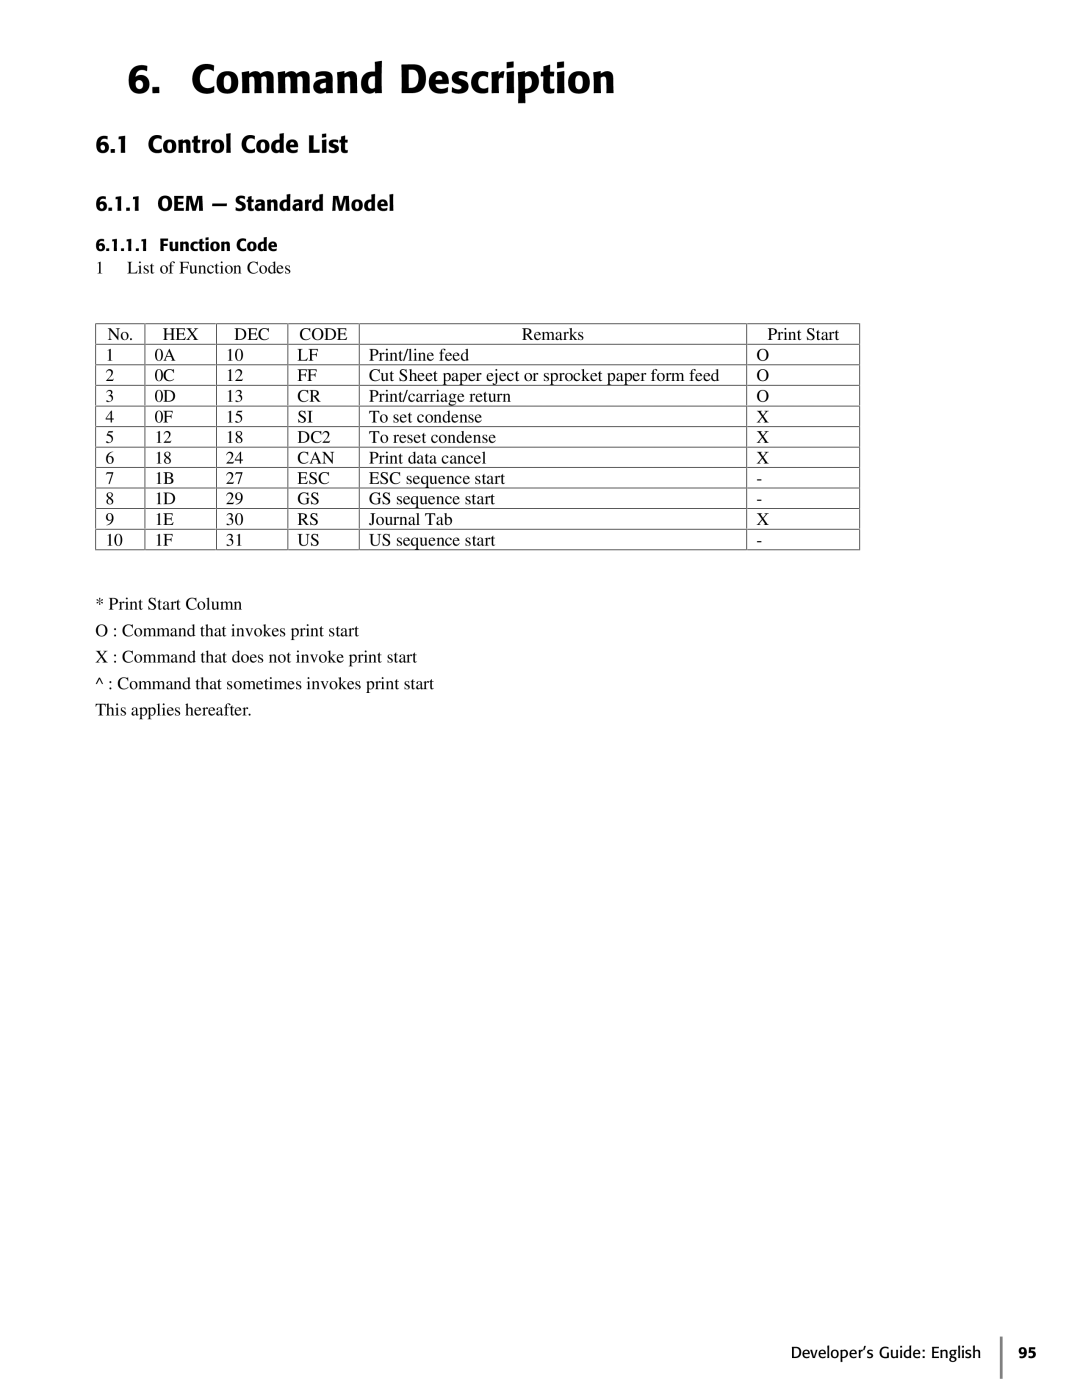
1 List of Function Codes
No.
1
2
3
4
5
6
7
8
9
10
HEX
0A
0C
0D
0F
12
18
1B
1D
1E
1F
DEC
10
12
13
15
18
24
27
29
30
31
CODE
LF
FF
CR
SI
DC2
CAN
ESC
GS
RS
US
Remarks
Print/line feed
Cut Sheet paper eject or sprocket paper form feed
Print/carriage return
To set condense
To reset condense
Print data cancel
ESC sequence start
GS sequence start
Journal Tab
US sequence start
Print Start
O
O
O
X
X
X
-
-
X
-
* Print Start Column
O : Command that invokes print start
X : Command that does not invoke print start
^: Command that sometimes invokes print start This applies hereafter.