Additional information | 12 |
Video
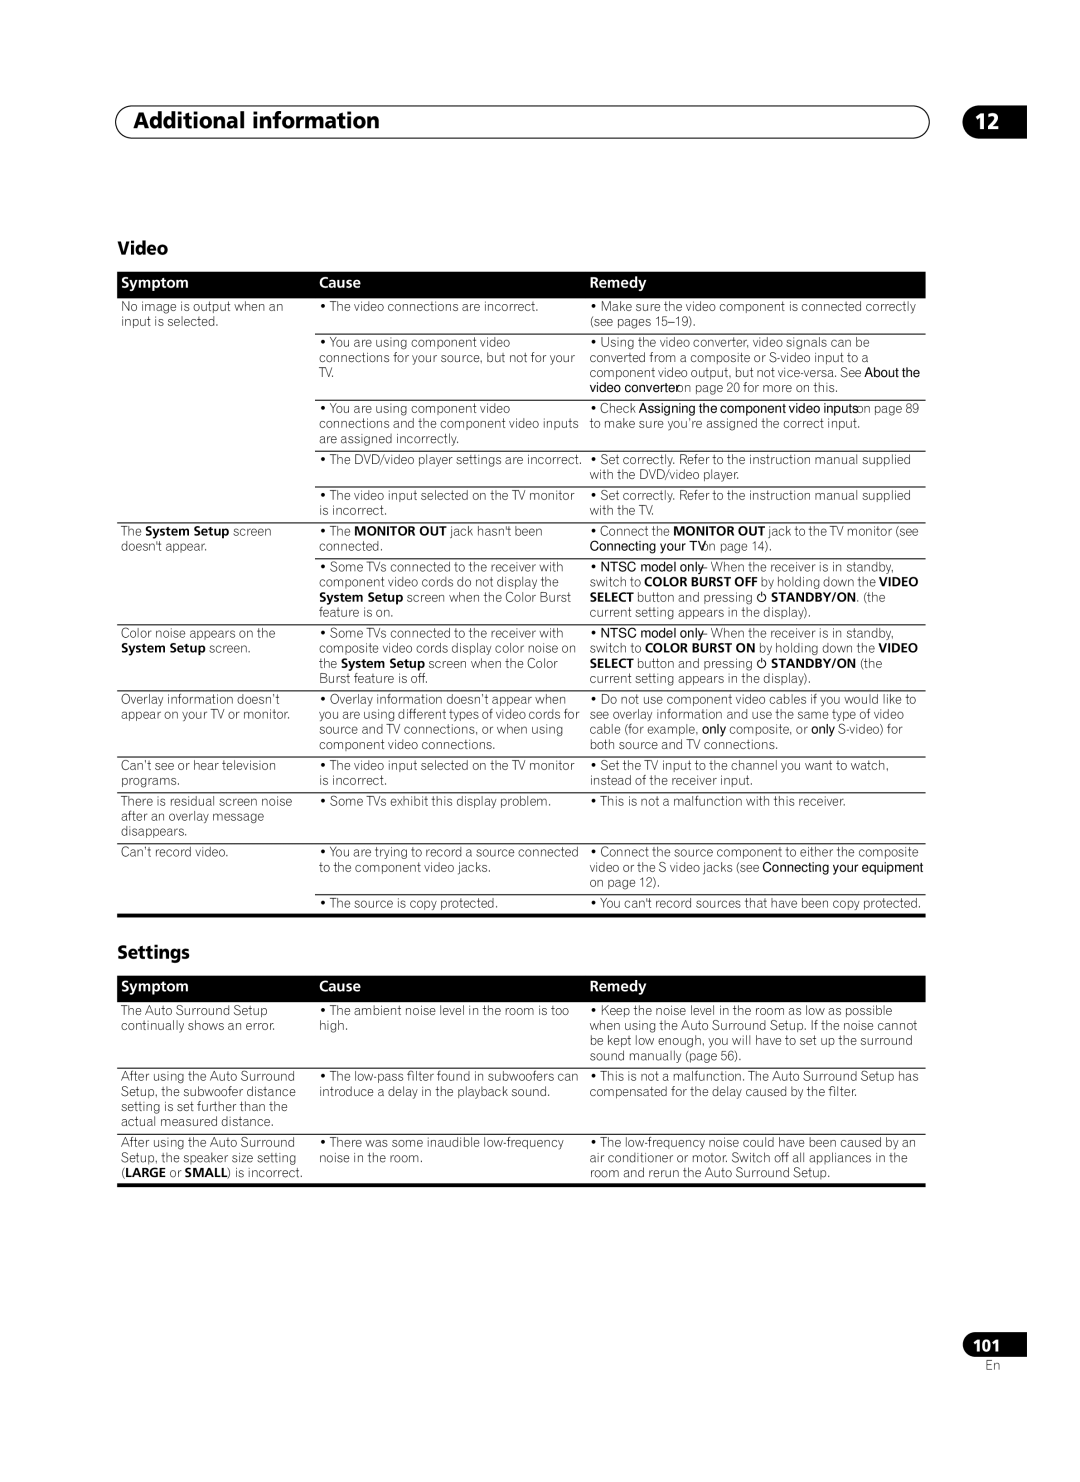
Symptom | Cause | Remedy |
|
|
|
No image is output when an input is selected.
• The video connections are incorrect. | • Make sure the video component is connected correctly |
| (see pages |
|
|
• You are using component video | • Using the video converter, video signals can be |
connections for your source, but not for your | converted from a composite or |
TV. | component video output, but not |
| video converter on page 20 for more on this. |
• You are using component video | • Check Assigning the component video inputs on page 89 |
connections and the component video inputs | to make sure you’re assigned the correct input. |
are assigned incorrectly. |
|
•The DVD/video player settings are incorrect. • Set correctly. Refer to the instruction manual supplied with the DVD/video player.
| • The video input selected on the TV monitor | • Set correctly. Refer to the instruction manual supplied | |
| is incorrect. | with the TV. |
|
|
|
| |
The System Setup screen | • The MONITOR OUT jack hasn't been | • Connect the MONITOR OUT jack to the TV monitor (see | |
doesn't appear. | connected. | Connecting your TV on page 14). | |
|
|
| |
| • Some TVs connected to the receiver with | • NTSC model only – When the receiver is in standby, | |
| component video cords do not display the | switch to COLOR BURST OFF by holding down the VIDEO | |
| System Setup screen when the Color Burst | SELECT button and pressing | STANDBY/ON. (the |
| feature is on. | current setting appears in the display). | |
|
|
| |
Color noise appears on the | • Some TVs connected to the receiver with | • NTSC model only – When the receiver is in standby, | |
System Setup screen. | composite video cords display color noise on | switch to COLOR BURST ON by holding down the VIDEO | |
| the System Setup screen when the Color | SELECT button and pressing | STANDBY/ON (the |
| Burst feature is off. | current setting appears in the display). | |
Overlay information doesn’t | • Overlay information doesn’t appear when |
appear on your TV or monitor. | you are using different types of video cords for |
| source and TV connections, or when using |
| component video connections. |
•Do not use component video cables if you would like to see overlay information and use the same type of video cable (for example, only composite, or only
Can’t see or hear television | • The video input selected on the TV monitor | • Set the TV input to the channel you want to watch, |
programs. | is incorrect. | instead of the receiver input. |
There is residual screen noise after an overlay message disappears.
• Some TVs exhibit this display problem. | • This is not a malfunction with this receiver. |
Can’t record video. | • You are trying to record a source connected | • Connect the source component to either the composite |
| to the component video jacks. | video or the S video jacks (see Connecting your equipment |
|
| on page 12). |
|
|
|
| • The source is copy protected. | • You can't record sources that have been copy protected. |
|
|
|
Settings
Symptom | Cause | Remedy |
|
|
|
The Auto Surround Setup | • The ambient noise level in the room is too |
continually shows an error. | high. |
•Keep the noise level in the room as low as possible when using the Auto Surround Setup. If the noise cannot be kept low enough, you will have to set up the surround sound manually (page 56).
After using the Auto Surround Setup, the subwoofer distance setting is set further than the actual measured distance.
•The
•This is not a malfunction. The Auto Surround Setup has compensated for the delay caused by the filter.
After using the Auto Surround Setup, the speaker size setting (LARGE or SMALL) is incorrect.
•There was some inaudible
•The
101
En
