Other connections | 10 |
Alternating surround speaker setups using speaker system B
After you connect an alternate set of surround speakers, you can use speaker system B to provide surround sound when listening to sources like
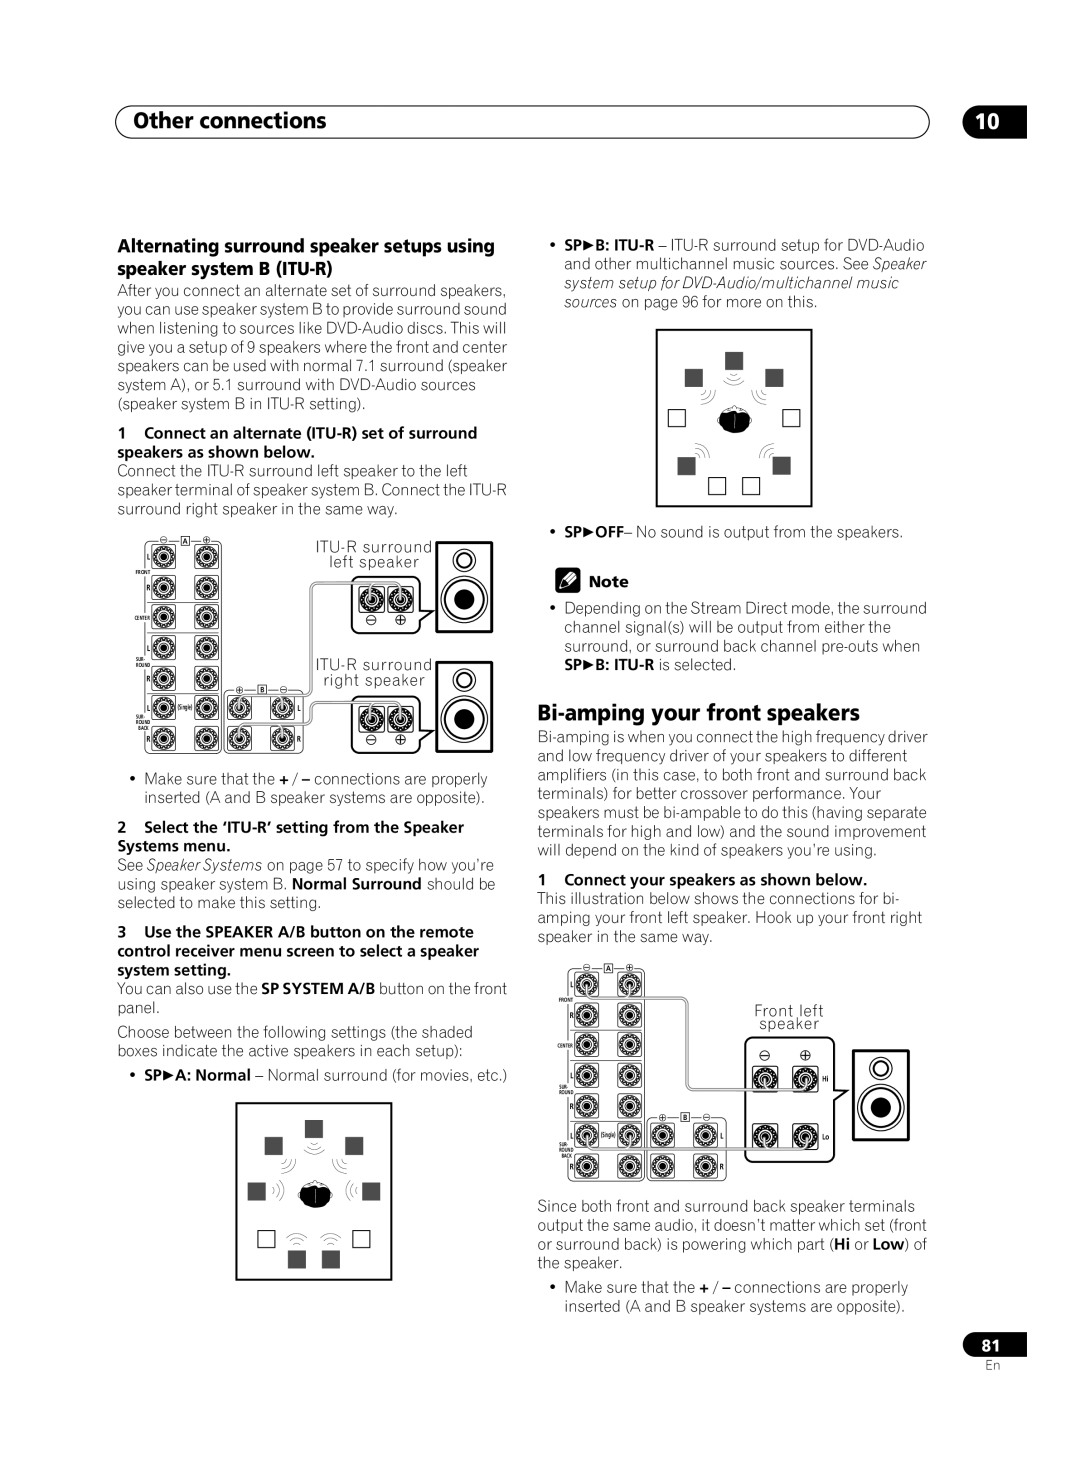
1Connect an alternate
Connect the
| A | |
L |
| |
| left speaker | |
FRONT |
| |
|
| |
R |
|
|
CENTER |
|
|
L |
|
|
SUR- |
| |
ROUND |
| |
R |
| right speaker |
|
| |
|
| B |
L | (Single) | L |
SUR- |
|
|
ROUND |
|
|
BACK |
|
|
R |
| R |
•Make sure that the + / – connections are properly inserted (A and B speaker systems are opposite).
2Select the ‘ITU-R’ setting from the Speaker Systems menu.
See Speaker Systems on page 57 to specify how you’re using speaker system B. Normal Surround should be selected to make this setting.
3Use the SPEAKER A/B button on the remote control receiver menu screen to select a speaker system setting.
You can also use the SP SYSTEM A/B button on the front panel.
Choose between the following settings (the shaded boxes indicate the active speakers in each setup):
• SP A: Normal – Normal surround (for movies, etc.)
• SP B:
• SP OFF– No sound is output from the speakers.
![]() Note
Note
•Depending on the Stream Direct mode, the surround channel signal(s) will be output from either the surround, or surround back channel
SP B: ITU-R is selected.
Bi-amping your front speakers
1Connect your speakers as shown below. This illustration below shows the connections for bi- amping your front left speaker. Hook up your front right speaker in the same way.
A
L ![]()
![]()
![]()
FRONT
R | Front left |
| speaker |
CENTER
L | Hi |
SUR-
ROUND
R ![]()
![]()
![]()
B
L | (Single) | L | Lo |
SUR-
ROUND
BACK
R ![]()
![]()
![]()
![]()
![]()
![]()
![]()
![]()
![]()
![]()
![]()
![]() R
R
Since both front and surround back speaker terminals output the same audio, it doesn’t matter which set (front or surround back) is powering which part (Hi or Low) of the speaker.
•Make sure that the + / – connections are properly inserted (A and B speaker systems are opposite).
81
En
