07The Surround Setup menu
Professional Acoustic Calibration EQ
This setup minimizes the unwanted effects of room reverberation by calibrating your system based on the direct sound coming from the speakers. It can also provide you with a graphical output of the frequency response of your room.
![]() Note
Note
•Before setting up with Professional Acoustic Calibration EQ, you should finish calibrating using the Auto Surround Setup on page 37.
How to use Professional Acoustic Calibration EQ
If you find that lower frequencies seem overly reverberant in your listening room (i.e. it sounds ‘boomy’), or that different channels seem to exhibit different reverb characteristics, use the auto pro setup to calibrate the room automatically. This should provide a more balanced calibration than simply using the standard Acoustic Calibration EQ. The manual setup allows you to customize your system calibration with the help of a graphical output that can be displayed
How to interpret the graphical output
The graph shows decibels on the vertical axis and time (in milliseconds) on the horizontal axis. A straight line indicates a
By analyzing the graph, you should be able to see how your room is responding to certain frequencies. Differences in channel level and speaker distance are taken into account automatically (compensation is provided for comparison purposes), but the frequency measurements are always shown without the equalization performed by this receiver.
Note that due to an effect known as ‘group delay’, lower frequencies will take longer to be generated than higher frequencies (this is most obvious when comparing the frequencies at 0ms). This initial slope is not a problem (i.e. excessive reverb) with your listening room.
Setting Professional Acoustic Calibration EQ according to your room characteristics
Using the manual setup, you can set the time period at which the frequency response is analyzed for calibration. You can pinpoint the time that is best for calibration of the system for your particular room characteristics.
62
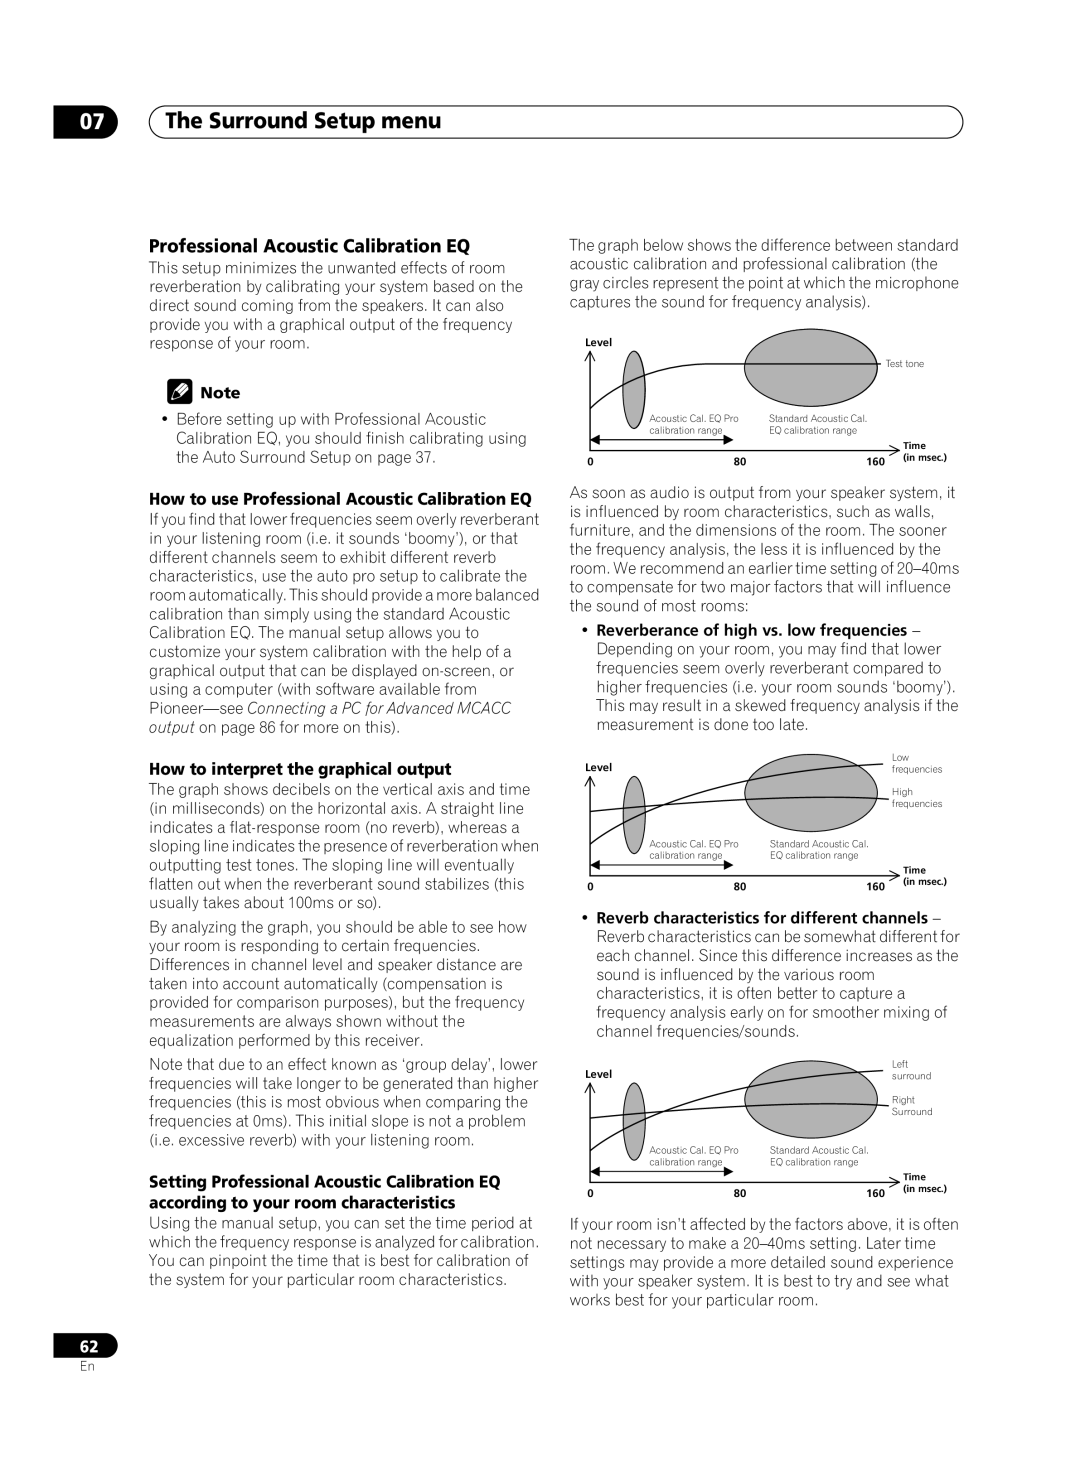
The graph below shows the difference between standard acoustic calibration and professional calibration (the gray circles represent the point at which the microphone captures the sound for frequency analysis).
Level |
|
|
|
|
|
| Test tone |
| Acoustic Cal. EQ Pro | Standard Acoustic Cal. |
|
| calibration range | EQ calibration range |
|
|
|
| Time |
0 | 80 | 160 | (in msec.) |
|
As soon as audio is output from your speaker system, it is influenced by room characteristics, such as walls, furniture, and the dimensions of the room. The sooner the frequency analysis, the less it is influenced by the room. We recommend an earlier time setting of
•Reverberance of high vs. low frequencies – Depending on your room, you may find that lower frequencies seem overly reverberant compared to higher frequencies (i.e. your room sounds ‘boomy’). This may result in a skewed frequency analysis if the measurement is done too late.
Level |
|
| Low | ||
|
| frequencies | |||
|
|
|
| High | |
|
|
|
| frequencies | |
|
| Acoustic Cal. EQ Pro | Standard Acoustic Cal. |
|
|
|
| calibration range | EQ calibration range |
|
|
|
|
|
|
| Time |
0 | 80 | 160 |
| (in msec.) | |
|
| ||||
•Reverb characteristics for different channels – Reverb characteristics can be somewhat different for each channel. Since this difference increases as the sound is influenced by the various room characteristics, it is often better to capture a frequency analysis early on for smoother mixing of channel frequencies/sounds.
Level |
|
| Left | ||
|
| surround | |||
|
|
|
| Right | |
|
|
|
| Surround | |
|
| Acoustic Cal. EQ Pro | Standard Acoustic Cal. |
|
|
|
| calibration range | EQ calibration range |
|
|
|
|
|
|
| Time |
0 | 80 | 160 |
| (in msec.) | |
|
| ||||
If your room isn’t affected by the factors above, it is often not necessary to make a
En