6.5.5 LOWER TRAY
[B]
[A]
[F]
[C]![]()
![]()
![]()
![]()
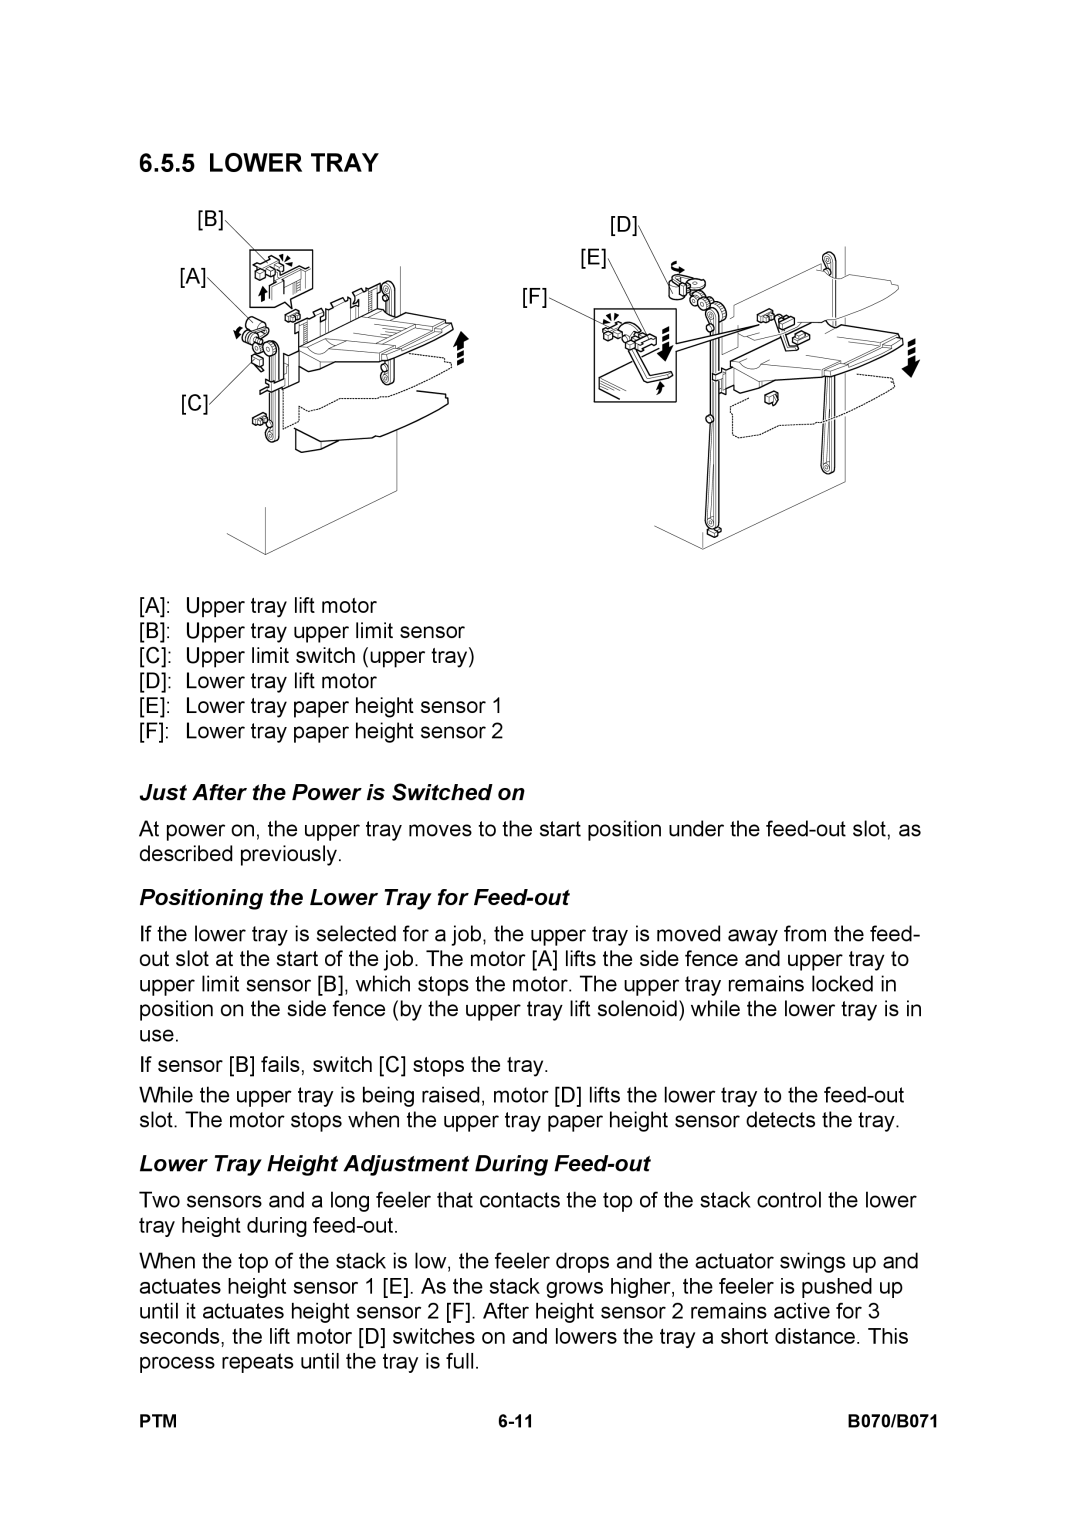
[A]: Upper tray lift motor
[B]: Upper tray upper limit sensor
[C]: Upper limit switch (upper tray)
[D]: Lower tray lift motor
[E]: Lower tray paper height sensor 1
[F]: Lower tray paper height sensor 2
Just After the Power is Switched on
[D]
[E]
At power on, the upper tray moves to the start position under the
Positioning the Lower Tray for Feed-out
If the lower tray is selected for a job, the upper tray is moved away from the feed- out slot at the start of the job. The motor [A] lifts the side fence and upper tray to upper limit sensor [B], which stops the motor. The upper tray remains locked in position on the side fence (by the upper tray lift solenoid) while the lower tray is in use.
If sensor [B] fails, switch [C] stops the tray.
While the upper tray is being raised, motor [D] lifts the lower tray to the
Lower Tray Height Adjustment During Feed-out
Two sensors and a long feeler that contacts the top of the stack control the lower tray height during
When the top of the stack is low, the feeler drops and the actuator swings up and actuates height sensor 1 [E]. As the stack grows higher, the feeler is pushed up until it actuates height sensor 2 [F]. After height sensor 2 remains active for 3 seconds, the lift motor [D] switches on and lowers the tray a short distance. This process repeats until the tray is full.
PTM | B070/B071 |