Chapter 4 Calibration Procedures
Aborting a Calibration in Progress
Aborting a Calibration in Progress
Sometimes it may be necessary to abort a calibration after the procedure has already been initiated. You can abort a calibration at any time by pressing any
Frequency and Burst Rate Adjustment
The function generator stores two calibration constants related to frequency and burst rate output. The constants are calculated from the adjustment value entered and are stored at the completion of each setup.
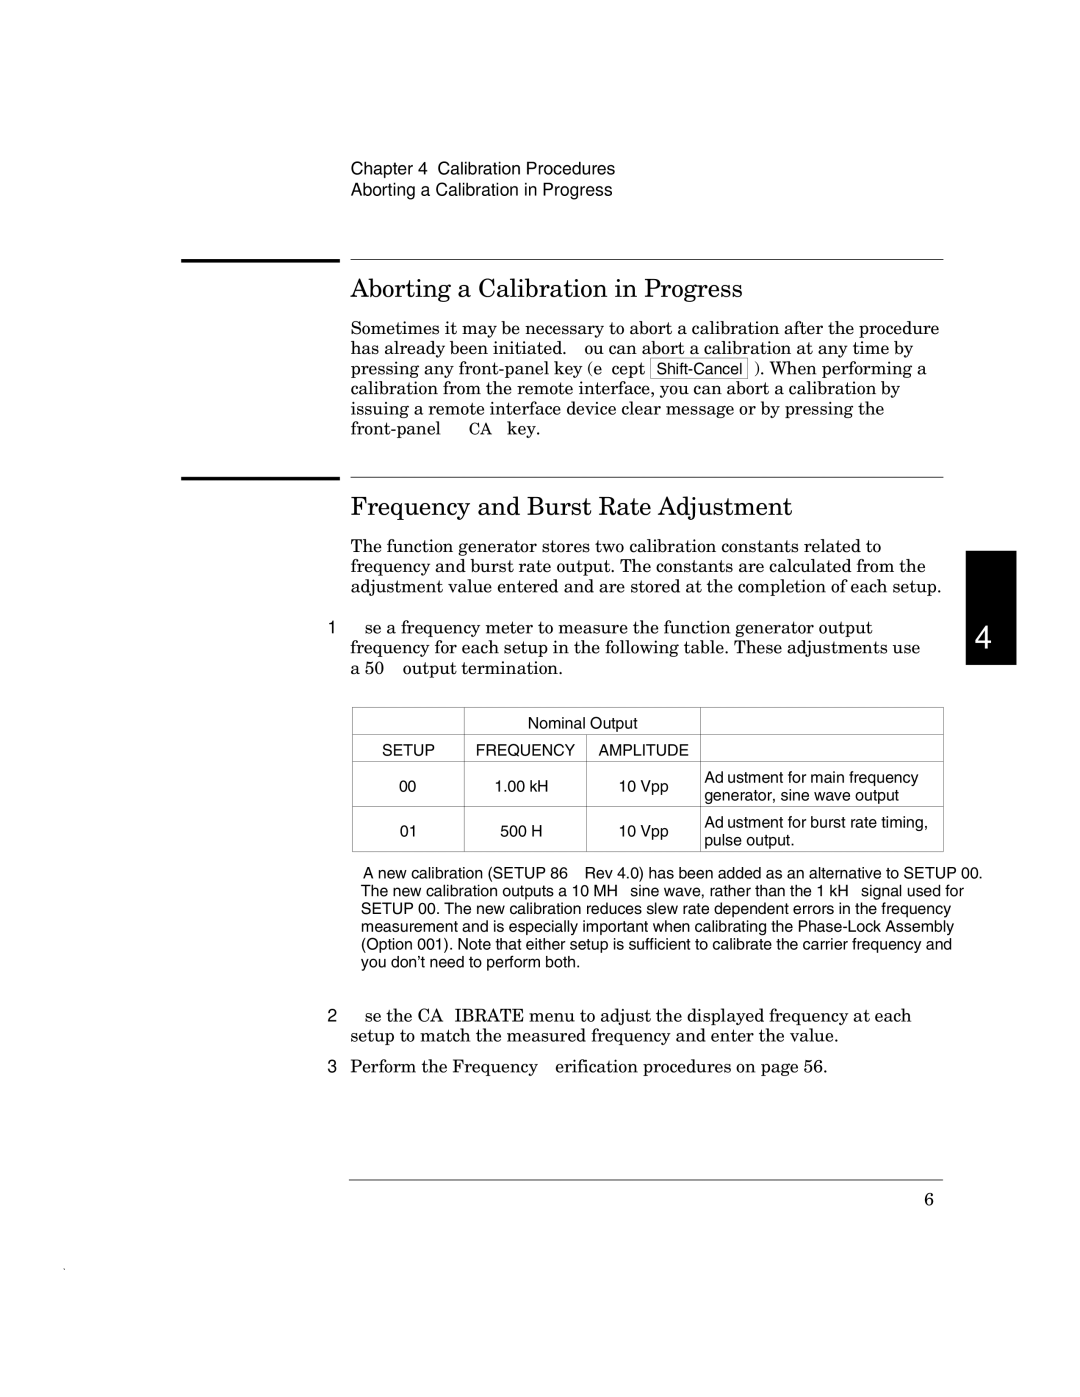
1 Use a frequency meter to measure the function generator output | 4 |
frequency for each setup in the following table. These adjustments use |
a 50W output termination.
| Nominal Output |
| ||
|
|
|
| |
SETUP | FREQUENCY | AMPLITUDE |
| |
|
|
|
| |
00 * | 1.00 kHz | 10 Vpp | Adjustment for main frequency | |
generator, sine wave output | ||||
|
|
| ||
01 | 500 Hz | 10 Vpp | Adjustment for burst rate timing, | |
pulse output. | ||||
|
|
| ||
|
|
|
| |
*A new calibration (SETUP 86 – Rev 4.0) has been added as an alternative to SETUP 00. The new calibration outputs a 10 MHz sine wave, rather than the 1 kHz signal used for SETUP 00. The new calibration reduces slew rate dependent errors in the frequency measurement and is especially important when calibrating the
2Use the CALIBRATE menu to adjust the displayed frequency at each setup to match the measured frequency and enter the value.
3Perform the Frequency Verification procedures on page 56.
69