User’s Guide
Apple Computer, Inc
Contents
Getting Help
Connecting Additional Equipment
Operating in the PC Environment
Troubleshooting in the PC Environment
Configuring the PC Environment
105
149
121
Environment
153
Communications regulation information
DOC statement
Your DOS-Compatible Macintosh Performa Computer
Your DOS-Compatible Macintosh Performa Computer
Monitor
Getting Started
Plugging in the computer
When you are ready to begin, follow these steps
Choose a power outlet to which you have easy access
Connecting a monitor
Installing an expansion card
Connecting the monitor power cord
On some monitors, the cord is already attached
Connecting the monitor cable
Connecting the mouse and keyboard
Computer
Turning the computer on
Connecting other equipment
Follow these steps to turn the computer on
Check to see what’s on your screen
Problems turning your computer on?
What’s next?
Learning the basics
Reviewing the basics
Guide h menu
Turning the computer off
To turn the computer off
Where to find answers
User’s Guidea
Getting Help
Getting answers to your questions
Getting answers with the Topics button
Small window appears with instructions for you to follow
Now continue with the next section
Getting answers with the Index button
Read and follow the instructions in the window
Getting answers with the Look For button
If you want to close Macintosh Guide, click here
Tips for using Macintosh Guide
Identifying objects on the screen
Learning useful shortcuts
Main Macintosh Shortcuts window appears
Chapter
Connecting Additional Equipment
Where to connect additional equipment
Power socket Security lock Port Apple Desktop
Connecting an Apple PlainTalk Microphone
Connecting external stereo speakers
Connecting a game controller
To connect a game controller, such as a joystick, do this
Expanding memory
Replacing internal storage devices
Macintosh Environment
Installing Macintosh application programs
Working with several programs at a time
Switching programs
Finding out which programs are open
Protecting the information on a disk
Making backup copies of your documents
Hiding and showing windows on the desktop
Restoring the information on your hard disk
Operating in the PC Environment
Switching between the Macintosh and PC environments
Turning the PC environment on and off
Switching with a keyboard command
Starting the PC environment automatically
Ejecting disks in the PC environment
Setting up the PC environment
Fading the screen
Memory management utilities
Floppy disk drives and floppy disks
Working in the PC environment
Restarting the PC from a floppy disk
If you preface these commands with REM, DOS ignores them
CONFIG.SYS file, type REM at the beginning of the line
CD-ROM discs and drives
Pointing device
Keyboard
MacShare
Windows Clipboard
Clipboards
DOS Clipboard
Changing the predefined keyboard commands in DOS
Cursor appears in the center of the screen
Chapter
Key Scan code F10 F11 F12
Tips for using the Clipboard
Running network software
Compatible and incompatible protocols
Using multimedia, MIDI, and game programs
Using Macintosh peripheral devices in the PC environment
Using printers
Chapter
Setting preferences in the PC Print Spooler
AppleShare Print Server
Dialog box appears
Using PC peripheral devices
TXDA+ GP1 RXD+
Configuring the PC Environment
Choosing settings
To choose settings, follow these steps
Configuring the PC serial ports
Setting the monitor
Setting the time and date
Setting shared memory
Changing the amount of conventional memory
Choosing shared folders or volumes
Using shared folders
Strange text characters in a document
Choosing a setting in the Sound pop-up menu
Turning on PC sounds
Configuring drives C and D
Managing PC files from the Mac OS
Drive container appears as a disk icon on the Mac OS desktop
Calculating the proper size
Changing the size of the drive container
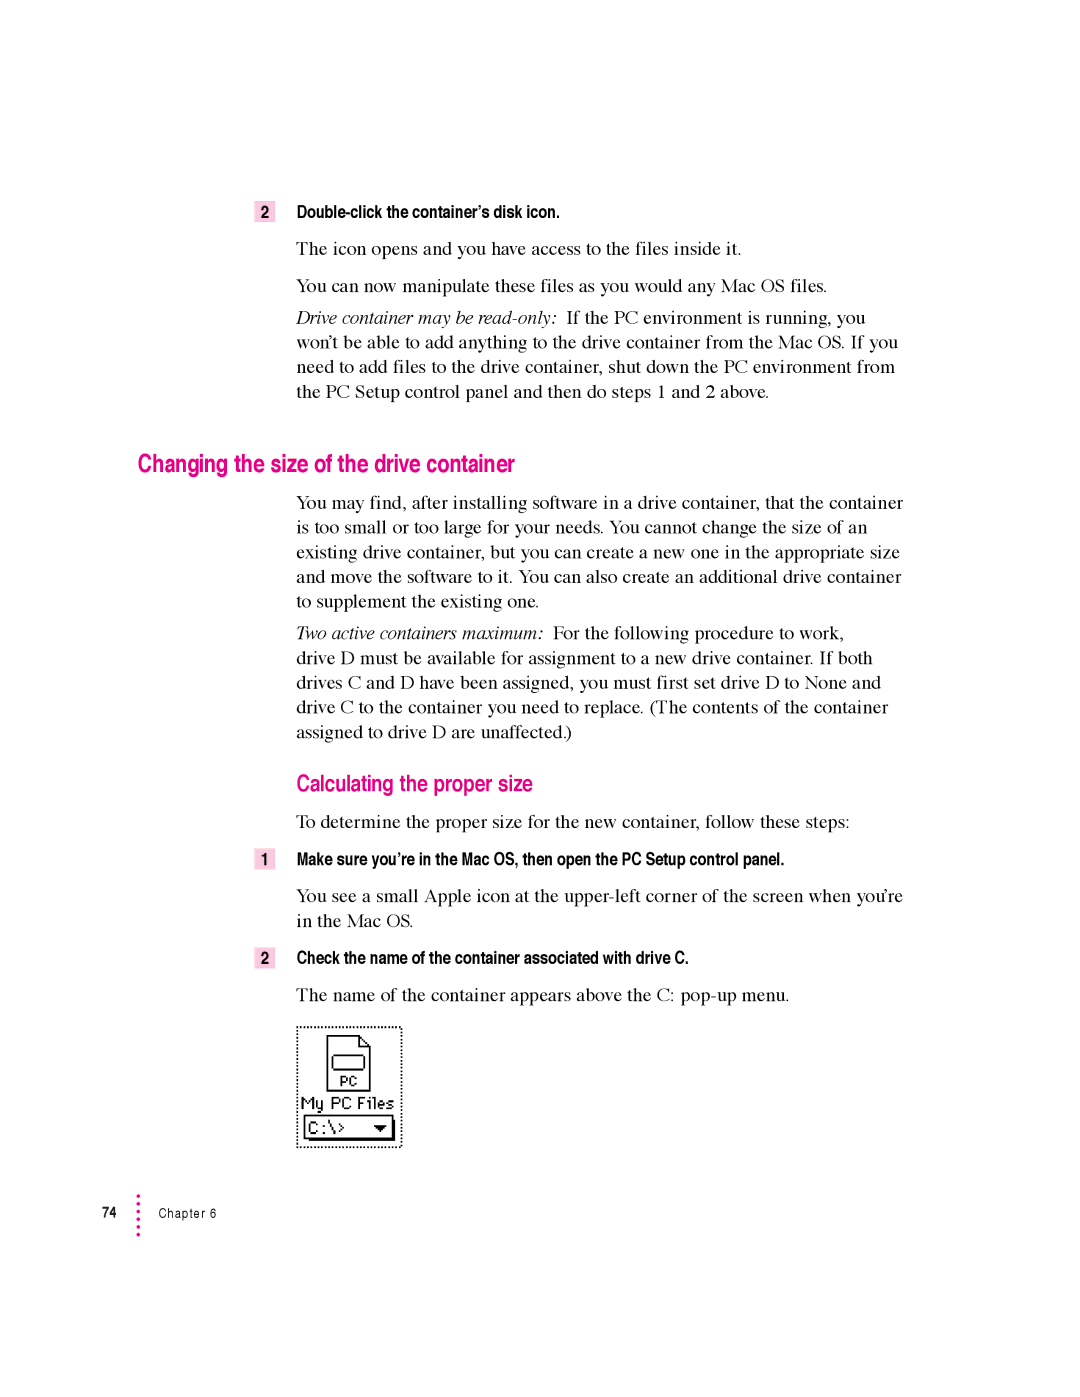
Name of the container appears above the C pop-up menu
Number you get is the current size you need for storage
Resulting sum is the size that the new container should be
Creating the new container
Moving the files
To move the files in the PC environment, follow these steps
Doing so deallocates drive D
Your new container is now associated with drive C
Understanding the status line
When you have questions
If you have trouble
Take your time
Start over
To restart your Macintosh, try the following steps
Rebuild your desktop regularly
Solutions to common problems
Computer’s clock keeps time inaccurately
Sad Macintosh icon appears and the computer won’t start up
Macintosh hangs or freezes during startup
Icons do not appear correctly on your screen
You see a message that you need to have an FPU installed
Dialog box with a bomb appears
Pointer 8 doesn’t move when you move the mouse
Typing on the keyboard produces nothing on the screen
Chapter
You experience problems using a DOS document
Chapter
Repairing a damaged disk
Try these suggestions first
Starting up from a CD-ROM disc
If you see a blinking question mark on your screen
Make sure the disc is lying flat in the tray
If you see the Macintosh desktop
Startup Disk control panel window appears
Problems starting up from the CD?
Startup Disk control panel appears
Checking for damage on your internal hard disk
See Starting Up From a CD-ROM Disc earlier in this section
How to repair a hard disk or floppy disk
If Disk First Aid cannot correct the problem
Initializing a hard disk
Installing or reinstalling Mac OS system software
When should you install or reinstall system software?
How to install or reinstall Mac OS system software
Troubleshooting in the PC Environment
Macintosh hangs or freezes during startup
There is a delay when you switch between environments
Press x-E
Press x-Return at any time to switch to the Mac OS
Press x-Y
PC Setup icon has a red slash through it at startup
Your monitor flashes oddly when you switch environments
Reinstalling the DOS-compatibility software
Software is automatically installed onto your hard disk
Reinstalling Mac OS software
This starts the Macintosh with extensions turned off
Creating a drive container
Choose a location for the drive container
Assigning RAM to the PC environment
Reinstalling PC software
Installing additional PC software
To install the additional software, follow these steps
Replacing the CONFIG.SYS and AUTOEXEC.BAT files
Modifying the CONFIG.SYS and AUTOEXEC.BAT files
DEVICE=C\DOS\EMM386.EXE Noems RAM=D000-EFFF
Bypassing the CONFIG.SYS and AUTOEXEC.BAT files at startup
Reinstalling Sound Blaster software
Reinstalling video drivers
To install Sound Blaster software, follow these steps
Appendix a Health, Safety, and Maintenance Tips
Health-related information about computer use
Musculoskeletal discomfort
Eye fatigue
Arranging your office
Shoulders relaxed
Avoiding fatigue
What about electromagnetic emissions?
Safety instructions
Handling your computer equipment
Handling the monitor
Handling the keyboard
Handling floppy disks
Ejecting a disk
Power supply
If you can’t eject a floppy disk
Cleaning the monitor
Cleaning your equipment
Cleaning the computer case
Cleaning the mouse
Rotate the rollers to clean all around them
Locking and unlocking the mouse
Recessed area on ring Recessed area surrounding ring
To unlock the mouse, follow these steps
135
Appendix B
137
You can also press the Power key on the keyboard
Opening the computer
139
Installing a communication card
Installing or replacing a Simm for the PC environment
Removing a Simm
Use your fingernails
Gently pull the Simm out of its slot
Installing a Simm
Handle the Simm by its edges. Avoid touching the connectors
Rotate the Simm back until it snaps into place
Closing the computer
If you removed security screws earlier, reinsert them now
Your computer is now ready to turn on and use
Appendix C Special Keys on Your Keyboard
Control key
Typing special characters and symbols
Special key combinations
Appendix D Installing Network Management Software
Installing NetWare client software
Change your Lastdrive statement so that it reads LASTDRIVE=Z
Press Y-Return
Eject the disk by pressing x-E Press Control-Alt-Delete
Conserving memory
During NetWare client installation, you add the line
Mapping drive letters
Installing Novell’s LAN Workplace for DOS TCP/IP software
Appendix D
Installing NetManage’s Chameleon TCP/IP software
To install Chameleon from Windows
Domain Name
Modify the NET.CFG file
Restarting Windows
Testing the installation
Using a dial-up service
You see the Chameleon group window
Installing Windows for Workgroups
Installing Spry’s Air Series TCP/IP software
Appendix D
Follow the instructions you see on the screen
To install Air Series from Windows
If you are using NETx, add the line
Comment out the line
An Open Telnet Session dialog box appears
To test the installation
You should now see the Air Series group window
You see a VT100 window with a log-in prompt
Installing Mosaic
Mosaic icon appears in the Win32 Applications group window
You are now ready to use Mosaic
Index
Index
Index
Index
DOS Compatibility Installer disk 112
Index
Sound Blaster Software Installation
Index
Index
Index
Index
Index
Index
Index
Index
Index
Index
Index
Y, Z
Apple Publishing System