Additional Procedures | Keycap Replacement - 4 | |
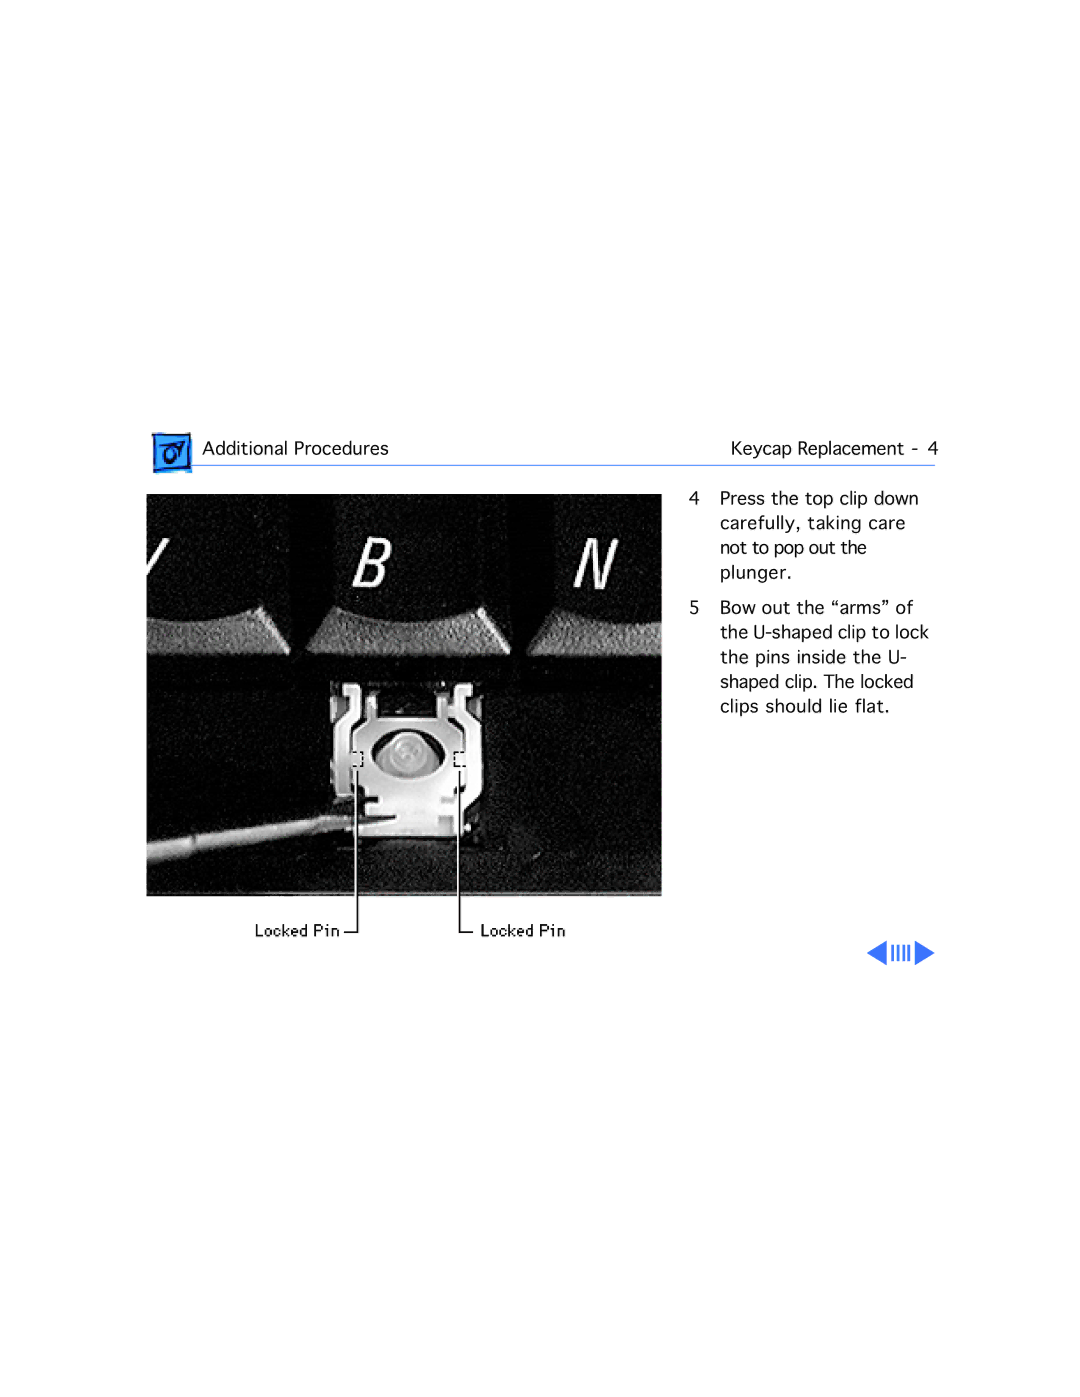
| 4 Press the top clip down |
|
| carefully, taking care | |
| not to pop out the | |
| plunger. | |
| 5 Bow out the “arms” of | |
| the | |
| the pins inside the U- | |
| shaped clip. The locked | |
| clips should lie flat. | |
Additional Procedures | Keycap Replacement - 4 | |
| 4 Press the top clip down |
|
| carefully, taking care | |
| not to pop out the | |
| plunger. | |
| 5 Bow out the “arms” of | |
| the | |
| the pins inside the U- | |
| shaped clip. The locked | |
| clips should lie flat. | |