Initial Setup
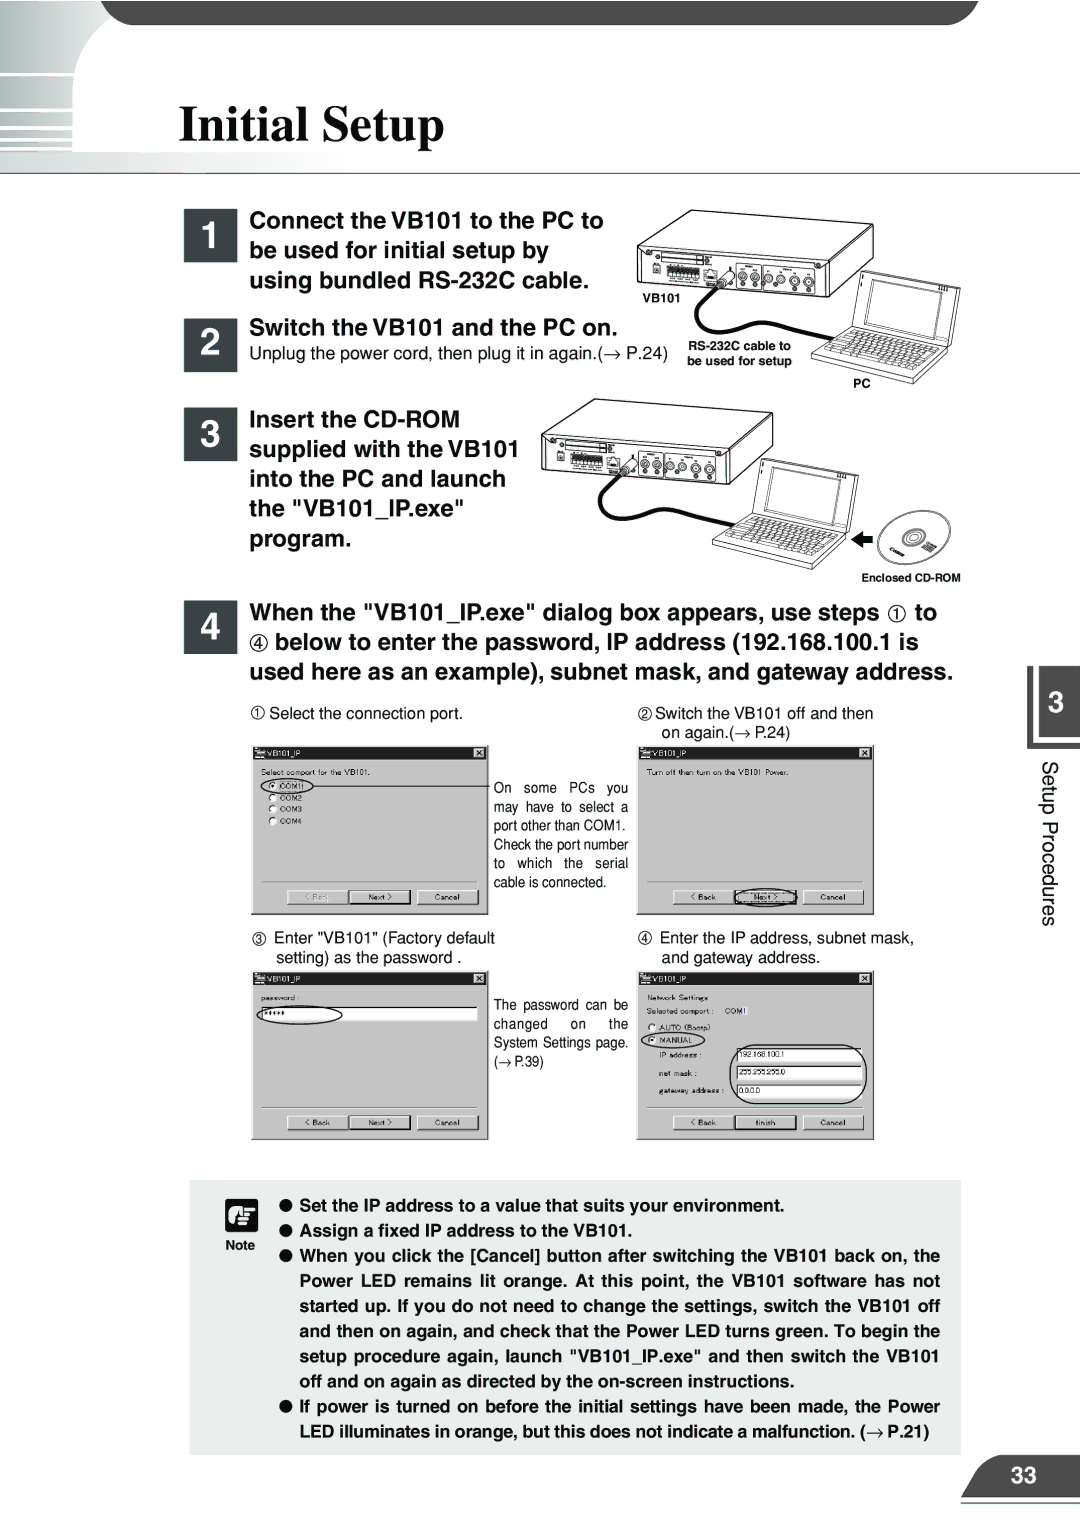
Connect the VB101 to the PC to
1 be used for initial setup by using bundled
| VB101 |
| |
| Switch the VB101 and the PC on. |
| |
2 | |||
Unplug the power cord, then plug it in again.(→ P.24) | |||
be used for setup | |||
|
| ||
|
|
|
PC
Insert the
3 supplied with the VB101 into the PC and launch the "VB101_IP.exe" program.
Enclosed
When the "VB101_IP.exe" dialog box appears, use steps to
4![]() below to enter the password, IP address (192.168.100.1 is used here as an example), subnet mask, and gateway address.
below to enter the password, IP address (192.168.100.1 is used here as an example), subnet mask, and gateway address.
1 Select the connection port. | 2 Switch the VB101 off and then |
| on again.(→ P.24) |
On some PCs you may have to select a port other than COM1. Check the port number to which the serial cable is connected.
3 Enter "VB101" (Factory default | 4 Enter the IP address, subnet mask, |
setting) as the password . | and gateway address. |
The password can be changed on the System Settings page. (→ P.39)
c | ● Set the IP address to a value that suits your environment. |
● Assign a fixed IP address to the VB101. | |
Note | ● When you click the [Cancel] button after switching the VB101 back on, the |
| |
| Power LED remains lit orange. At this point, the VB101 software has not |
| started up. If you do not need to change the settings, switch the VB101 off |
| and then on again, and check that the Power LED turns green. To begin the |
| setup procedure again, launch "VB101_IP.exe" and then switch the VB101 |
| off and on again as directed by the |
| ● If power is turned on before the initial settings have been made, the Power |
| LED illuminates in orange, but this does not indicate a malfunction. (→ P.21) |
|
|
3
Setup Procedures
33