Removing the Drive Panel
1. Follow the procedures in Before You Begin.
CAUTION: Your computer is heavy (it has an approximate minimum weight of 55 lbs) and can be difficult to maneuver. Seek assistance before attempting to lift, move, or tilt it; this computer requires a
CAUTION: The computer stand should be installed at all times to ensure maximum system stability. Failure to install the stand could result in the computer tipping over, potentially resulting in bodily injury or damage to the computer.
2.Remove the computer cover (see Removing the Computer Cover).
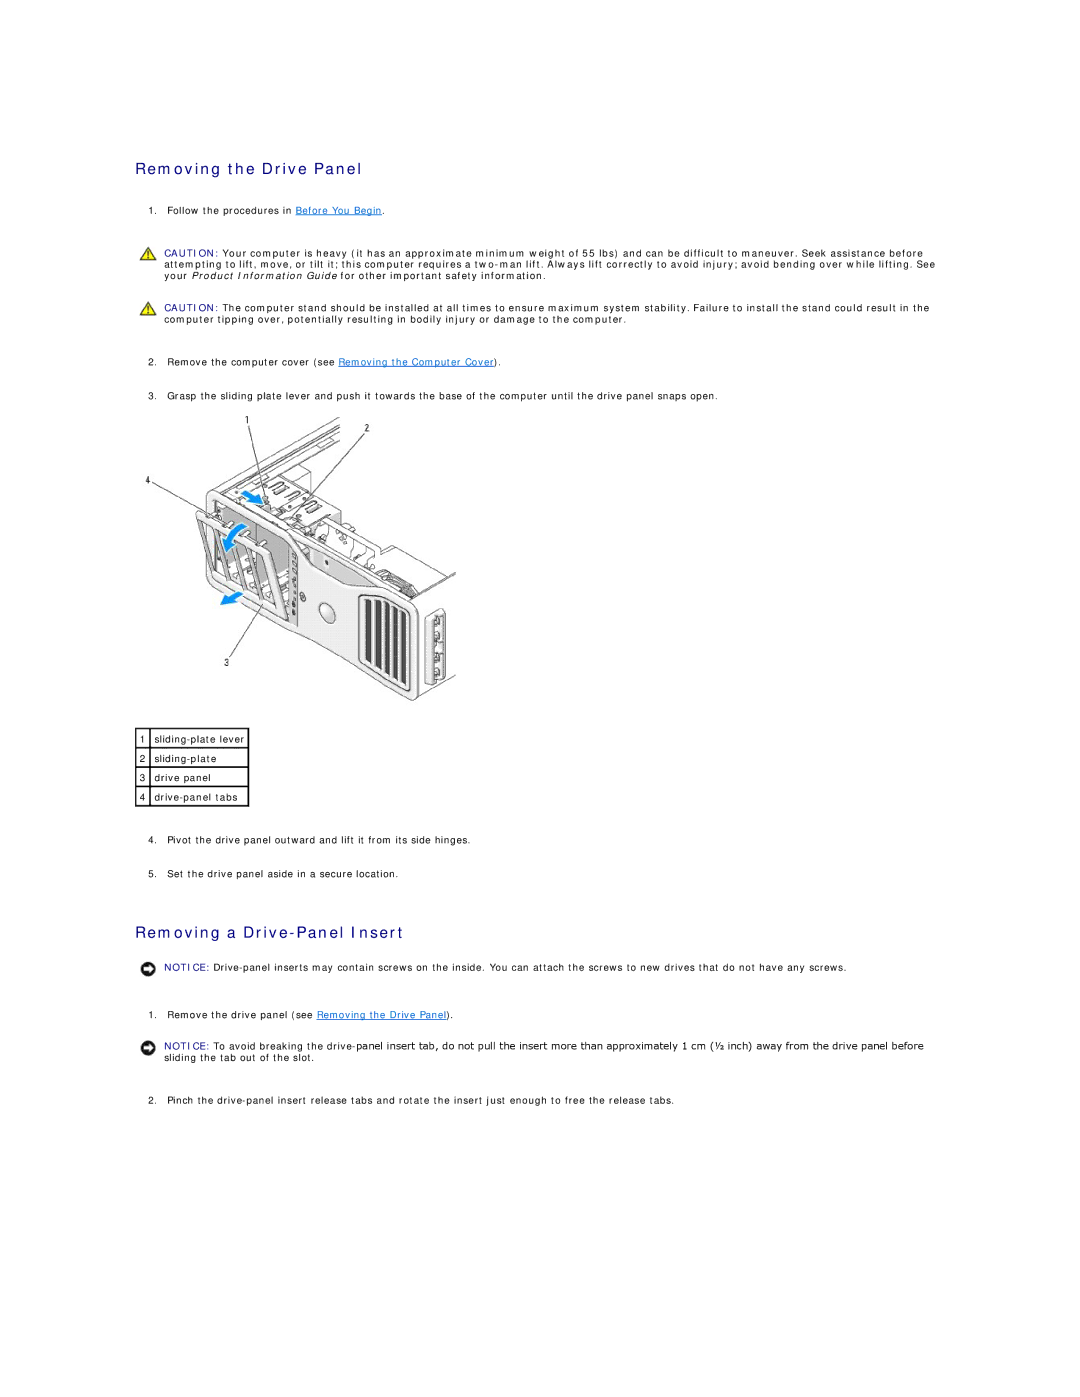
3.Grasp the sliding plate lever and push it towards the base of the computer until the drive panel snaps open.
1
2
3drive panel
4
4.Pivot the drive panel outward and lift it from its side hinges.
5.Set the drive panel aside in a secure location.
Removing a Drive-Panel Insert
NOTICE:
1. Remove the drive panel (see Removing the Drive Panel).
NOTICE: To avoid breaking the
2. Pinch the