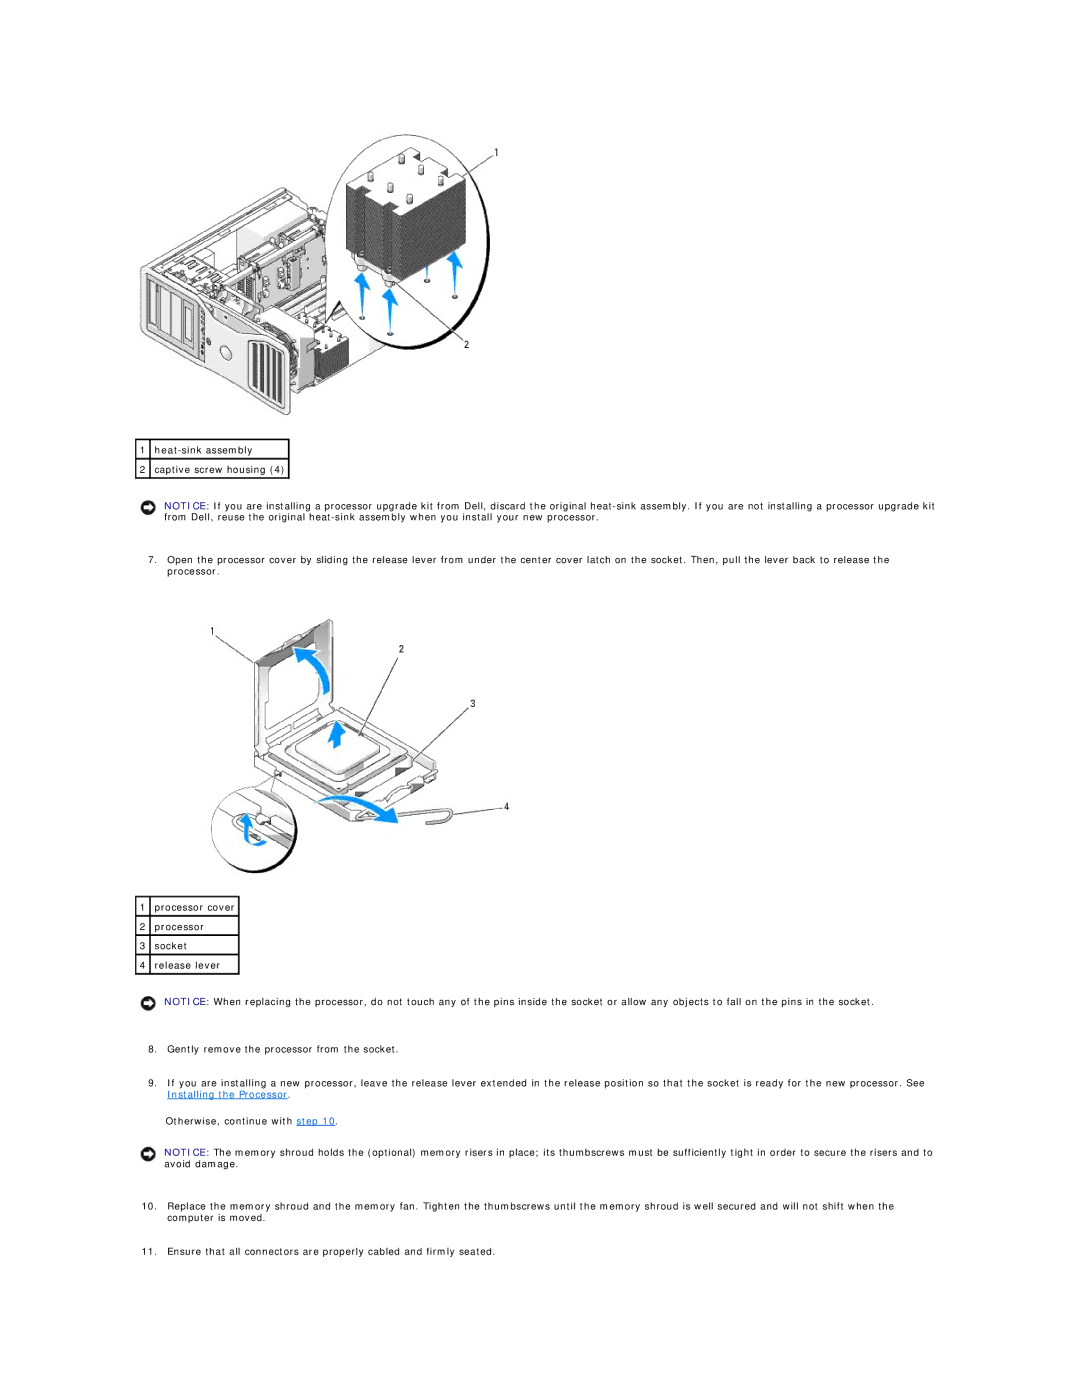
1
2captive screw housing (4)
NOTICE: If you are installing a processor upgrade kit from Dell, discard the original
7.Open the processor cover by sliding the release lever from under the center cover latch on the socket. Then, pull the lever back to release the processor.
1processor cover
2processor
3socket
4release lever
NOTICE: When replacing the processor, do not touch any of the pins inside the socket or allow any objects to fall on the pins in the socket.
8.Gently remove the processor from the socket.
9.If you are installing a new processor, leave the release lever extended in the release position so that the socket is ready for the new processor. See Installing the Processor.
Otherwise, continue with step 10.
NOTICE: The memory shroud holds the (optional) memory risers in place; its thumbscrews must be sufficiently tight in order to secure the risers and to avoid damage.
10.Replace the memory shroud and the memory fan. Tighten the thumbscrews until the memory shroud is well secured and will not shift when the computer is moved.
11.Ensure that all connectors are properly cabled and firmly seated.