Installing the FastIron GS Chassis
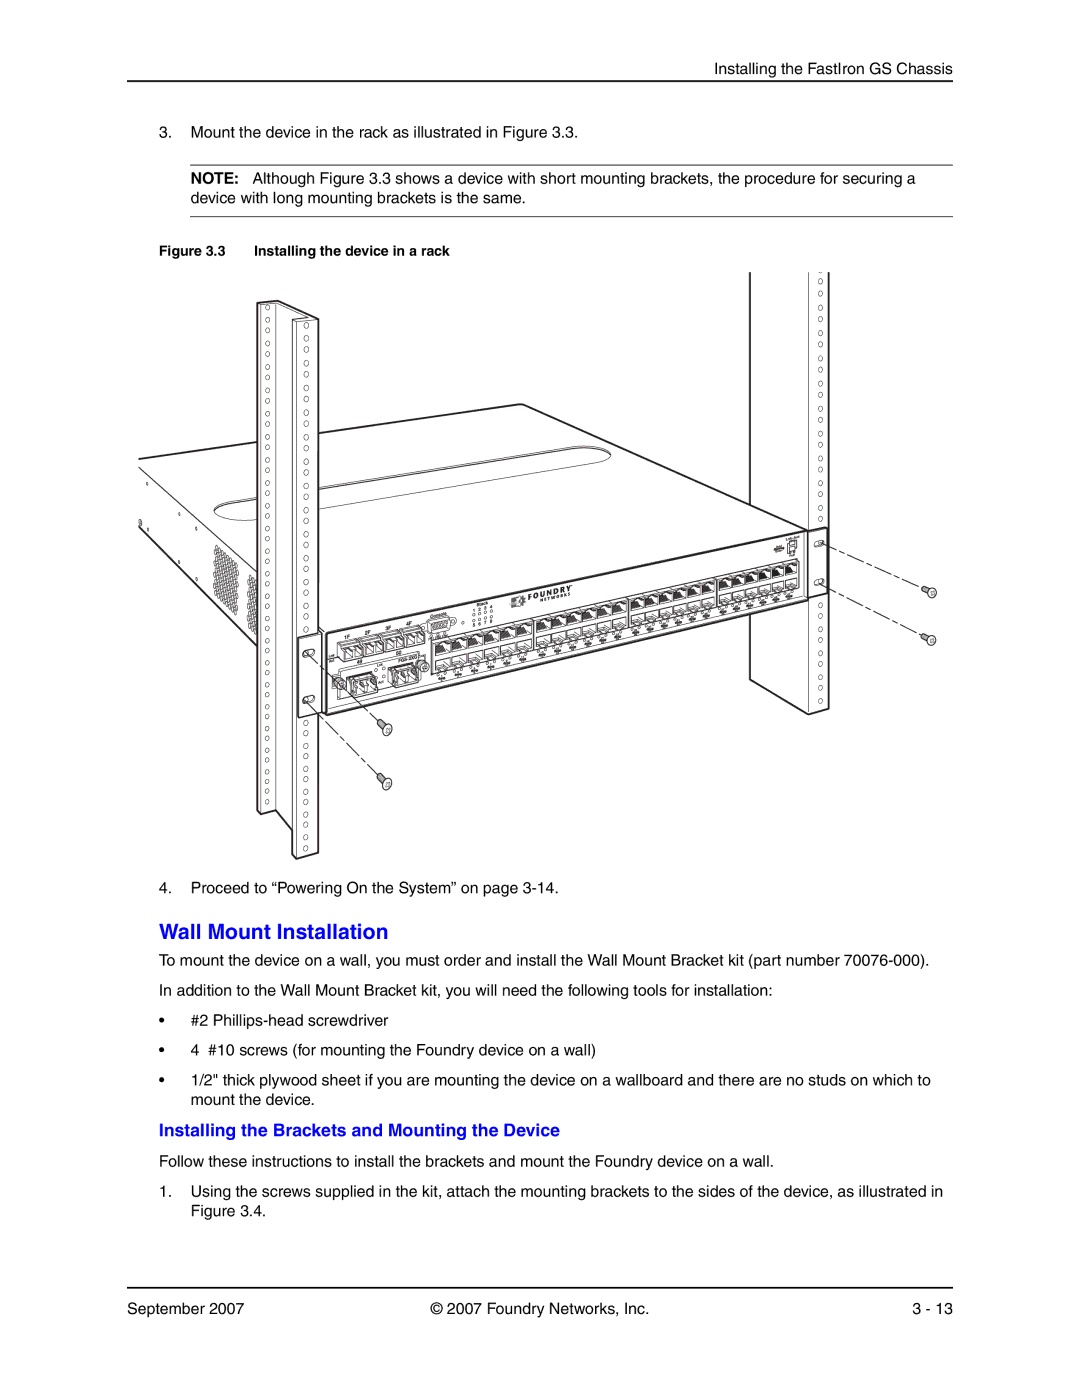
3.Mount the device in the rack as illustrated in Figure 3.3.
NOTE: Although Figure 3.3 shows a device with short mounting brackets, the procedure for securing a device with long mounting brackets is the same.
Figure 3.3 Installing the device in a rack
4.Proceed to “Powering On the System” on page
Wall Mount Installation
To mount the device on a wall, you must order and install the Wall Mount Bracket kit (part number
•#2
•4 #10 screws (for mounting the Foundry device on a wall)
•1/2" thick plywood sheet if you are mounting the device on a wallboard and there are no studs on which to mount the device.
Installing the Brackets and Mounting the Device
Follow these instructions to install the brackets and mount the Foundry device on a wall.
1.Using the screws supplied in the kit, attach the mounting brackets to the sides of the device, as illustrated in Figure 3.4.
September 2007 | © 2007 Foundry Networks, Inc. | 3 - 13 |