Installing the FastIron GS Chassis
After you complete the physical installation of the system, you can power on the system.
1.Ensure that all power supplies are fully and properly inserted and no power supply slots are uncovered.
CAUTION: Never leave tools inside the device.
2.For DC supplies, connect the power source to the wires to activate the circuit.
3.For AC supplies:
•Remove the power cord from the shipping package.
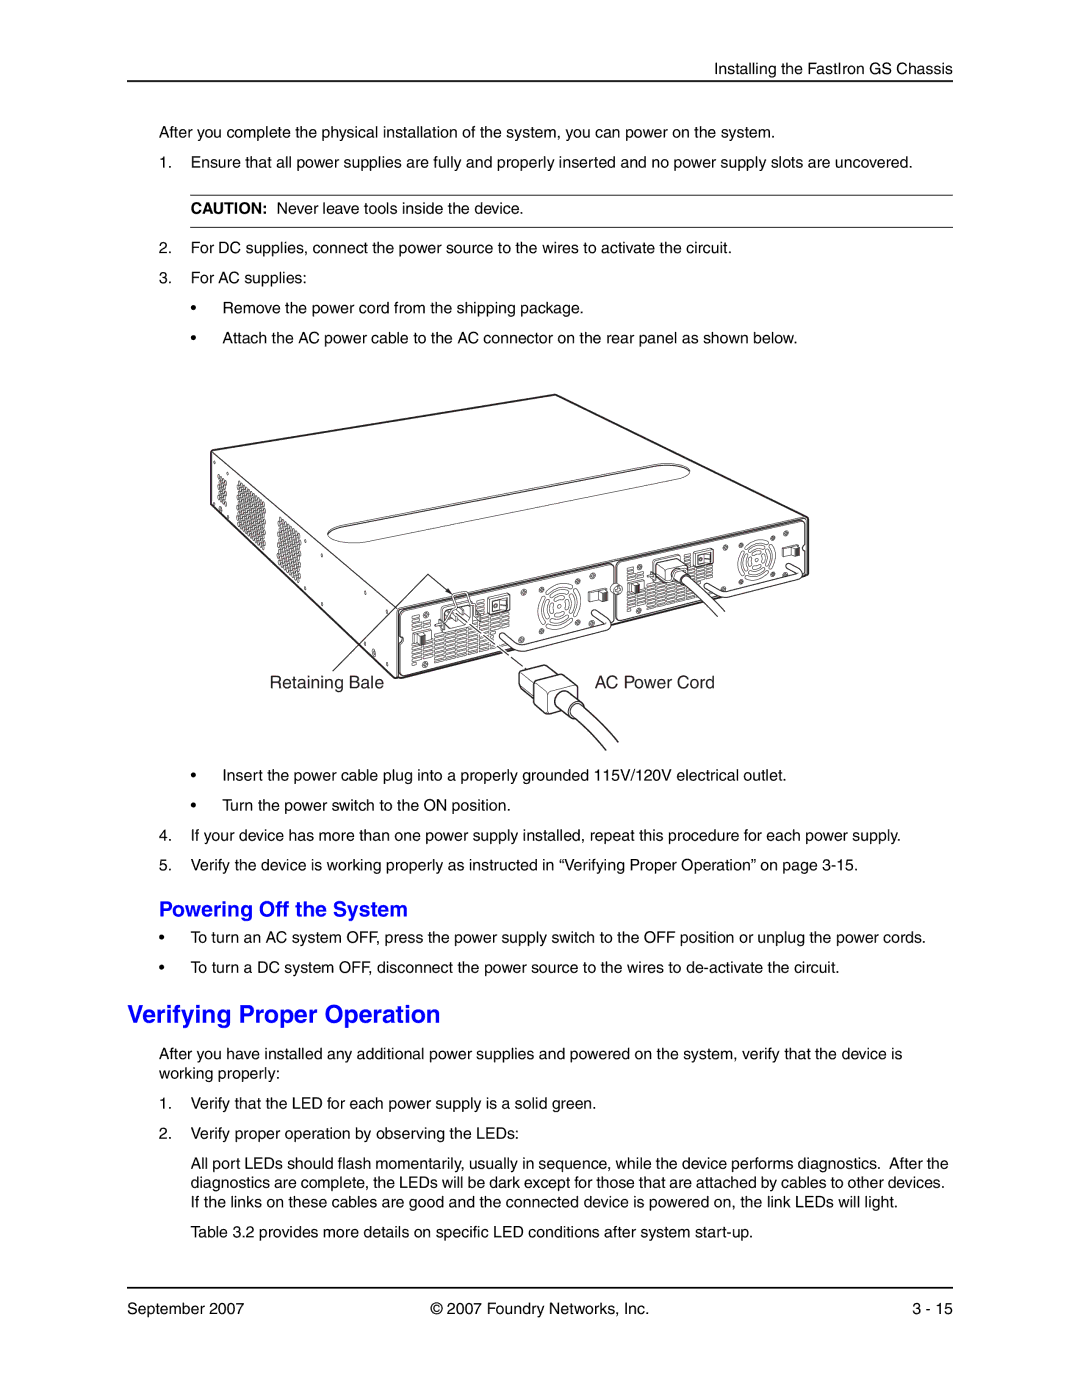
•Attach the AC power cable to the AC connector on the rear panel as shown below.
Retaining Bale | AC Power Cord |
•Insert the power cable plug into a properly grounded 115V/120V electrical outlet.
•Turn the power switch to the ON position.
4.If your device has more than one power supply installed, repeat this procedure for each power supply.
5.Verify the device is working properly as instructed in “Verifying Proper Operation” on page
Powering Off the System
•To turn an AC system OFF, press the power supply switch to the OFF position or unplug the power cords.
•To turn a DC system OFF, disconnect the power source to the wires to
Verifying Proper Operation
After you have installed any additional power supplies and powered on the system, verify that the device is working properly:
1.Verify that the LED for each power supply is a solid green.
2.Verify proper operation by observing the LEDs:
All port LEDs should flash momentarily, usually in sequence, while the device performs diagnostics. After the diagnostics are complete, the LEDs will be dark except for those that are attached by cables to other devices. If the links on these cables are good and the connected device is powered on, the link LEDs will light.
Table 3.2 provides more details on specific LED conditions after system
September 2007 | © 2007 Foundry Networks, Inc. | 3 - 15 |