Configuration
Note | Temperature and S.M.A.R.T. information will be available only |
| for IDE hard disk drives supporting the SMART |
| Analysis and Reporting Technology) monitoring program. |
|
|
7.Selecting Close and pressing ![]()
![]() exits the screen.
exits the screen.
User Setup Screen
1.Highlight User in the System menu and press ![]()
![]() . The User setup screen
. The User setup screen
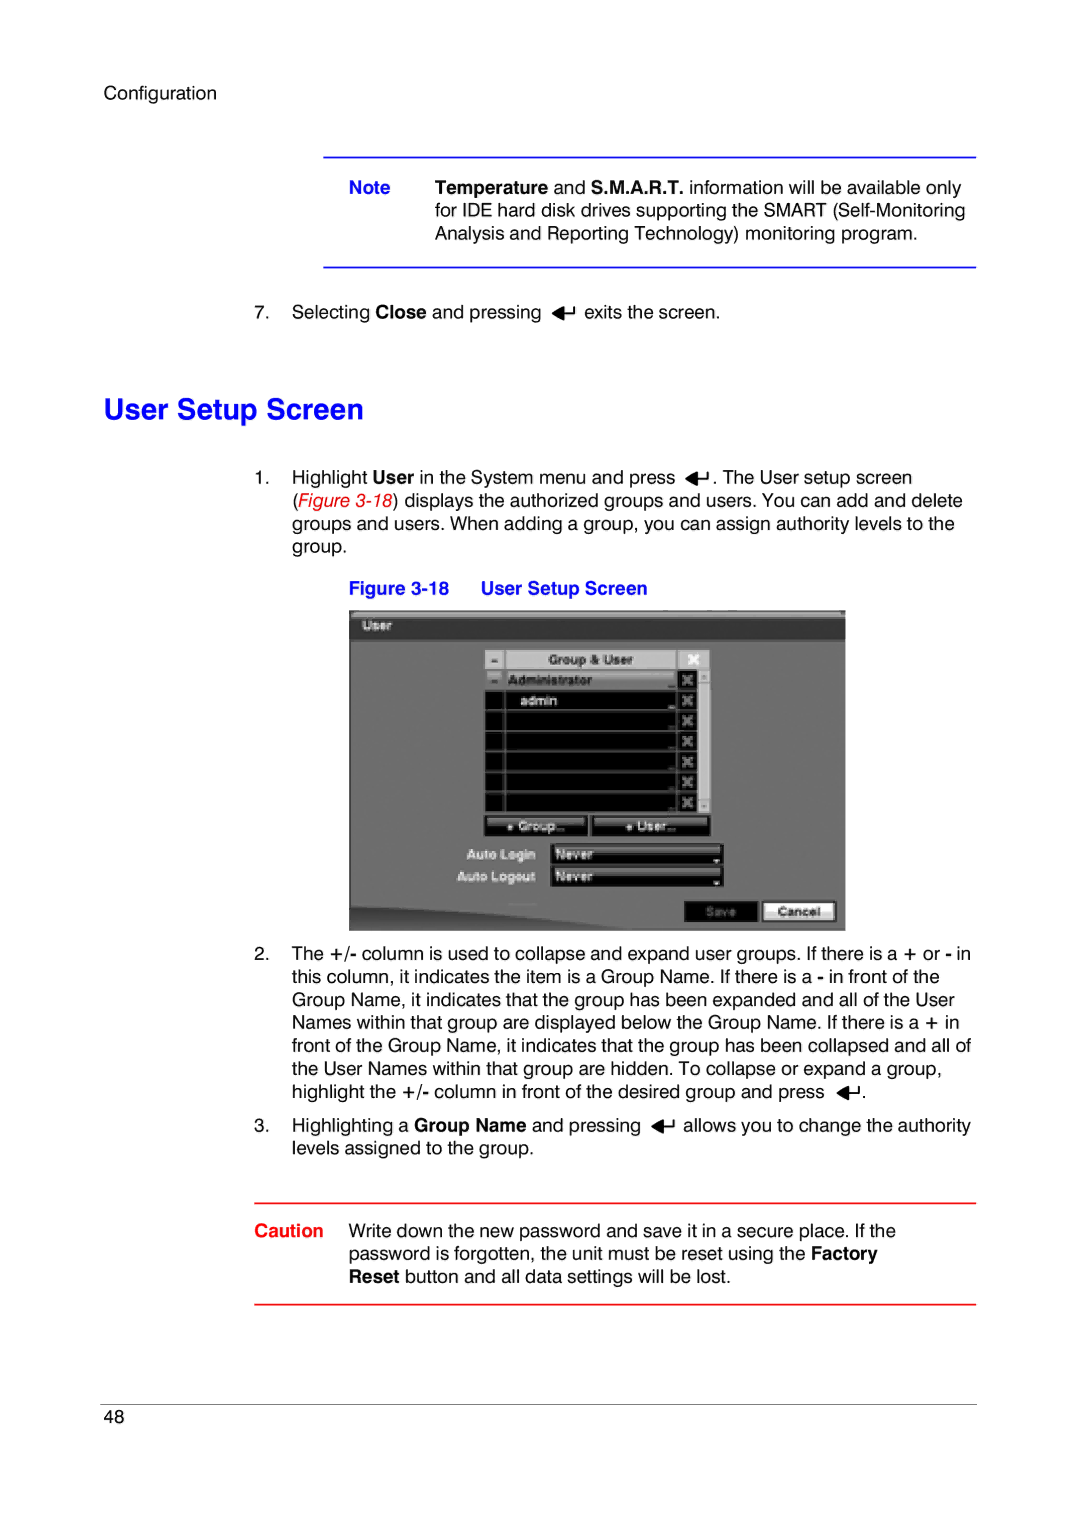
(Figure 3-18) displays the authorized groups and users. You can add and delete groups and users. When adding a group, you can assign authority levels to the group.
Figure 3-18 User Setup Screen
2.The +/- column is used to collapse and expand user groups. If there is a + or - in this column, it indicates the item is a Group Name. If there is a - in front of the Group Name, it indicates that the group has been expanded and all of the User Names within that group are displayed below the Group Name. If there is a + in front of the Group Name, it indicates that the group has been collapsed and all of the User Names within that group are hidden. To collapse or expand a group, highlight the +/- column in front of the desired group and press ![]()
![]() .
.
3.Highlighting a Group Name and pressing ![]()
![]() allows you to change the authority levels assigned to the group.
allows you to change the authority levels assigned to the group.
Caution Write down the new password and save it in a secure place. If the password is forgotten, the unit must be reset using the Factory Reset button and all data settings will be lost.
48