MENU SCREENS
Setting Menu Screens
Make the settings while observing the LCD monitor or the viewfinder screen.
If the ANALOG OUT CHAR. item on the OTHERS[1/2] screen is set to ON, the menu screen can also be viewed on a monitor connected to the video signal output connector.
1.Set the POWER switch to ON.
2.Set the mode of this device with the CAM/VTR button. (Camera mode or VTR mode)
3.Press the STATUS button for 1 second or longer.
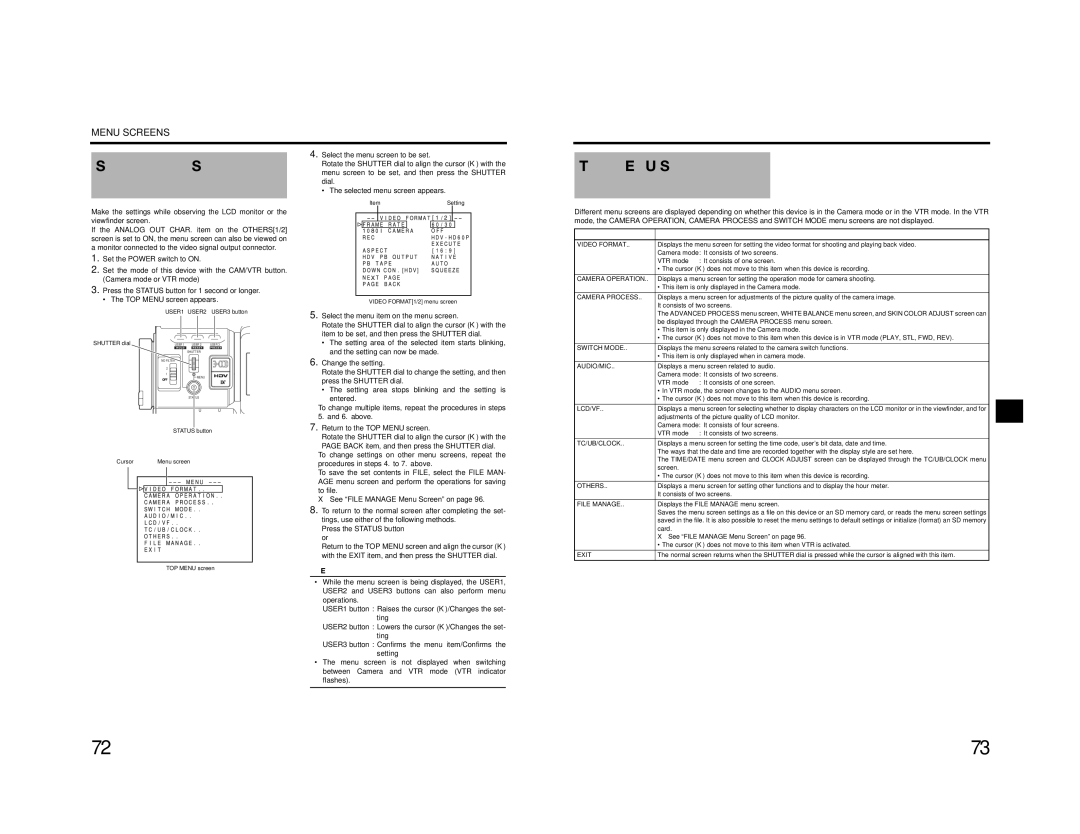
• The TOP MENU screen appears.
USER1 USER2 USER3 button
SHUTTER dial | USER 1 USER 2 USER 3 |
SHUTTER
ND FILTER
2
1
MENU
STATUS
STATUS button
Cursor | Menu screen |
TOP MENU screen
4.Select the menu screen to be set.
Rotate the SHUTTER dial to align the cursor (K) with the menu screen to be set, and then press the SHUTTER dial.
• The selected menu screen appears.
Item | Setting |
VIDEO FORMAT[1/2] menu screen
5.Select the menu item on the menu screen.
Rotate the SHUTTER dial to align the cursor (K) with the item to be set, and then press the SHUTTER dial.
•The setting area of the selected item starts blinking, and the setting can now be made.
6.Change the setting.
Rotate the SHUTTER dial to change the setting, and then press the SHUTTER dial.
•The setting area stops blinking and the setting is entered.
To change multiple items, repeat the procedures in steps 5. and 6. above.
7.Return to the TOP MENU screen.
Rotate the SHUTTER dial to align the cursor (K) with the
PAGE BACK item, and then press the SHUTTER dial.
To change settings on other menu screens, repeat the procedures in steps 4. to 7. above.
To save the set contents in FILE, select the FILE MAN- AGE menu screen and perform the operations for saving to file.
X See “FILE MANAGE Menu Screen” on page 96.
8.To return to the normal screen after completing the set- tings, use either of the following methods.
Press the STATUS button or
Return to the TOP MENU screen and align the cursor (K) with the EXIT item, and then press the SHUTTER dial.
MEMO
TOP MENU Screen
Different menu screens are displayed depending on whether this device is in the Camera mode or in the VTR mode. In the VTR mode, the CAMERA OPERATION, CAMERA PROCESS and SWITCH MODE menu screens are not displayed.
Item |
| Function |
VIDEO FORMAT.. | Displays the menu screen for setting the video format for shooting and playing back video. | |
| Camera mode: It consists of two screens. | |
| VTR mode | : It consists of one screen. |
| • The cursor (K) does not move to this item when this device is recording. | |
CAMERA OPERATION.. | Displays a menu screen for setting the operation mode for camera shooting. | |
| • This item is only displayed in the Camera mode. | |
CAMERA PROCESS.. | Displays a menu screen for adjustments of the picture quality of the camera image. | |
| It consists of two screens. | |
| The ADVANCED PROCESS menu screen, WHITE BALANCE menu screen, and SKIN COLOR ADJUST screen can | |
| be displayed through the CAMERA PROCESS menu screen. | |
| • This item is only displayed in the Camera mode. | |
| • The cursor (K) does not move to this item when this device is in VTR mode (PLAY, STL, FWD, REV). | |
SWITCH MODE.. | Displays the menu screens related to the camera switch functions. | |
| • This item is only displayed when in camera mode. | |
AUDIO/MIC.. | Displays a menu screen related to audio. | |
| Camera mode: It consists of two screens. | |
| VTR mode | : It consists of one screen. |
| • In VTR mode, the screen changes to the AUDIO menu screen. | |
| • The cursor (K) does not move to this item when this device is recording. | |
LCD/VF.. | Displays a menu screen for selecting whether to display characters on the LCD monitor or in the viewfinder, and for | |
| adjustments of the picture quality of LCD monitor. | |
| Camera mode: It consists of four screens. | |
| VTR mode | : It consists of two screens. |
TC/UB/CLOCK.. | Displays a menu screen for setting the time code, user’s bit data, date and time. | |
| The ways that the date and time are recorded together with the display style are set here. | |
| The TIME/DATE menu screen and CLOCK ADJUST screen can be displayed through the TC/UB/CLOCK menu | |
| screen. |
|
| • The cursor (K) does not move to this item when this device is recording. | |
OTHERS.. | Displays a menu screen for setting other functions and to display the hour meter. | |
| It consists of two screens. | |
FILE MANAGE.. | Displays the FILE MANAGE menu screen. | |
| Saves the menu screen settings as a file on this device or an SD memory card, or reads the menu screen settings | |
| saved in the file. It is also possible to reset the menu settings to default settings or initialize (format) an SD memory | |
| card. |
|
| X See “FILE MANAGE Menu Screen” on page 96. | |
| • The cursor (K) does not move to this item when VTR is activated. | |
EXIT | The normal screen returns when the SHUTTER dial is pressed while the cursor is aligned with this item. | |
•While the menu screen is being displayed, the USER1, USER2 and USER3 buttons can also perform menu operations.
USER1 button : Raises the cursor (K)/Changes the set- ting
USER2 button : Lowers the cursor (K)/Changes the set- ting
USER3 button : Confirms the menu item/Confirms the setting
•The menu screen is not displayed when switching between Camera and VTR mode (VTR indicator flashes).
72 | 73 |