USING EXTERNAL COMPONENTS
Dubbing with AV Devices
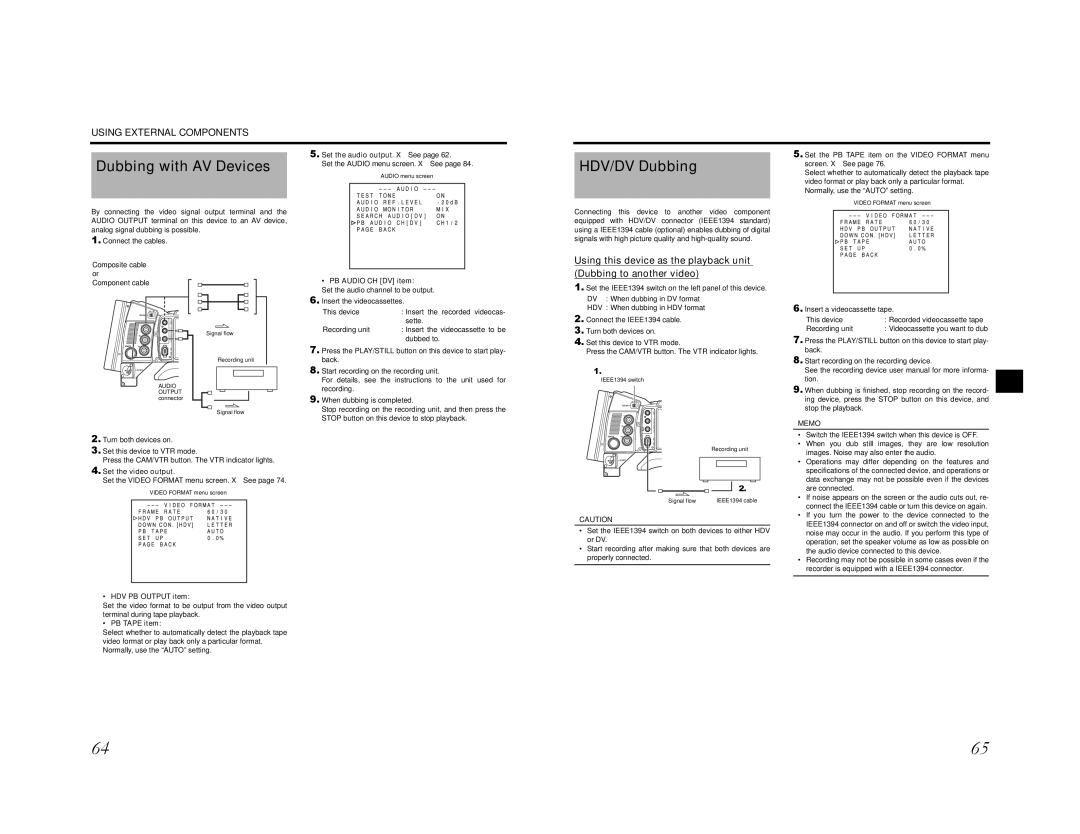
By connecting the video signal output terminal and the AUDIO OUTPUT terminal on this device to an AV device, analog signal dubbing is possible.
5.Set the audio output. X See page 62.
Set the AUDIO menu screen. X See page 84.
AUDIO menu screen
HDV/DV Dubbing
Connecting this device to another video component equipped with HDV/DV connector (IEEE1394 standard) using a IEEE1394 cable (optional) enables dubbing of digital
5.Set the PB TAPE item on the VIDEO FORMAT menu screen. X See page 76.
Select whether to automatically detect the playback tape video format or play back only a particular format. Normally, use the “AUTO” setting.
VIDEO FORMAT menu screen
1.Connect the cables.
Composite cable or Component cable
![]()
![]()
![]()
![]()
![]()
![]()
![]()
![]() IEEE 1394
IEEE 1394 ![]()
![]()
![]()
AUDIO
OUTPUT connector
Signal flow
Recording unit
Signal flow
• PB AUDIO CH [DV] item:
Set the audio channel to be output.
6.Insert the videocassettes.
This device | : Insert the recorded videocas- |
| sette. |
Recording unit | : Insert the videocassette to be |
| dubbed to. |
7. Press the PLAY/STILL button on this device to start play- |
back. |
8. Start recording on the recording unit. |
For details, see the instructions to the unit used for |
recording. |
9. When dubbing is completed. |
Stop recording on the recording unit, and then press the |
signals with high picture quality and
Using this device as the playback unit (Dubbing to another video)
1.Set the IEEE1394 switch on the left panel of this device.
DV : When dubbing in DV format
HDV : When dubbing in HDV format
2.Connect the IEEE1394 cable.
3.Turn both devices on.
4.Set this device to VTR mode.
Press the CAM/VTR button. The VTR indicator lights.
1.
IEEE1394 switch
VIDEO
6.Insert a videocassette tape.
This device | : Recorded videocassette tape |
Recording unit | : Videocassette you want to dub |
7.Press the PLAY/STILL button on this device to start play- back.
8.Start recording on the recording device.
See the recording device user manual for more informa- tion.
9.When dubbing is finished, stop recording on the record- ing device, press the STOP button on this device, and stop the playback.
2.Turn both devices on.
3.Set this device to VTR mode.
Press the CAM/VTR button. The VTR indicator lights.
4.Set the video output.
Set the VIDEO FORMAT menu screen. X See page 74.
VIDEO FORMAT menu screen
• HDV PB OUTPUT item:
Set the video format to be output from the video output terminal during tape playback.
• PB TAPE item:
Select whether to automatically detect the playback tape video format or play back only a particular format. Normally, use the “AUTO” setting.
STOP button on this device to stop playback. |
1394IEEE
Recording unit
|
|
|
|
|
|
|
|
|
|
|
|
|
|
|
|
|
|
|
|
|
|
|
|
|
|
|
|
|
|
|
|
|
| 2. |
|
|
| |
|
|
|
|
|
|
|
|
|
| |||
Signal flow |
|
|
|
| IEEE1394 cable | |||||||
CAUTION
•Set the IEEE1394 switch on both devices to either HDV or DV.
•Start recording after making sure that both devices are properly connected.
MEMO
•Switch the IEEE1394 switch when this device is OFF.
•When you dub still images, they are low resolution images. Noise may also enter the audio.
•Operations may differ depending on the features and specifications of the connected device, and operations or data exchange may not be possible even if the devices are connected.
•If noise appears on the screen or the audio cuts out, re- connect the IEEE1394 cable or turn this device on again.
•If you turn the power to the device connected to the IEEE1394 connector on and off or switch the video input, noise may occur in the audio. If you perform this type of operation, set the speaker volume as low as possible on the audio device connected to this device.
•Recording may not be possible in some cases even if the recorder is equipped with a IEEE1394 connector.
64 | 65 |
