PREPARATIONS FOR OPERATION
SETTING AND ADJUSTMENTS BEFORE SHOOTING
White Shading Adjustment
It is necessary to perform this adjustment to the camera when attaching a lens that is different from the previously attached lens.
Setting in the WHITE BALANCE screen is performed as fol- lows.
Selecting an item
Turn the SHUTTER dial to align the cursor (j) with the desired item, and press the SHUTTER dial.
• The item is selected and the setting value blinks. |
Changing the setting value |
Turn the SHUTTER dial to change the blinking value. When |
the SHUTTER dial is pressed, the value stops blinking and |
Setting the Video Format
Set the video format using the FRAME RATE item and the REC item on the VIDEO FORMAT menu screen.
4.Turn the SHUTTER dial, change the setting and push the SHUTTER dial.
•The setting stops flashing and is temporarily set.
•Move the cursor (K) to the EXECUTE item and EXE- CUTE flashes.
5.Push the SHUTTER dial.
•“REBOOT! SYSTEM CHANGE” is displayed on the screen and after a few seconds the system is reboo- ted.
Even if white balance is achieved in the middle of the screen, it may not be achieved at the top and bottom of the screen. Greens and magentas may be colored. This is due to char- acteristics of the lens. Correcting this phenomenon is called White Shading Adjustment.
Perform this after adjusting white balance.
White shading adjustment is performed on the WHITE BAL- ANCE menu screen.
Adjustment procedure
1.White balance the camera.
2.Set the camera’s lens controls as follows:
a.Set the IRIS opening to F4 or higher number.
b.In the case of a zoom lens set the ZOOM at the center of its range.
3.Shoot a uniformly lit white sheet of paper and fill the mon- itor screen with it.
4.Set the monitor CHROMA level to maximum.
5.Check the color of the monitor screen. If the top and the bottom of the monitor screen are white then no adjust- ment is necessary. If the top of the monitor screen is greenish and the bottom is reddish or if the top is reddish and the bottom is greenish then continue with this adjust- ment.
6.Adjust the LEVEL G in the SHADING menu item to mini- mize the color difference between the top and bottom of the screen.
7.It is recommended that only LEVEL G be adjusted.
1Display the WHITE BALANCE menu screen.
Follow the steps in “Setting Menu Screens” on page 72 and proceed as follows.
MENUrCAMERA PROCESS[1/2]rCAMERA PRO- CESS[2/2]rADVANCE PROCESSrWHITE BALANCE
the setting is changed. |
2Perform the above steps to set SHADING to MANUAL.
3Select LEVEL R, LEVEL G, LEVEL B and press the SHUTTER dial.
•The setting value for the selected LEVEL blinks and becomes available for changing.
4Change the setting values for LEVEL R, LEVEL G, and LEVEL B with the SHUTTER dial while referring to the monitor.
When setting values are increased, colors at the bottom of the screen are suppressed and the top is enhanced. LEVEL R: Adjusts reds.
LEVEL G: Adjusts greens.
LEVEL B: Adjusts blues.
<Range:
5Press the SHUTTER dial after changing the setting val- ues to save in the memory.
6Press the STATUS button to return to the normal screen.
8.When white shading adjustment is completed, adjust white balance again.
X See “White Balance Adjustment” on page 51.
CAUTION
•If the lens setup is incorrect, the white shading adjust- ment might result in over compensation. When perform- ing this adjustment, set the lens to the recommended settings. Do not open the lens IRIS beyond F4; do not set a telephoto lens to its extreme wide position or tele- photo position.
•White shading occurs due to the optical characteristics of the mounted lens, it is not a camera malfunction.
Setting the FRAME RATE Item
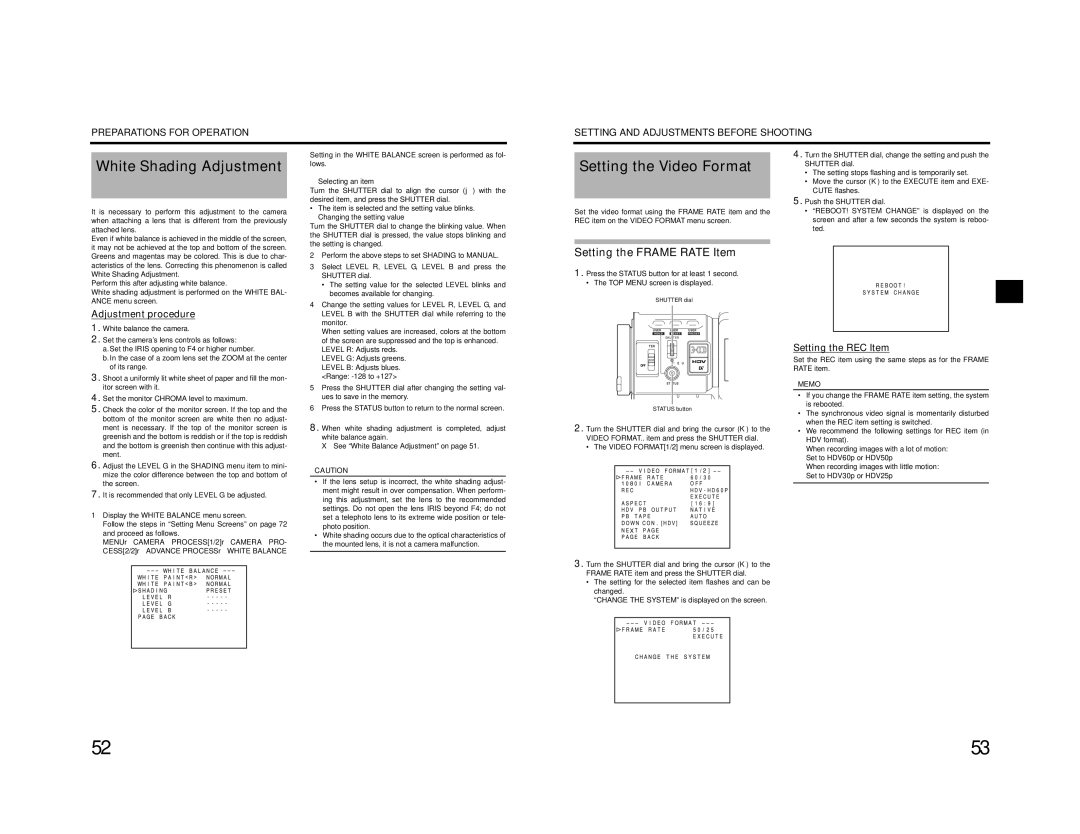
1.Press the STATUS button for at least 1 second.
• The TOP MENU screen is displayed.
SHUTTER dial
USER 1 | USER 2 | USER 3 |
SHUTTER
ND FILTER
2
1
MENU
STATUS
STATUS button
2.Turn the SHUTTER dial and bring the cursor (K) to the VIDEO FORMAT.. item and press the SHUTTER dial.
• The VIDEO FORMAT[1/2] menu screen is displayed.
3.Turn the SHUTTER dial and bring the cursor (K) to the FRAME RATE item and press the SHUTTER dial.
•The setting for the selected item flashes and can be changed.
“CHANGE THE SYSTEM” is displayed on the screen.
Setting the REC Item
Set the REC item using the same steps as for the FRAME RATE item.
MEMO
•If you change the FRAME RATE item setting, the system is rebooted.
•The synchronous video signal is momentarily disturbed when the REC item setting is switched.
•We recommend the following settings for REC item (in HDV format).
When recording images with a lot of motion: Set to HDV60p or HDV50p
When recording images with little motion: Set to HDV30p or HDV25p
52 | 53 |