PREPARATIONS
AC Operation
The
Use the AC adapter as the AC power supply.
1.After making sure that the power switches of the GY-
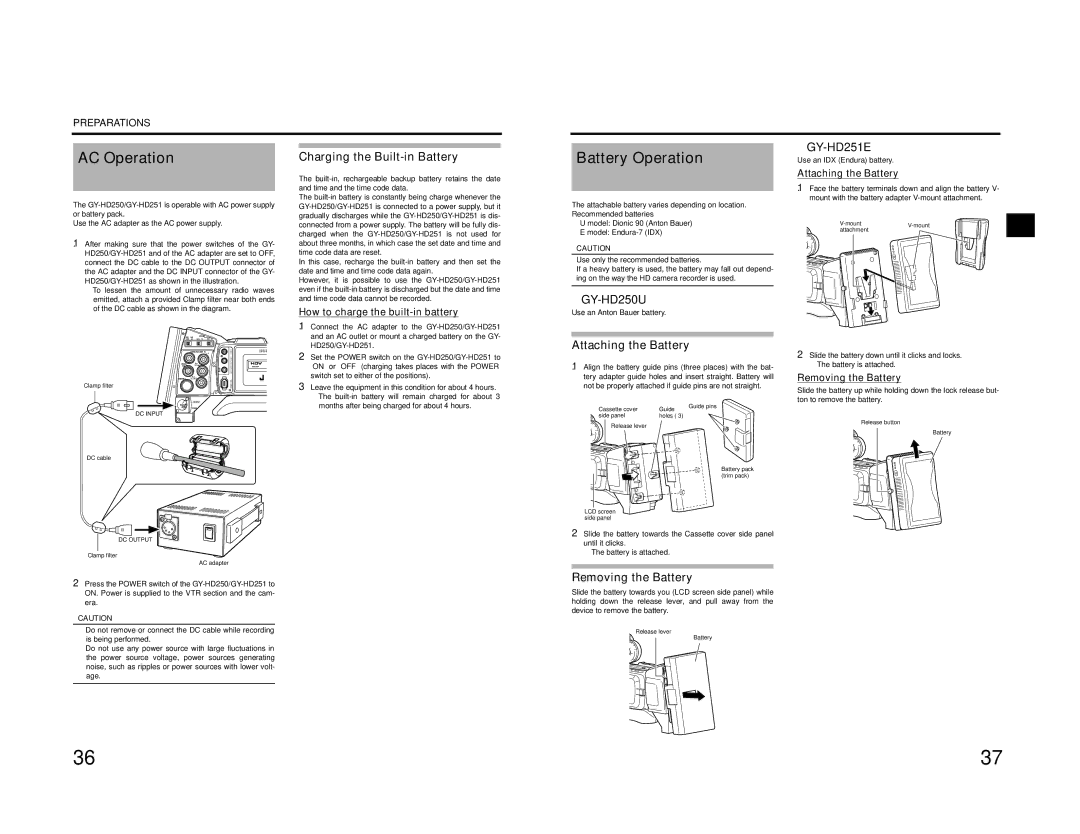
•To lessen the amount of unnecessary radio waves emitted, attach a provided Clamp filter near both ends of the DC cable as shown in the diagram.
| VIDEO |
| |
Clamp filter | IEEE 1394 |
DC INPUT
DC cable
DC OUTPUT
Clamp filter
AC adapter
2.Press the POWER switch of the
CAUTION
•Do not remove or connect the DC cable while recording is being performed.
•Do not use any power source with large fluctuations in the power source voltage, power sources generating noise, such as ripples or power sources with lower volt- age.
Charging the Built-in Battery
The
The
In this case, recharge the
However, it is possible to use the
How to charge the built-in battery
1.Connect the AC adapter to the
2.Set the POWER switch on the
3.Leave the equipment in this condition for about 4 hours.
•The
Battery Operation
The attachable battery varies depending on location. Recommended batteries
U model: Dionic 90 (Anton Bauer)
E model:
CAUTION
Use only the recommended batteries.
If a heavy battery is used, the battery may fall out depend- ing on the way the HD camera recorder is used.
GY-HD250U
Use an Anton Bauer battery.
Attaching the Battery
1.Align the battery guide pins (three places) with the bat- tery adapter guide holes and insert straight. Battery will not be properly attached if guide pins are not straight.
Cassette cover | Guide | Guide pins |
side panel | holes (×3) |
|
Release lever |
|
|
Battery pack (trim pack)
LCD screen side panel
2.Slide the battery towards the Cassette cover side panel until it clicks.
• The battery is attached.
Removing the Battery
Slide the battery towards you (LCD screen side panel) while holding down the release lever, and pull away from the device to remove the battery.
Release lever
Battery
GY-HD251E
Use an IDX (Endura) battery.
Attaching the Battery
1.Face the battery terminals down and align the battery V- mount with the battery adapter
2.Slide the battery down until it clicks and locks.
• The battery is attached.
Removing the Battery
Slide the battery up while holding down the lock release but- ton to remove the battery.
Release button
Battery
36 | 37 |