Maintenance
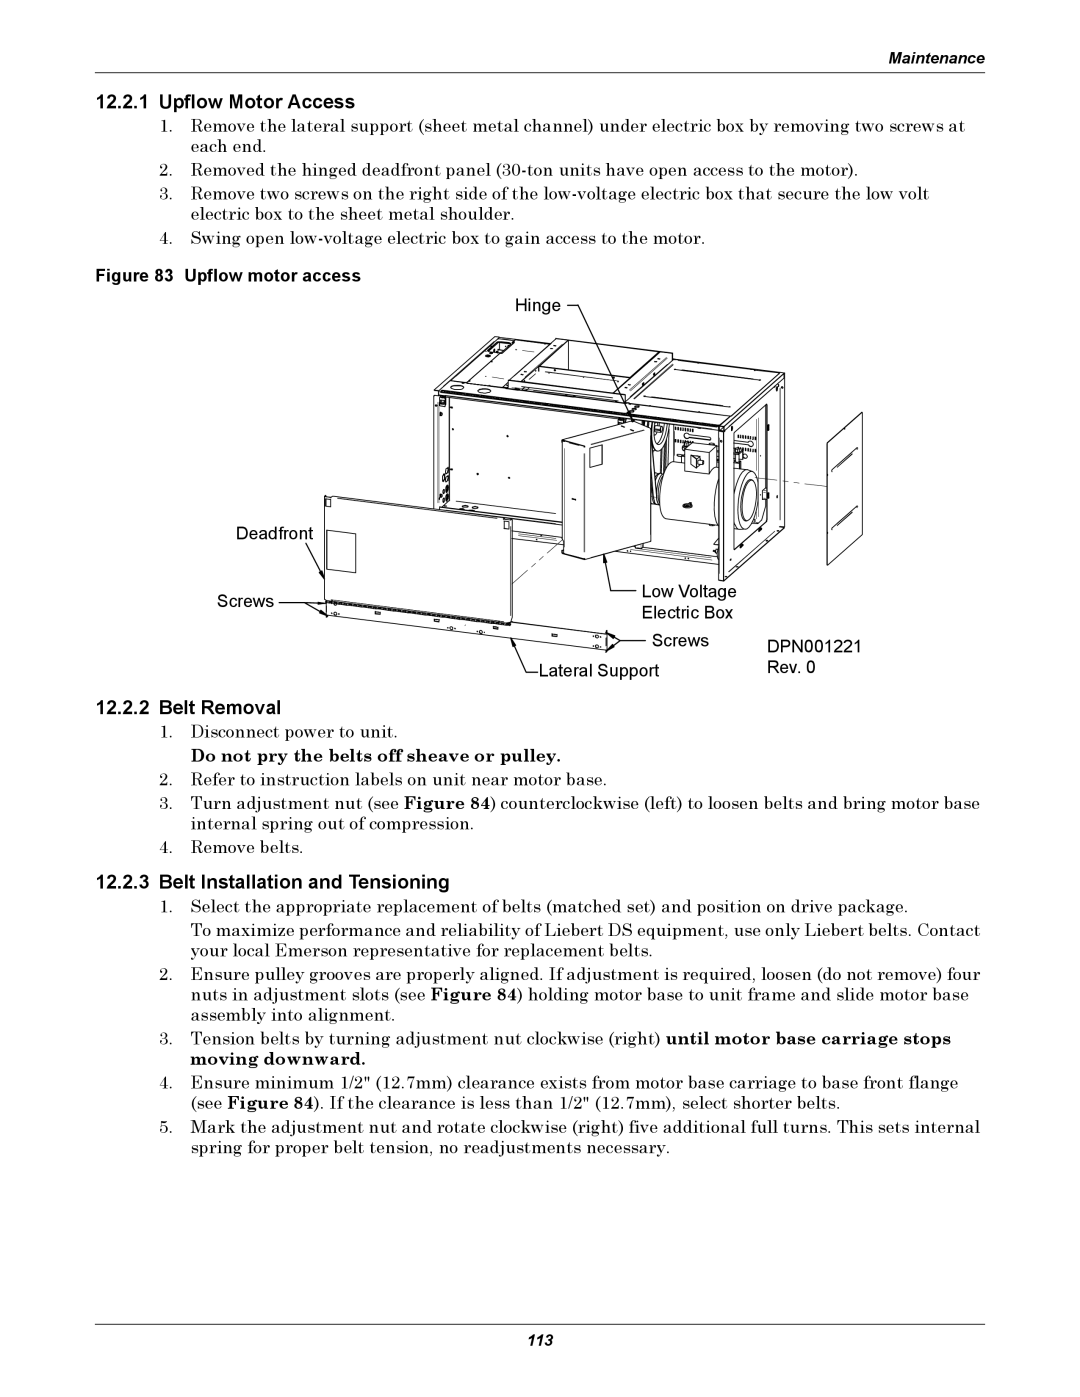
12.2.1Upflow Motor Access
1.Remove the lateral support (sheet metal channel) under electric box by removing two screws at each end.
2.Removed the hinged deadfront panel
3.Remove two screws on the right side of the
4.Swing open
Figure 83 Upflow motor access
Deadfront
Screws
Hinge
Low Voltage
Electric Box
Screws | DPN001221 |
Lateral Support | Rev. 0 |
12.2.2Belt Removal
1.Disconnect power to unit.
Do not pry the belts off sheave or pulley.
2.Refer to instruction labels on unit near motor base.
3.Turn adjustment nut (see Figure 84) counterclockwise (left) to loosen belts and bring motor base internal spring out of compression.
4.Remove belts.
12.2.3Belt Installation and Tensioning
1.Select the appropriate replacement of belts (matched set) and position on drive package.
To maximize performance and reliability of Liebert DS equipment, use only Liebert belts. Contact your local Emerson representative for replacement belts.
2.Ensure pulley grooves are properly aligned. If adjustment is required, loosen (do not remove) four nuts in adjustment slots (see Figure 84) holding motor base to unit frame and slide motor base assembly into alignment.
3.Tension belts by turning adjustment nut clockwise (right) until motor base carriage stops moving downward.
4.Ensure minimum 1/2" (12.7mm) clearance exists from motor base carriage to base front flange (see Figure 84). If the clearance is less than 1/2" (12.7mm), select shorter belts.
5.Mark the adjustment nut and rotate clockwise (right) five additional full turns. This sets internal spring for proper belt tension, no readjustments necessary.
113