IP Telephony System
8.The Voice - Info screen will appear. Click the SIP tab.
9.In the PBX Parameters section, select WAN from the Proxy Network Interface
10.Click the Submit All Changes button.
11.The Voice - Info screen will appear. Click the Router tab.
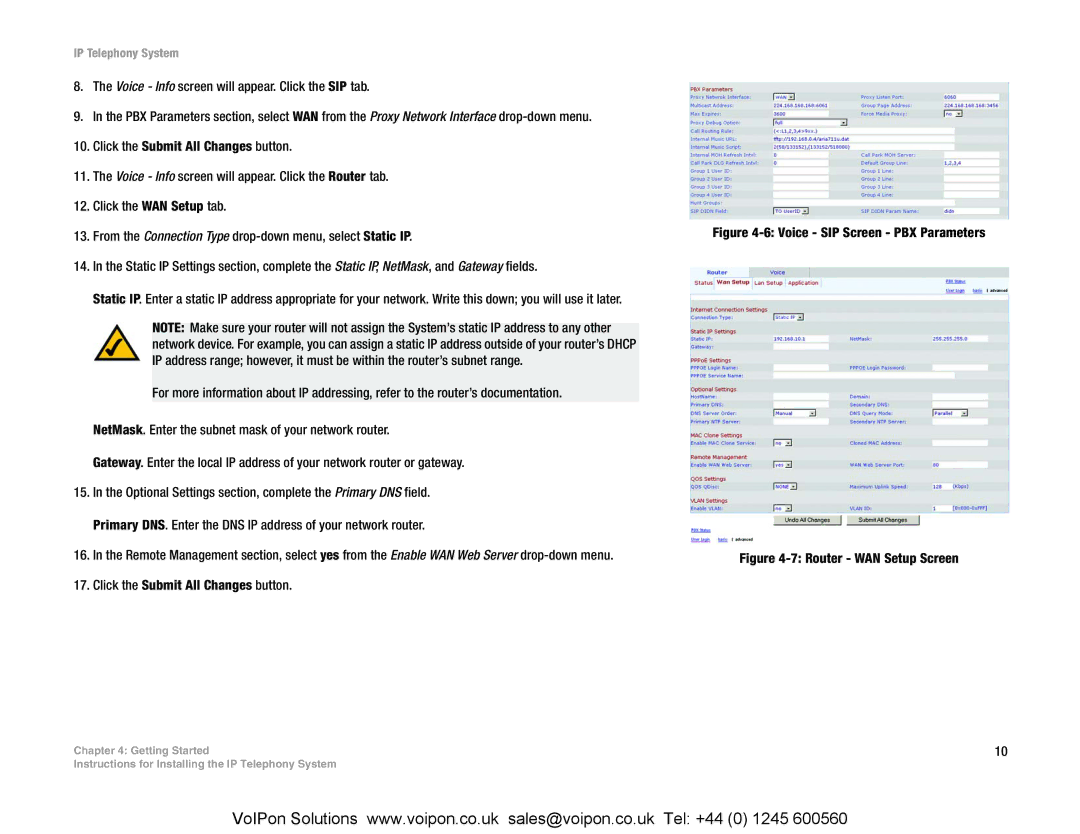
12.Click the WAN Setup tab.
13.From the Connection Type
14.In the Static IP Settings section, complete the Static IP, NetMask, and Gateway fields.
Static IP. Enter a static IP address appropriate for your network. Write this down; you will use it later.
NOTE: Make sure your router will not assign the System’s static IP address to any other network device. For example, you can assign a static IP address outside of your router’s DHCP IP address range; however, it must be within the router’s subnet range.
For more information about IP addressing, refer to the router’s documentation.
NetMask. Enter the subnet mask of your network router.
Gateway. Enter the local IP address of your network router or gateway.
15.In the Optional Settings section, complete the Primary DNS field. Primary DNS. Enter the DNS IP address of your network router.
16.In the Remote Management section, select yes from the Enable WAN Web Server
17.Click the Submit All Changes button.
Chapter 4: Getting Started
Instructions for Installing the IP Telephony System
Figure 4-6: Voice - SIP Screen - PBX Parameters
Figure 4-7: Router - WAN Setup Screen
10
VoIPon Solutions www.voipon.co.uk sales@voipon.co.uk Tel: +44 (0) 1245 600560