IP Telephony System
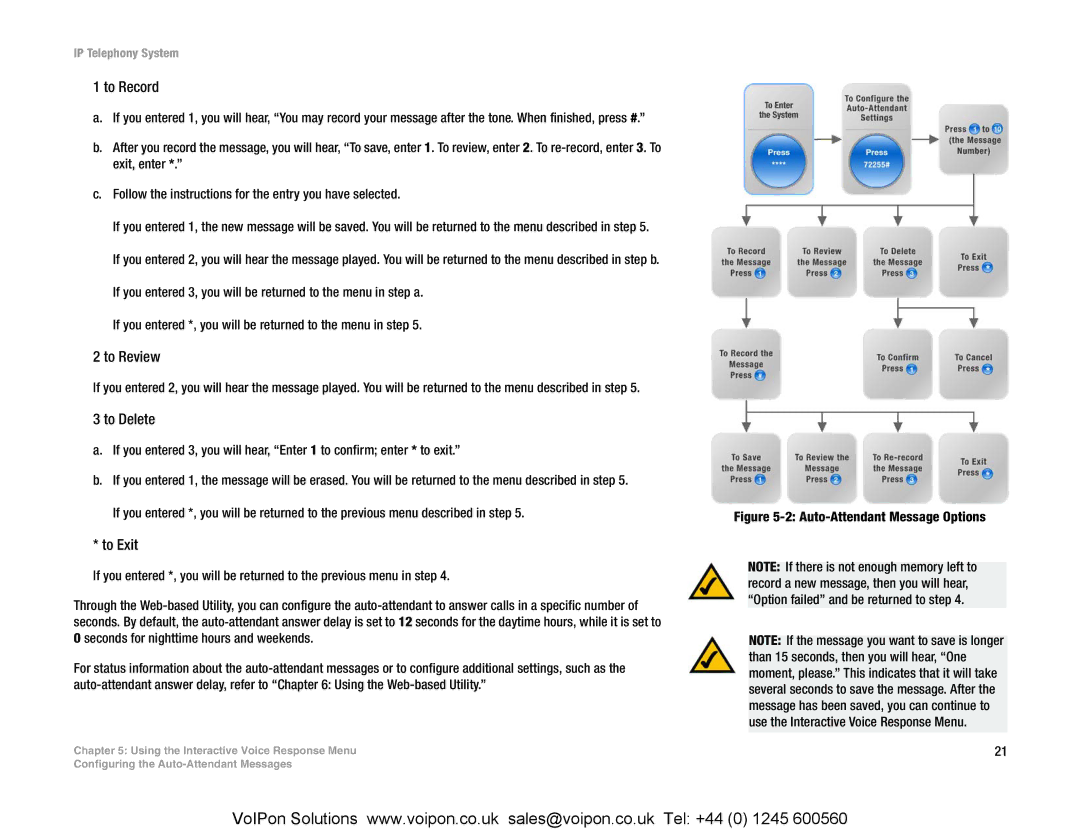
1 to Record
a.If you entered 1, you will hear, “You may record your message after the tone. When finished, press #.”
b.After you record the message, you will hear, “To save, enter 1. To review, enter 2. To
c.Follow the instructions for the entry you have selected.
If you entered 1, the new message will be saved. You will be returned to the menu described in step 5. If you entered 2, you will hear the message played. You will be returned to the menu described in step b. If you entered 3, you will be returned to the menu in step a.
If you entered *, you will be returned to the menu in step 5.
2 to Review
If you entered 2, you will hear the message played. You will be returned to the menu described in step 5.
3 to Delete
a.If you entered 3, you will hear, “Enter 1 to confirm; enter * to exit.”
b.If you entered 1, the message will be erased. You will be returned to the menu described in step 5.
If you entered *, you will be returned to the previous menu described in step 5.
* to Exit
If you entered *, you will be returned to the previous menu in step 4.
Through the
For status information about the
Chapter 5: Using the Interactive Voice Response Menu
Configuring the
Figure 5-2: Auto-Attendant Message Options
NOTE: If there is not enough memory left to record a new message, then you will hear, “Option failed” and be returned to step 4.
NOTE: If the message you want to save is longer than 15 seconds, then you will hear, “One moment, please.” This indicates that it will take several seconds to save the message. After the message has been saved, you can continue to use the Interactive Voice Response Menu.
21
VoIPon Solutions www.voipon.co.uk sales@voipon.co.uk Tel: +44 (0) 1245 600560
