IP Telephony System
Instructions for Installing the IP Telephony System
Internal Calls
To install the System for internal calls, you will do the following:
•connect and configure the System
•connect the Internet phones
Connect and Configure the System
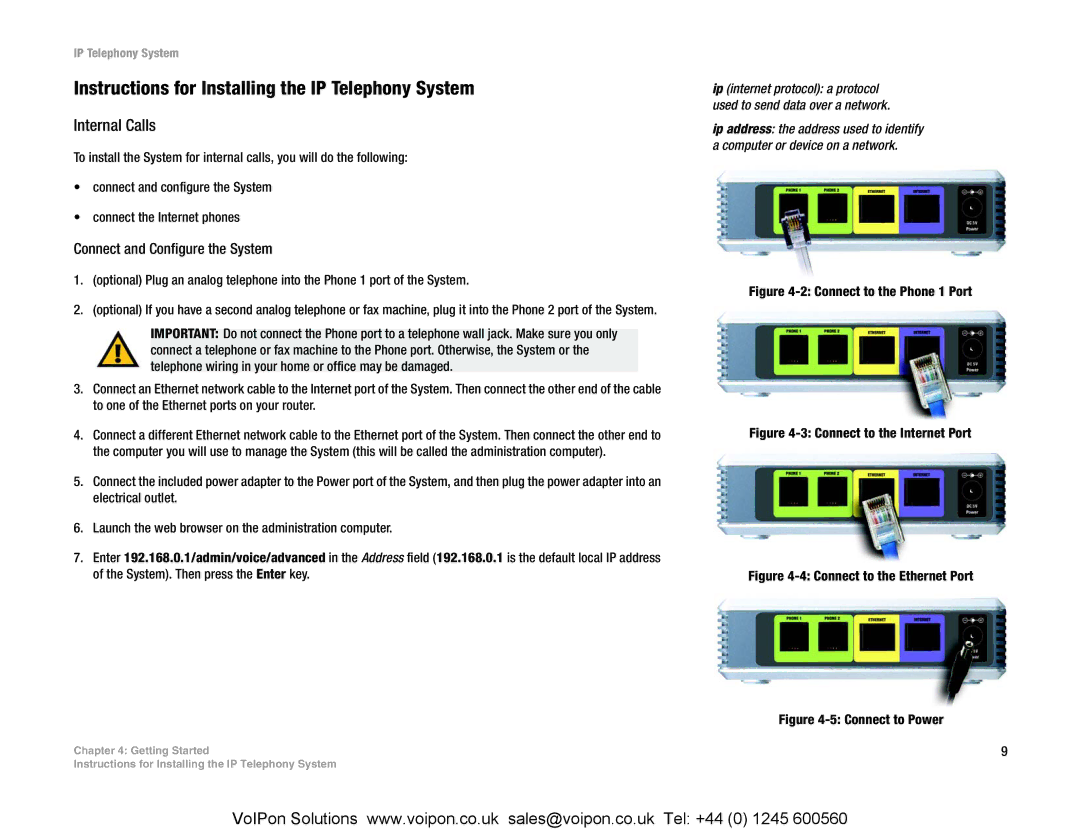
1.(optional) Plug an analog telephone into the Phone 1 port of the System.
2.(optional) If you have a second analog telephone or fax machine, plug it into the Phone 2 port of the System.
IMPORTANT: Do not connect the Phone port to a telephone wall jack. Make sure you only connect a telephone or fax machine to the Phone port. Otherwise, the System or the telephone wiring in your home or office may be damaged.
3.Connect an Ethernet network cable to the Internet port of the System. Then connect the other end of the cable to one of the Ethernet ports on your router.
4.Connect a different Ethernet network cable to the Ethernet port of the System. Then connect the other end to the computer you will use to manage the System (this will be called the administration computer).
5.Connect the included power adapter to the Power port of the System, and then plug the power adapter into an electrical outlet.
6.Launch the web browser on the administration computer.
7.Enter 192.168.0.1/admin/voice/advanced in the Address field (192.168.0.1 is the default local IP address of the System). Then press the Enter key.
Chapter 4: Getting Started
Instructions for Installing the IP Telephony System
ip (internet protocol): a protocol used to send data over a network.
ip address: the address used to identify a computer or device on a network.
Figure 4-2: Connect to the Phone 1 Port
Figure 4-3: Connect to the Internet Port
Figure 4-4: Connect to the Ethernet Port
Figure 4-5: Connect to Power
9
VoIPon Solutions www.voipon.co.uk sales@voipon.co.uk Tel: +44 (0) 1245 600560
