PS536 Gas and Electric Ovens
English
Table of Contents
III. Oven Specifications
Description
Oven Uses
II. Oven Components see Figure
Electrical specifications for electric ovens per oven cavity
Installation
Installation KIT see Figure
Installation Kit
II. Ventilation System
Requirements
Recommendations
Other ventilation concerns
III. Assembly
Top panel and base pad installation
Restraint Cable Installation
Stacking
Conveyor Installation
Assembling and tensioning the conveyor
Final Assembly
10 Conveyor placement
VI. Electrical Supply
Duringpressuretestingnoteoneofthefollowing
VII. GAS Supply
Gas Utility Rough-In Recommendations
Gas Conversion
Operation
Location and Description of Controls
Dailystartupprocedure
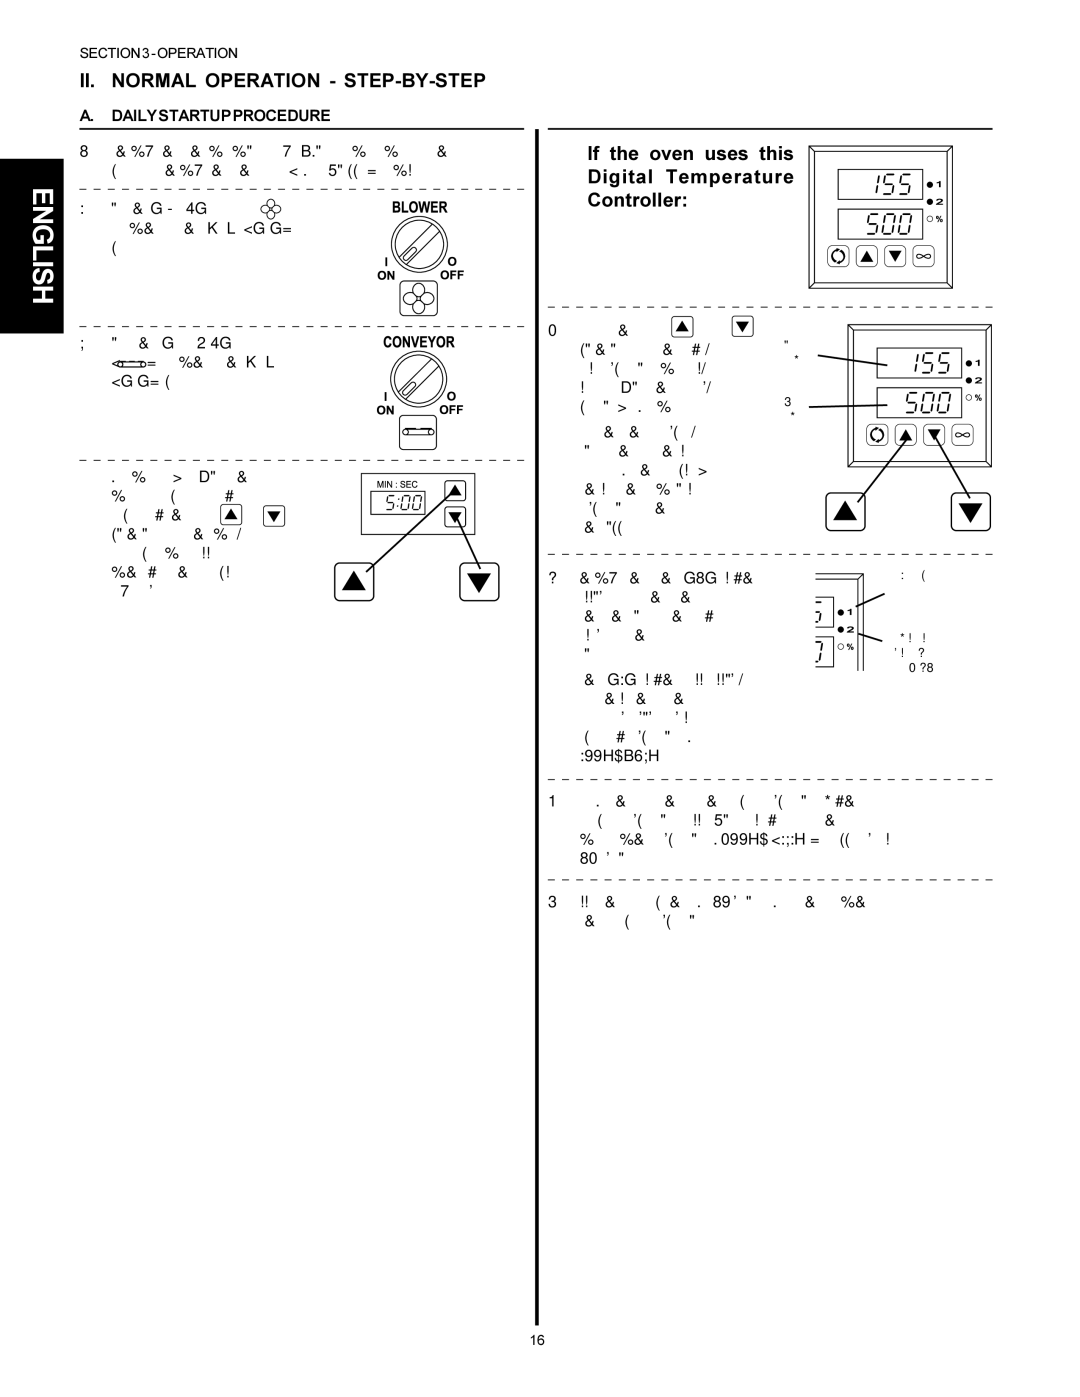
If the oven uses this Digital Temperature Controller
II. Normal Operation STEP-BY-STEP
Dailyshutdownprocedure
For
III. Quick Reference Digital Temperature Controllers
Light
Overtemp
SP Lock
Actual
IV. Quick Reference Troubleshooting
Symptom
Maintenance
Maintenance Daily
III. Maintenance Every 3 Months
II. Maintenance Monthly
Split Belt Disassembly and Cleaning
Disassembling the drive shaft
IV. Maintenance Every 6 Months
KEY Spare Parts KIT Available sepa- rately. See Figure
Blower Belt
Lubricating the Blower Fan Bearings
Electrical Wiring Diagrams
Wiring diagram, PS536 Gas Oven 208/230V, 60 Hz, 1 Ph
Wiring diagram, PS536 Electric Oven 208/230V, 60 Hz, 3 Ph
Wiring diagram, PS536 Electric Oven 380V, 50 Hz, 3 Ph
English Français
Fours électriques et à gaz, modèle PS536
Avertissement
Table DES Matières
Fonctionnement
Entretien
Schémas DE Câblage
II. Composants DU Four Figure
Utilisations DU Four
III. Spécifications DU Four
Neut., 1 masse
Mise EN Garde
Trousse D’INSTALLATION Figure
Trousse d’installation
II. Système DE Ventilation
Recommandations
Autres considérations pour la ventilation
III. Assemblage
Panneau supérieur et plaque de pose
Installation du câble de retenue
Superposition
Installation du transporteur
Assemblage et ajustement de tension du Transporteur
10 Placement du transporteur
Assemblage Final
VII. Alimentation EN GAZ
VI. Alimentation EN Électricité
DURANTL’ESSAIDEPRESSION,NOTEZCEQUISUIT
14 Installation du tuyau à gaz flexible
Emplacement ET Description DES Commandes
Fonctionnement
II. Fonctionnement Normal PAS-À-PAS
Procédurequotidiennedemiseenmarche
Attendez
PROCÉDUREQUOTIDIENNEDEMISEÀL’ARRÊT
Affichage du
« Overtemp »
Lock »
Temp »
IV. Consultation Rapide Résolution DE Problèmes
Symptôme
Entretien
Avertissement
Mise EN Garde
Remarque
II. Entretien Mensuel
III. Entretien Trimestriel
Démontage de l’arbre d’entraînement
IV. Entretien Semestriel
Schémas DE Câblage
Schéma de câblage, Four à gaz PS536 208/230 V, 60 Hz, 1 Ph
Schémas DE Câblage
Schéma de câblage, Four électrique PS536 380 V, 50 Hz, 3 Ph
Anglais Français Espagnol
Hornos de Gas y Eléctricos PS536
Aviso
SECCIÓN5-DIAGRAMASDELCABLEADOELÉCTRICO
Índice
Sección 3 Operación
Sección 4 Mantenimiento
SECCIÓN1DESCRIPCIÓN
III. Especificaciones DEL Horno
Importante
Sección 2 Instalación
Precaución
Juego DE Instalación ver Figura
Juego de Instalación
Otros problemas de ventilación
II. Sistema DE Ventilación
Requisitos
Recomendaciones
III. Ensamblado
Conjunto del panel superior y cojín de base
Apilado
Para hornos sencillos, pase al apartado C, Instalación del
Cable de sujeción. Para hornos dobles o triples, continúe
Con el paso 1 descrito a continuación
Instalación del Transportador
Figura 2-8 Instalación y tensión del transportador
Ensamblado Final
Figura 2-10 Colocación del transportador
VII. Suministro DE GAS Precaución
VI. Suministro Eléctrico
Durantelaspruebasdepresiónobservelosiguiente
Conexión
Conversión Según el Tipo de Gas
Sección 3 Operación
Ubicación Y Descripción DE LOS Controles
Si el horno usa un controlador digital de la temperatura
II. Operaciones Normales Paso a Paso
Procedimientodiariodeencendido
Importante
Procedimientodiariodeapagado
Luz
III. Referencia Rápida Controlador Digital DE Temperatura
Lock
Temp
IV. Referencia Rápida Diagnóstico DE Averías
Síntoma
SECCIÓN4-MANTENIMIENTO
Aviso
Nota
Mantenimiento Diario
II. Mantenimiento Mensual
III. Mantenimiento Trimestral
Figura 4-5 Desensamble del eje impulsor
IV. Mantenimiento Semestral
Figura 4-6 Acceso al panel posterior
Sección 5 Diagramas DEL Cableado Eléctrico
Solamente Para LOS Hornos DE Banda Doble
Sección 5 Diagramas DEL Cableado Eléctrico
Contactor Fases
English Français