3. Preparations before operation
Menu display
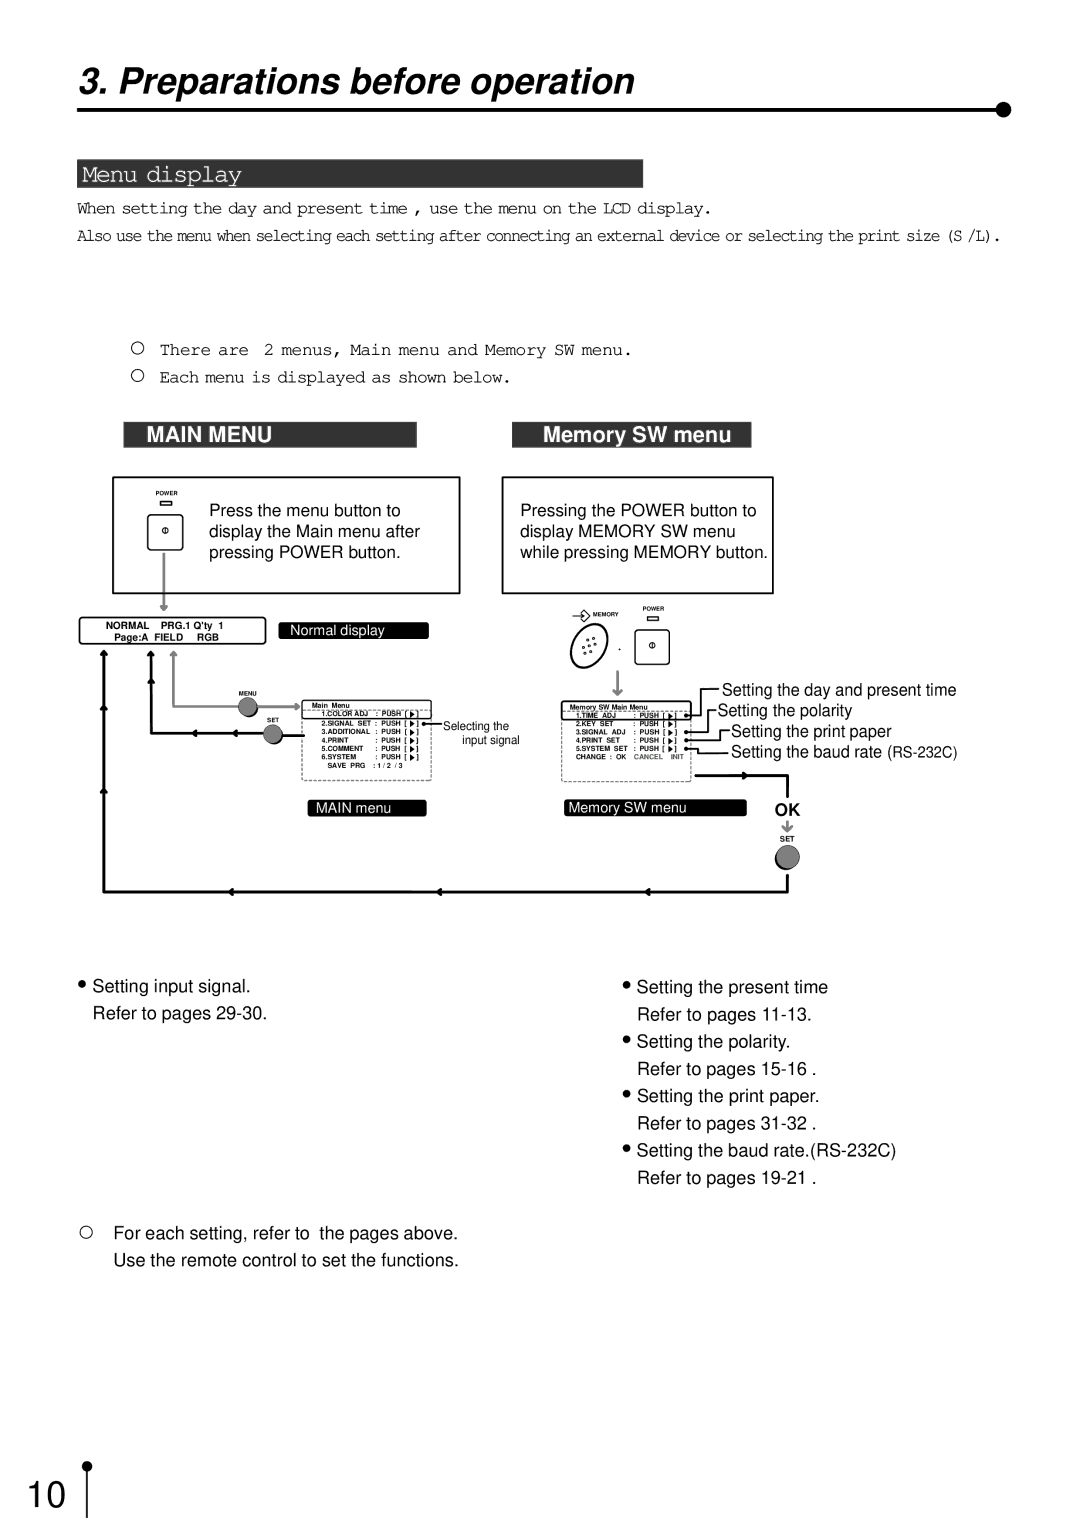
When setting the day and present time , use the menu on the LCD display.
Also use the menu when selecting each setting after connecting an external device or selecting the print size (S /L).
,There are 2 menus, Main menu and Memory SW menu.
,Each menu is displayed as shown below.
MAIN MENU |
| Memory SW menu |
POWER |
| |
Press the menu button to | ||
display the Main menu after | ||
pressing POWER button. | ||
NORMAL PRG.1 Q'ty 1 | Normal display | |
Page:A FIELD RGB | ||
| ||
Pressing the POWER button to display MEMORY SW menu while pressing MEMORY button.
POWER
MEMORY
![]() +
+
MENU
|
| Main Menu |
|
|
|
|
| Memory SW Main Menu |
| |
SET | 1.COLOR ADJ | : PUSH [ | ] |
|
| Selecting the | 1.TIME ADJ | : PUSH [ | ] | |
2.SIGNAL SET : PUSH [ | ] |
|
| 2.KEY SET | : PUSH [ | ] | ||||
|
|
|
| |||||||
|
| 3.ADDITIONAL | : PUSH [ | ] |
|
| 3.SIGNAL ADJ | : PUSH [ | ] | |
|
| 4.PRINT | : PUSH [ | ] |
|
| input signal | 4.PRINT SET | : PUSH [ | ] |
|
| 5.COMMENT | : PUSH [ | ] |
|
|
| 5.SYSTEM SET | : PUSH [ | ] |
|
| 6.SYSTEM | : PUSH [ | ] |
|
|
| CHANGE : OK | CANCEL | INIT |
|
| SAVE PRG | : 1 / 2 / 3 |
|
|
|
|
|
|
|
Setting the day and present time Setting the polarity
Setting the print paper
Setting the baud rate
MAIN menu | Memory SW menu | OK |
|
| SET |
0Setting input signal. | 0Setting the present time |
Refer to pages | Refer to pages |
| 0Setting the polarity. |
| Refer to pages |
| 0Setting the print paper. |
| Refer to pages |
| 0Setting the baud |
| Refer to pages |
,For each setting, refer to the pages above. Use the remote control to set the functions.
10
