5. Features and Functions
4 REMOTE CONTROL
DISPLAY
COLOR FIELD
PROG. ADJUST /FRAME
![]() +
+
-
| |
| Q' ty |
MENU | SET |
CLEAR | STOP |
MONITOR | MEMORY |
PAGE |
MEMORY PRINT
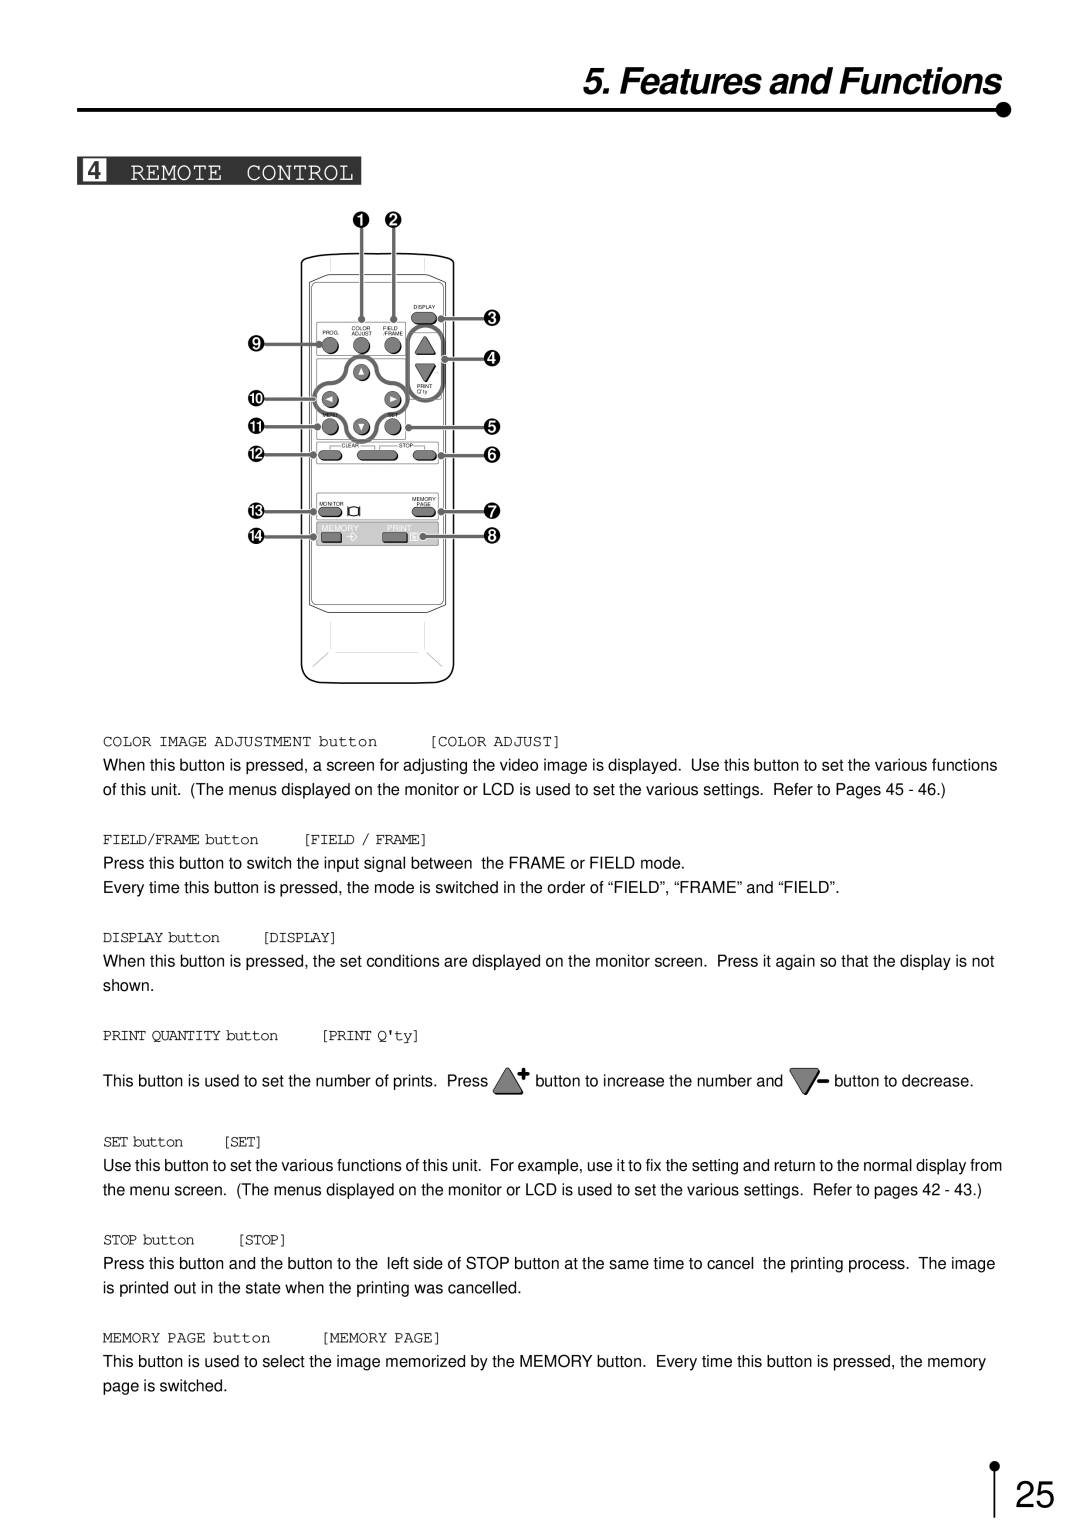
1 COLOR IMAGE ADJUSTMENT button | [COLOR ADJUST] |
When this button is pressed, a screen for adjusting the video image is displayed. Use this button to set the various functions of this unit. (The menus displayed on the monitor or LCD is used to set the various settings. Refer to Pages 45 - 46.)
2 | FIELD/FRAME button |
| [FIELD / FRAME] |
| Press this button to switch the input signal between the FRAME or FIELD mode. | ||
| Every time this button is pressed, the mode is switched in the order of “FIELD”, “FRAME” and “FIELD”. | ||
3 | DISPLAY button | [DISPLAY] | |
| When this button is pressed, the set conditions are displayed on the monitor screen. Press it again so that the display is not | ||
| shown. |
|
|
4 | PRINT QUANTITY button | [PRINT Q'ty] | |
This button is used to set the number of prints. Press ![]()
button to increase the number and ![]() button to decrease.
button to decrease.
5 SET button | [SET] |
Use this button to set the various functions of this unit. For example, use it to fix the setting and return to the normal display from the menu screen. (The menus displayed on the monitor or LCD is used to set the various settings. Refer to pages 42 - 43.)
6 STOP button | [STOP] |
Press this button and the button to the left side of STOP button at the same time to cancel the printing process. The image is printed out in the state when the printing was cancelled.
7 MEMORY PAGE button | [MEMORY PAGE] |
This button is used to select the image memorized by the MEMORY button. Every time this button is pressed, the memory page is switched.
25
