PRINTING ENVELOPES
1.Format your envelopes in your computer application.
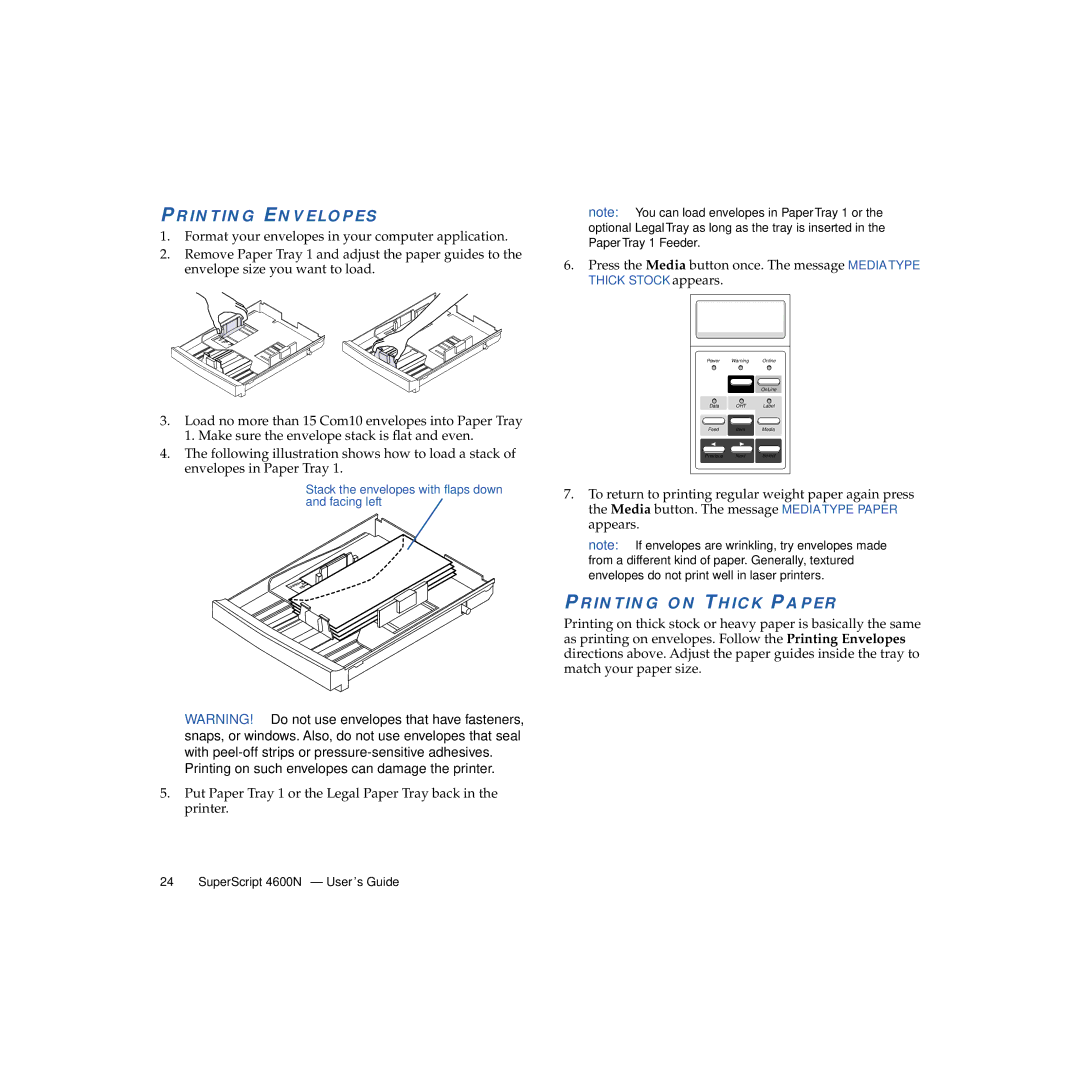
2.Remove Paper Tray 1 and adjust the paper guides to the envelope size you want to load.
3.Load no more than 15 Com10 envelopes into Paper Tray 1. Make sure the envelope stack is flat and even.
4.The following illustration shows how to load a stack of envelopes in Paper Tray 1.
Stack the envelopes with flaps down and facing left
WARNING! Do not use envelopes that have fasteners, snaps, or windows. Also, do not use envelopes that seal with
Printing on such envelopes can damage the printer.
5.Put Paper Tray 1 or the Legal Paper Tray back in the printer.
note: You can load envelopes in Paper Tray 1 or the optional Legal Tray as long as the tray is inserted in the Paper Tray 1 Feeder.
6.Press the Media button once. The message MEDIA TYPE THICK STOCK appears.
Power | Warning | Online |
| Menu | OnLine |
Data | OHT | Label |
Feed | Item | Media |
Previous | Next | Select |
7.To return to printing regular weight paper again press the Media button. The message MEDIA TYPE PAPER appears.
note: If envelopes are wrinkling, try envelopes made from a different kind of paper. Generally, textured envelopes do not print well in laser printers.
PRINTING ON THICK PAPER
Printing on thick stock or heavy paper is basically the same as printing on envelopes. Follow the Printing Envelopes directions above. Adjust the paper guides inside the tray to match your paper size.
24 SuperScript 4600N — User’s Guide
