7-6 User’s Reference Guide
Easy Setup Profile screen
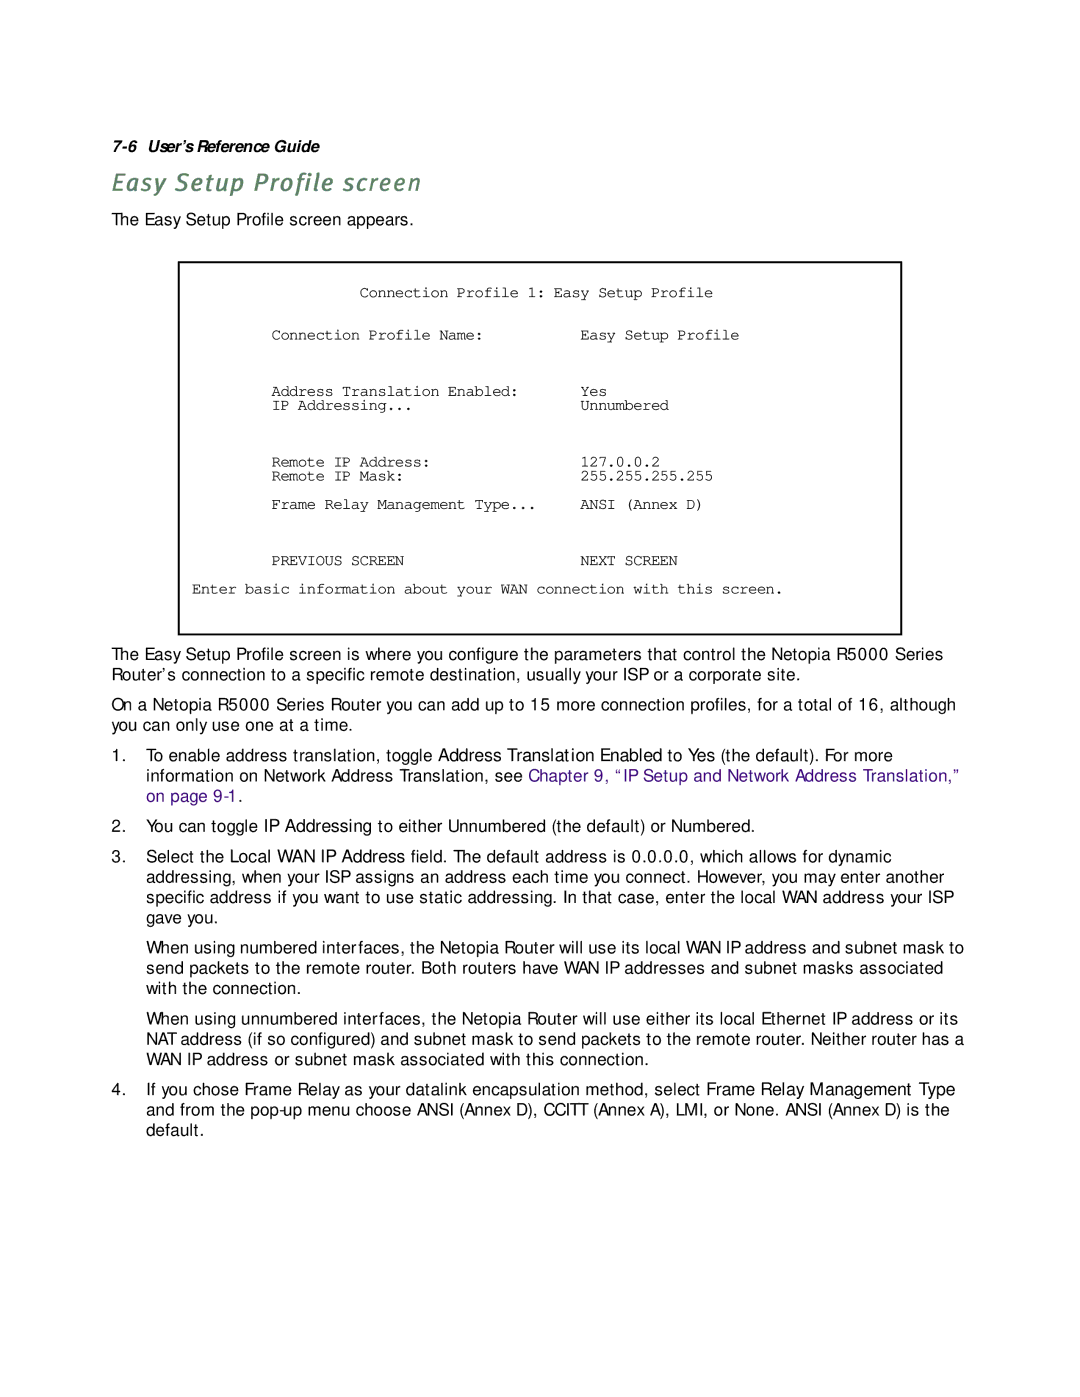
The Easy Setup Profile screen appears.
Connection Profile 1: Easy Setup Profile
Connection Profile Name: | Easy Setup Profile |
Address Translation Enabled: | Yes |
IP Addressing... | Unnumbered |
Remote IP Address: | 127.0.0.2 |
Remote IP Mask: | 255.255.255.255 |
Frame Relay Management Type... | ANSI (Annex D) |
PREVIOUS SCREEN | NEXT SCREEN |
Enter basic information about your WAN connection with this screen.
The Easy Setup Profile screen is where you configure the parameters that control the Netopia R5000 Series Router’s connection to a specific remote destination, usually your ISP or a corporate site.
On a Netopia R5000 Series Router you can add up to 15 more connection profiles, for a total of 16, although you can only use one at a time.
1.To enable address translation, toggle Address Translation Enabled to Yes (the default). For more information on Network Address Translation, see Chapter 9, “IP Setup and Network Address Translation,” on page
2.You can toggle IP Addressing to either Unnumbered (the default) or Numbered.
3.Select the Local WAN IP Address field. The default address is 0.0.0.0, which allows for dynamic addressing, when your ISP assigns an address each time you connect. However, you may enter another specific address if you want to use static addressing. In that case, enter the local WAN address your ISP gave you.
When using numbered interfaces, the Netopia Router will use its local WAN IP address and subnet mask to send packets to the remote router. Both routers have WAN IP addresses and subnet masks associated with the connection.
When using unnumbered interfaces, the Netopia Router will use either its local Ethernet IP address or its NAT address (if so configured) and subnet mask to send packets to the remote router. Neither router has a WAN IP address or subnet mask associated with this connection.
4.If you chose Frame Relay as your datalink encapsulation method, select Frame Relay Management Type and from the