Using the Console Interface
SNMP Configuration
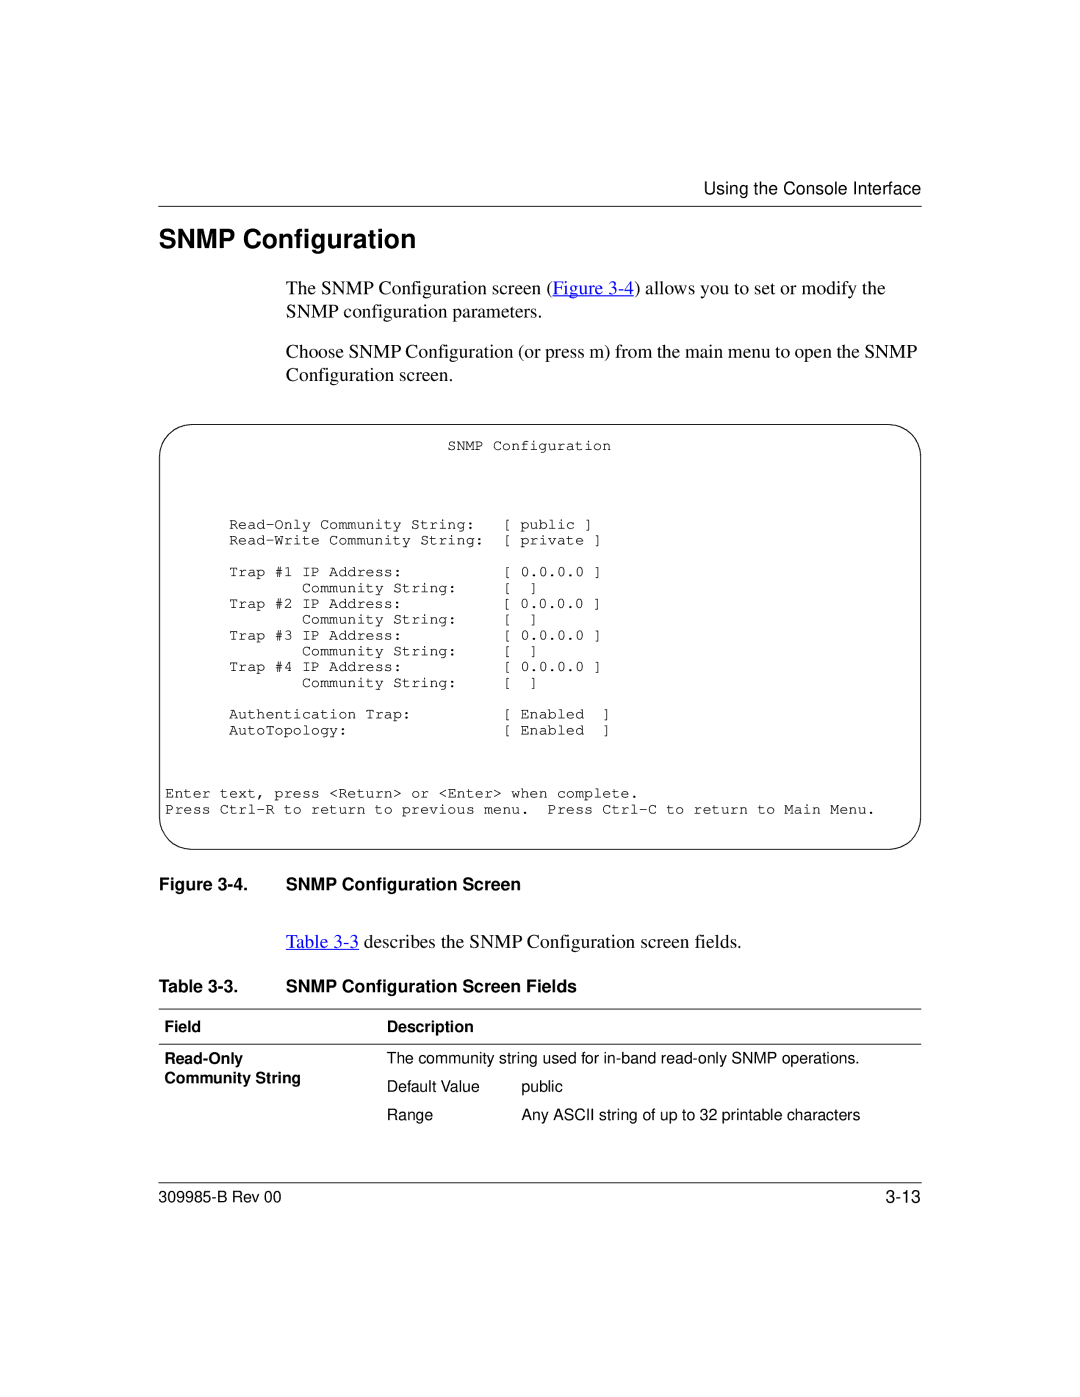
The SNMP Configuration screen (Figure
Choose SNMP Configuration (or press m) from the main menu to open the SNMP Configuration screen.
| SNMP Configuration | |||
[ public ] |
| |||
Community String: [ private ] |
| |||
Trap #1 IP | Address: | [ 0.0.0.0 ] |
| |
Community String: | [ | ] |
| |
Trap #2 IP | Address: | [ 0.0.0.0 ] |
| |
Community String: | [ | ] |
| |
Trap #3 IP | Address: | [ 0.0.0.0 ] |
| |
Community String: | [ | ] |
| |
Trap #4 IP | Address: | [ 0.0.0.0 ] |
| |
Community String: | [ | ] |
| |
Authentication Trap: | [ Enabled | ] | ||
AutoTopology: | [ Enabled | ] | ||
Enter text, press | <Return> or <Enter> when complete. | |||
Press | Press | |||
Figure 3-4. SNMP Configuration Screen
Table 3-3 describes the SNMP Configuration screen fields.
Table | SNMP Configuration Screen Fields | ||
|
|
|
|
Field |
| Description |
|
|
|
| |
|
| The community string used for | |
Community String | Default Value | public | |
|
| ||
|
| Range | Any ASCII string of up to 32 printable characters |
|
|
|
|
|
|
| |
