4. Changing the Projector Settings
| Item | Summary |
|
|
|
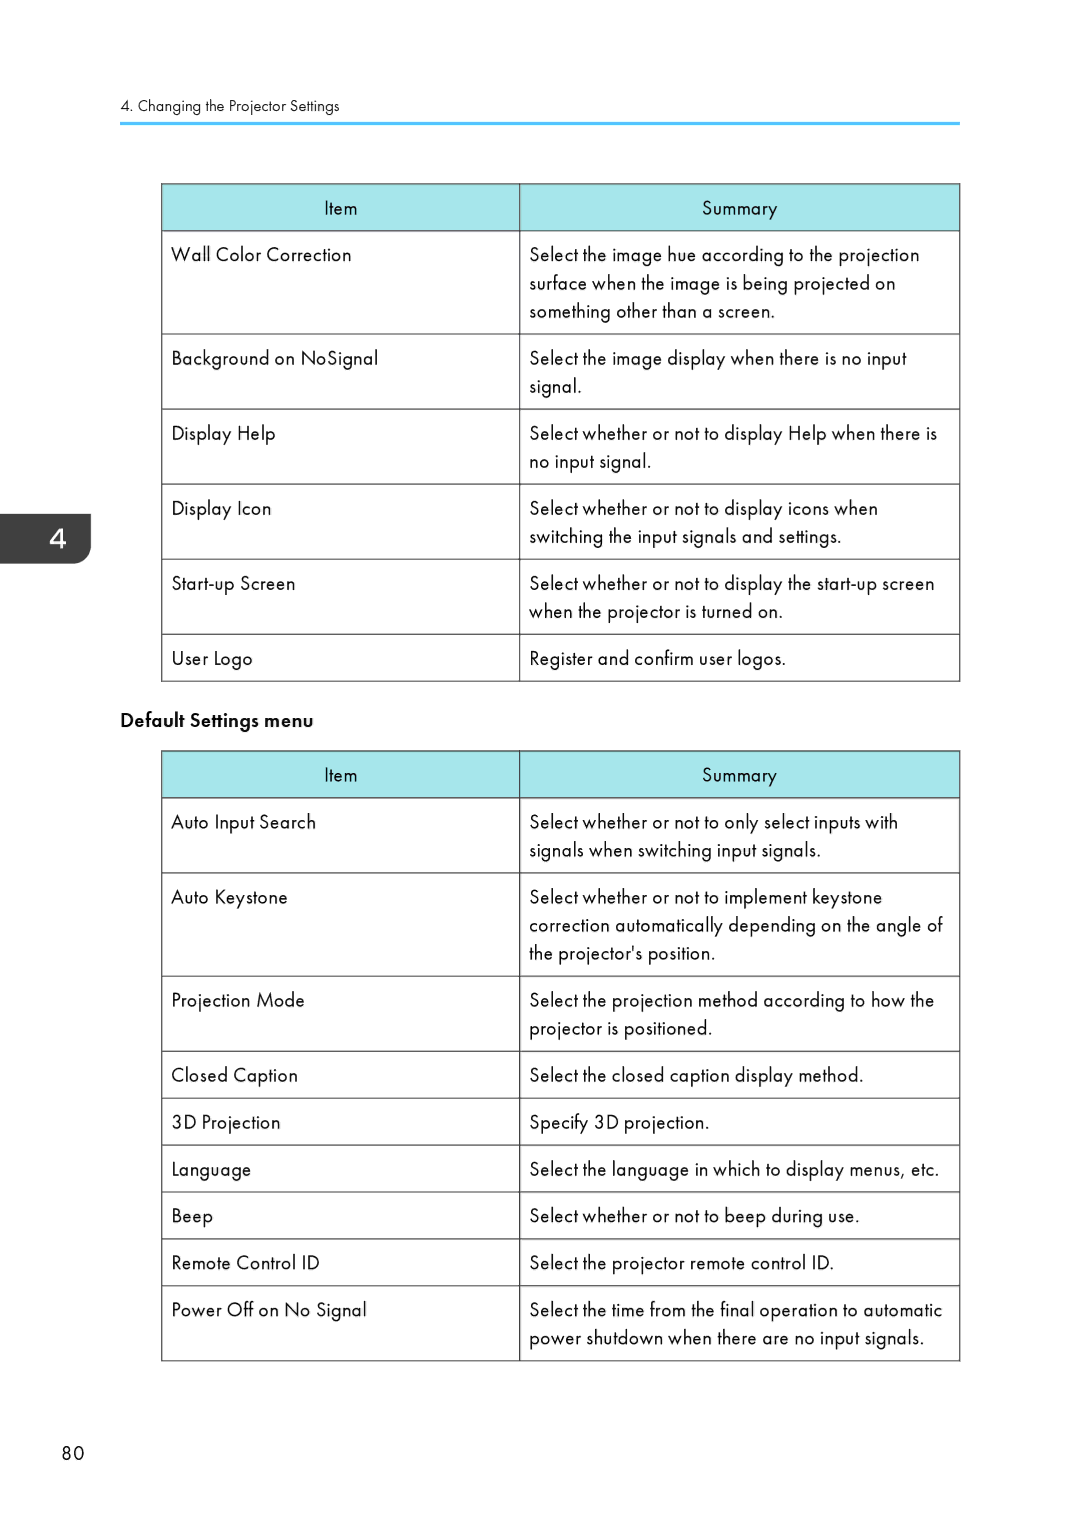
| Wall Color Correction | Select the image hue according to the projection |
|
| surface when the image is being projected on |
|
| something other than a screen. |
|
|
|
| Background on NoSignal | Select the image display when there is no input |
|
| signal. |
|
|
|
| Display Help | Select whether or not to display Help when there is |
|
| no input signal. |
|
|
|
| Display Icon | Select whether or not to display icons when |
|
| switching the input signals and settings. |
|
|
|
| Select whether or not to display the | |
|
| when the projector is turned on. |
|
|
|
| User Logo | Register and confirm user logos. |
|
|
|
Default Settings menu |
| |
|
|
|
| Item | Summary |
|
|
|
| Auto Input Search | Select whether or not to only select inputs with |
|
| signals when switching input signals. |
|
|
|
| Auto Keystone | Select whether or not to implement keystone |
|
| correction automatically depending on the angle of |
|
| the projector's position. |
|
|
|
| Projection Mode | Select the projection method according to how the |
|
| projector is positioned. |
|
|
|
| Closed Caption | Select the closed caption display method. |
|
|
|
| 3D Projection | Specify 3D projection. |
|
|
|
| Language | Select the language in which to display menus, etc. |
|
|
|
| Beep | Select whether or not to beep during use. |
|
|
|
| Remote Control ID | Select the projector remote control ID. |
|
|
|
| Power Off on No Signal | Select the time from the final operation to automatic |
|
| power shutdown when there are no input signals. |
|
|
|
80